Kohlrabi Made Easy: Grow This Weird Little Veggie in Cold Climates
How to grow kohlrabi.
By Steven Biggs
Growing Kohlrabi in Home Gardens
THREE CHEERS for one of the most photogenic veggies out there.
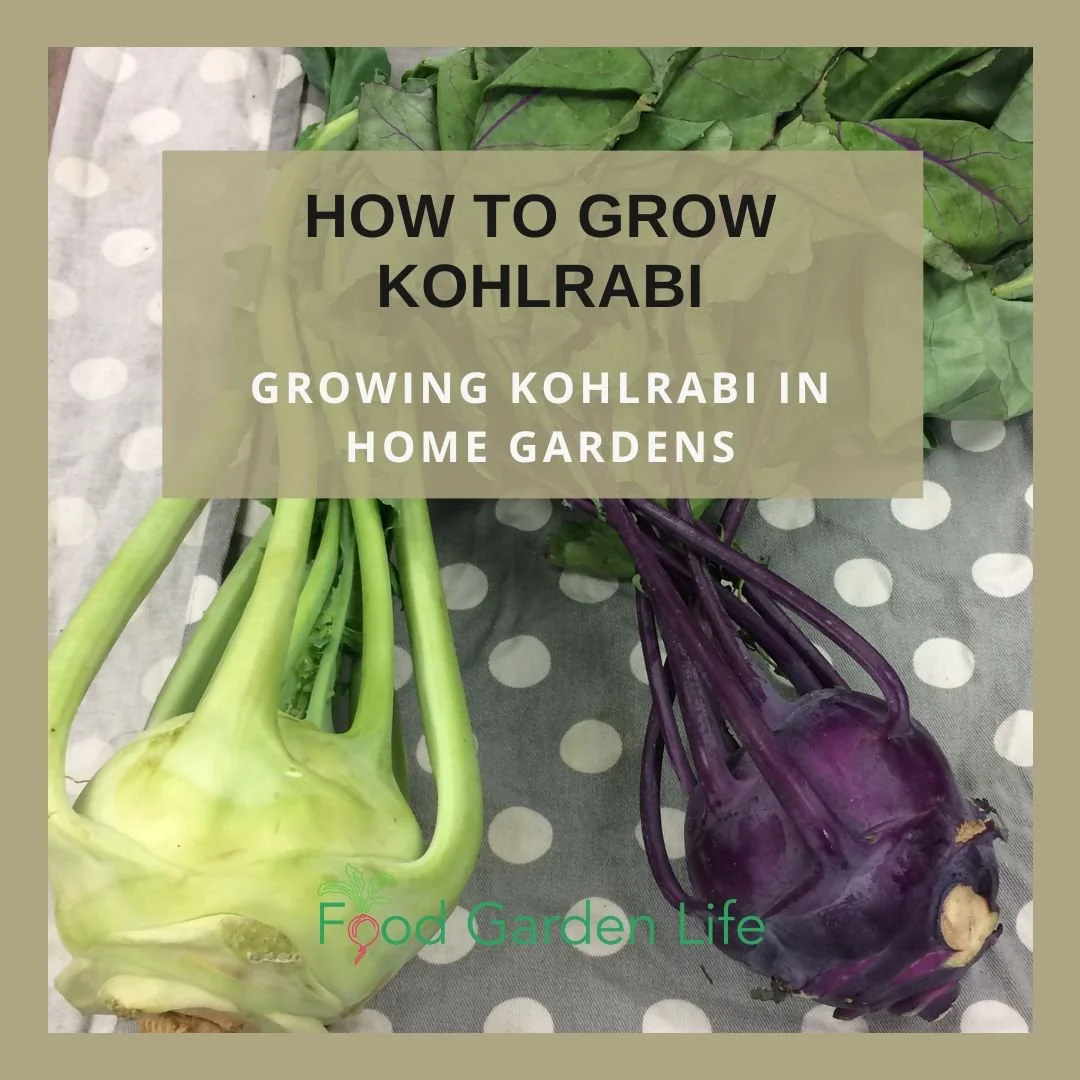
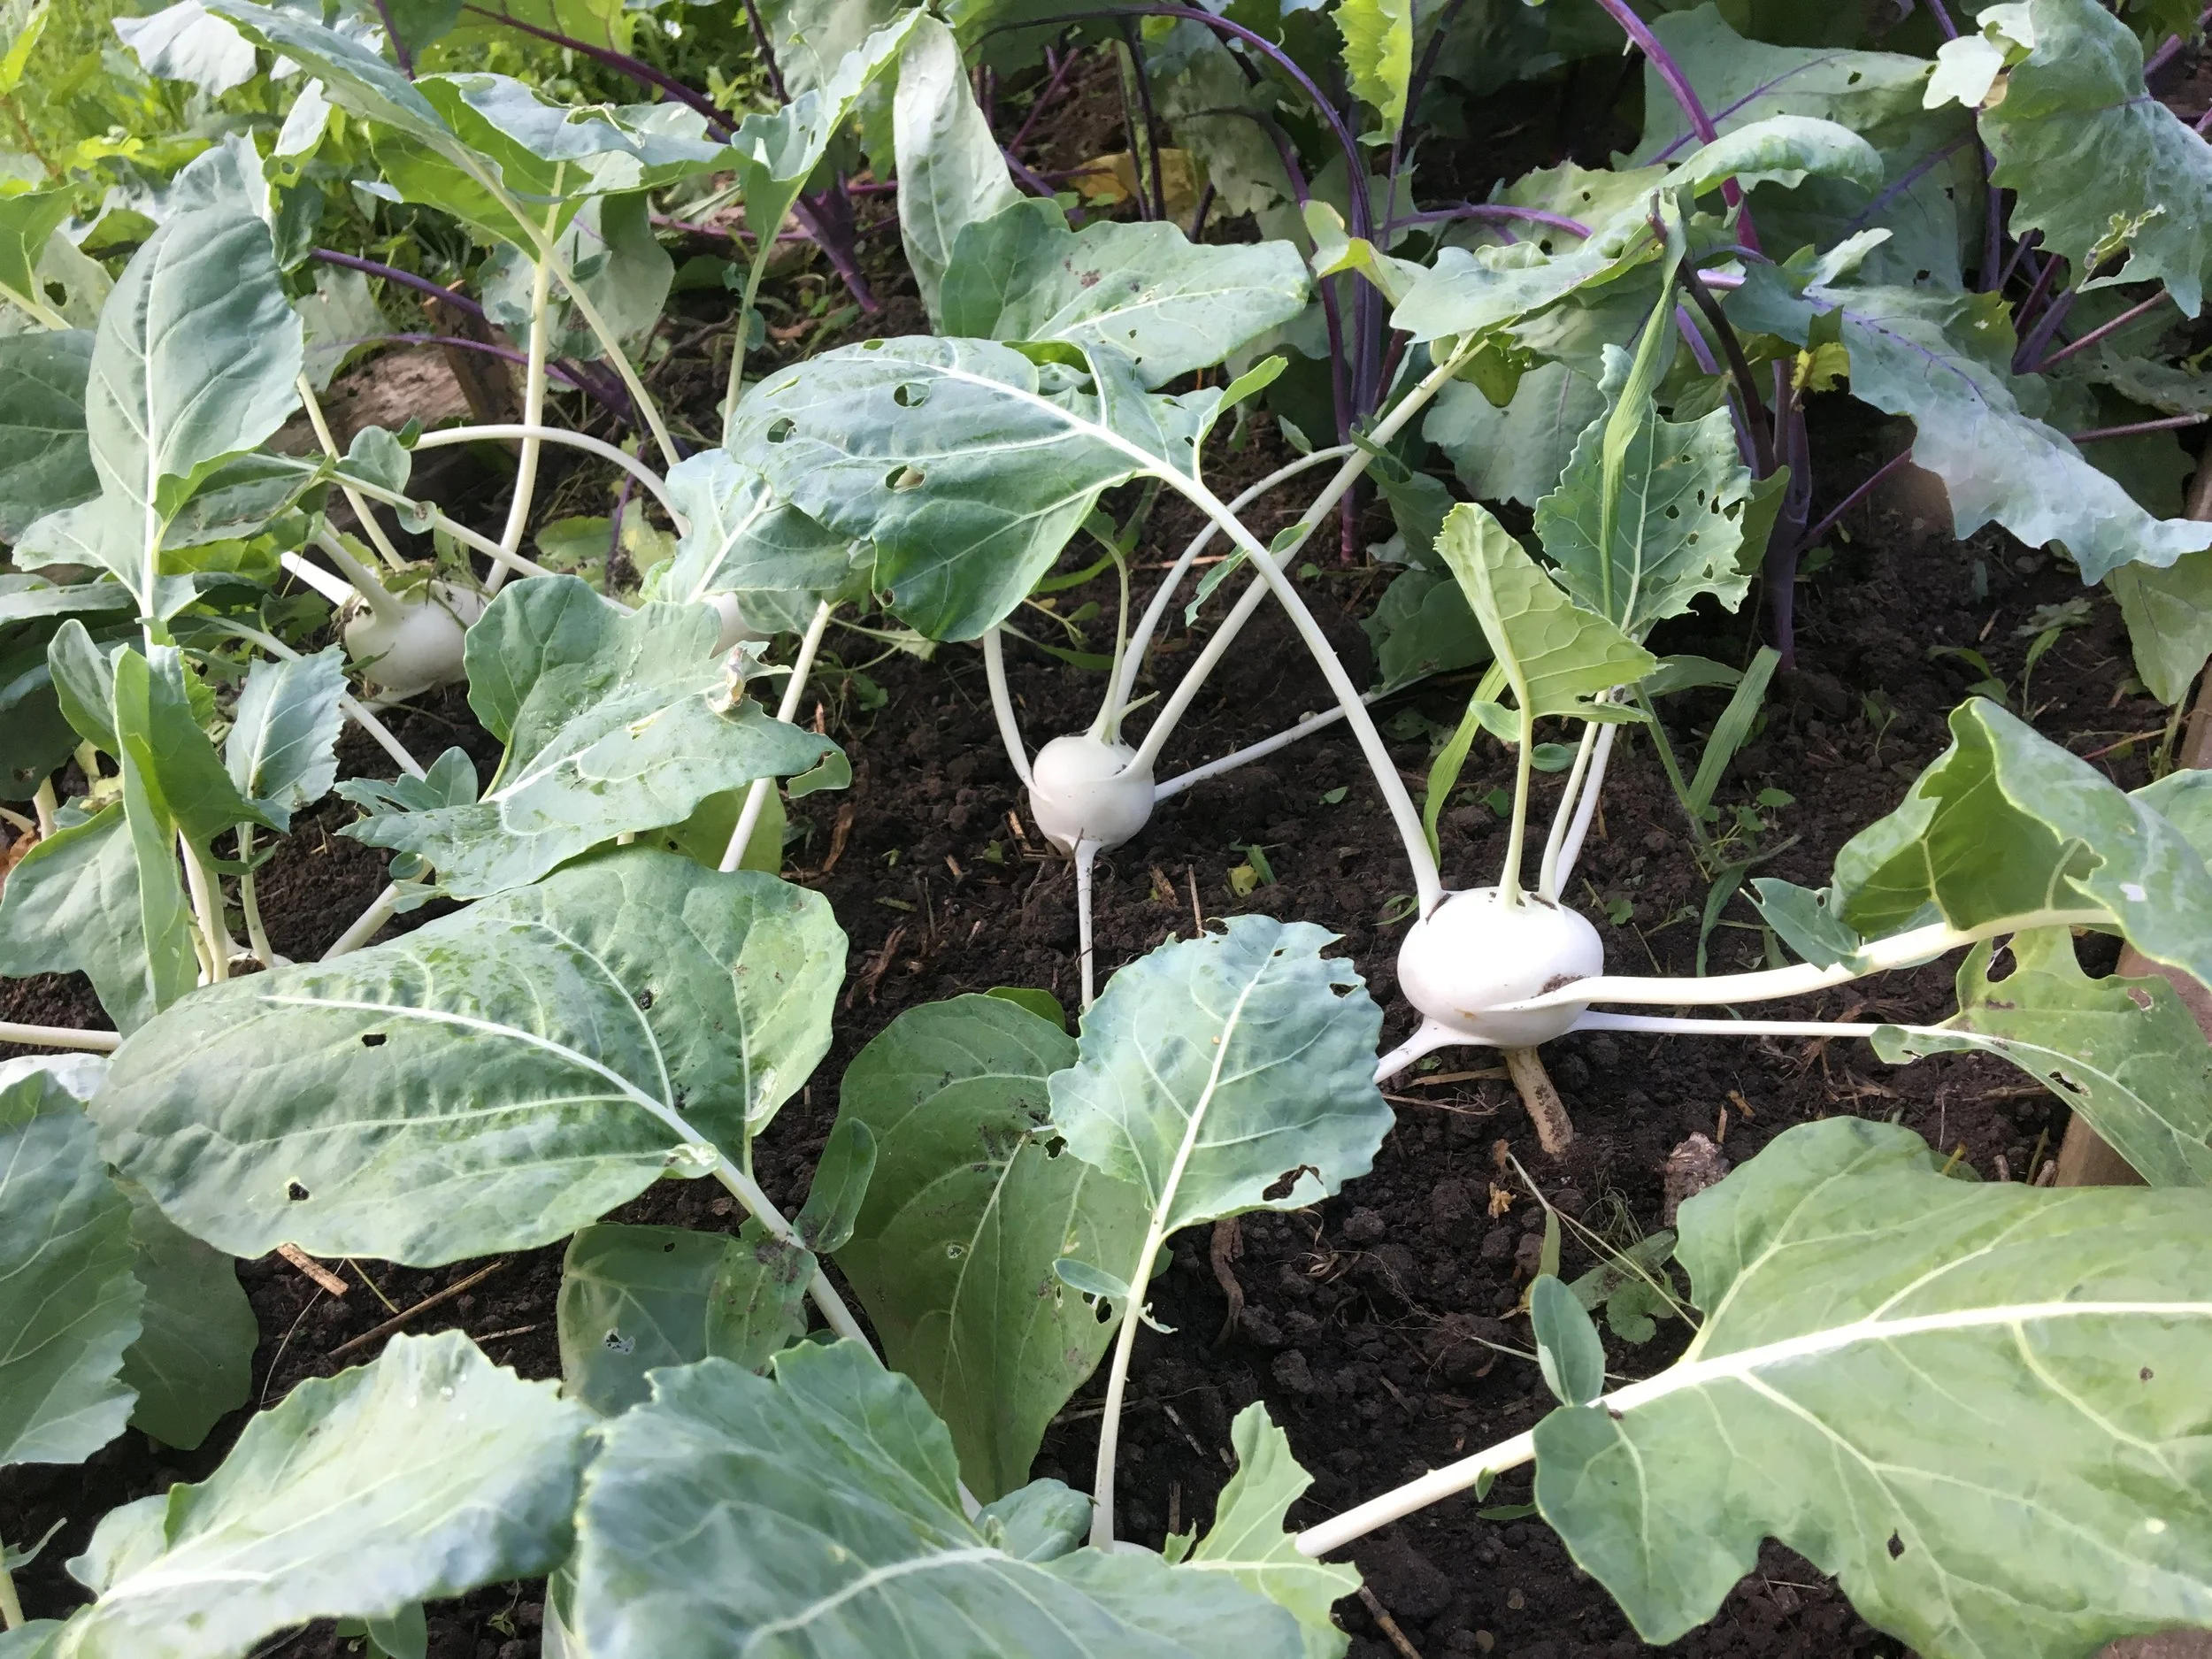
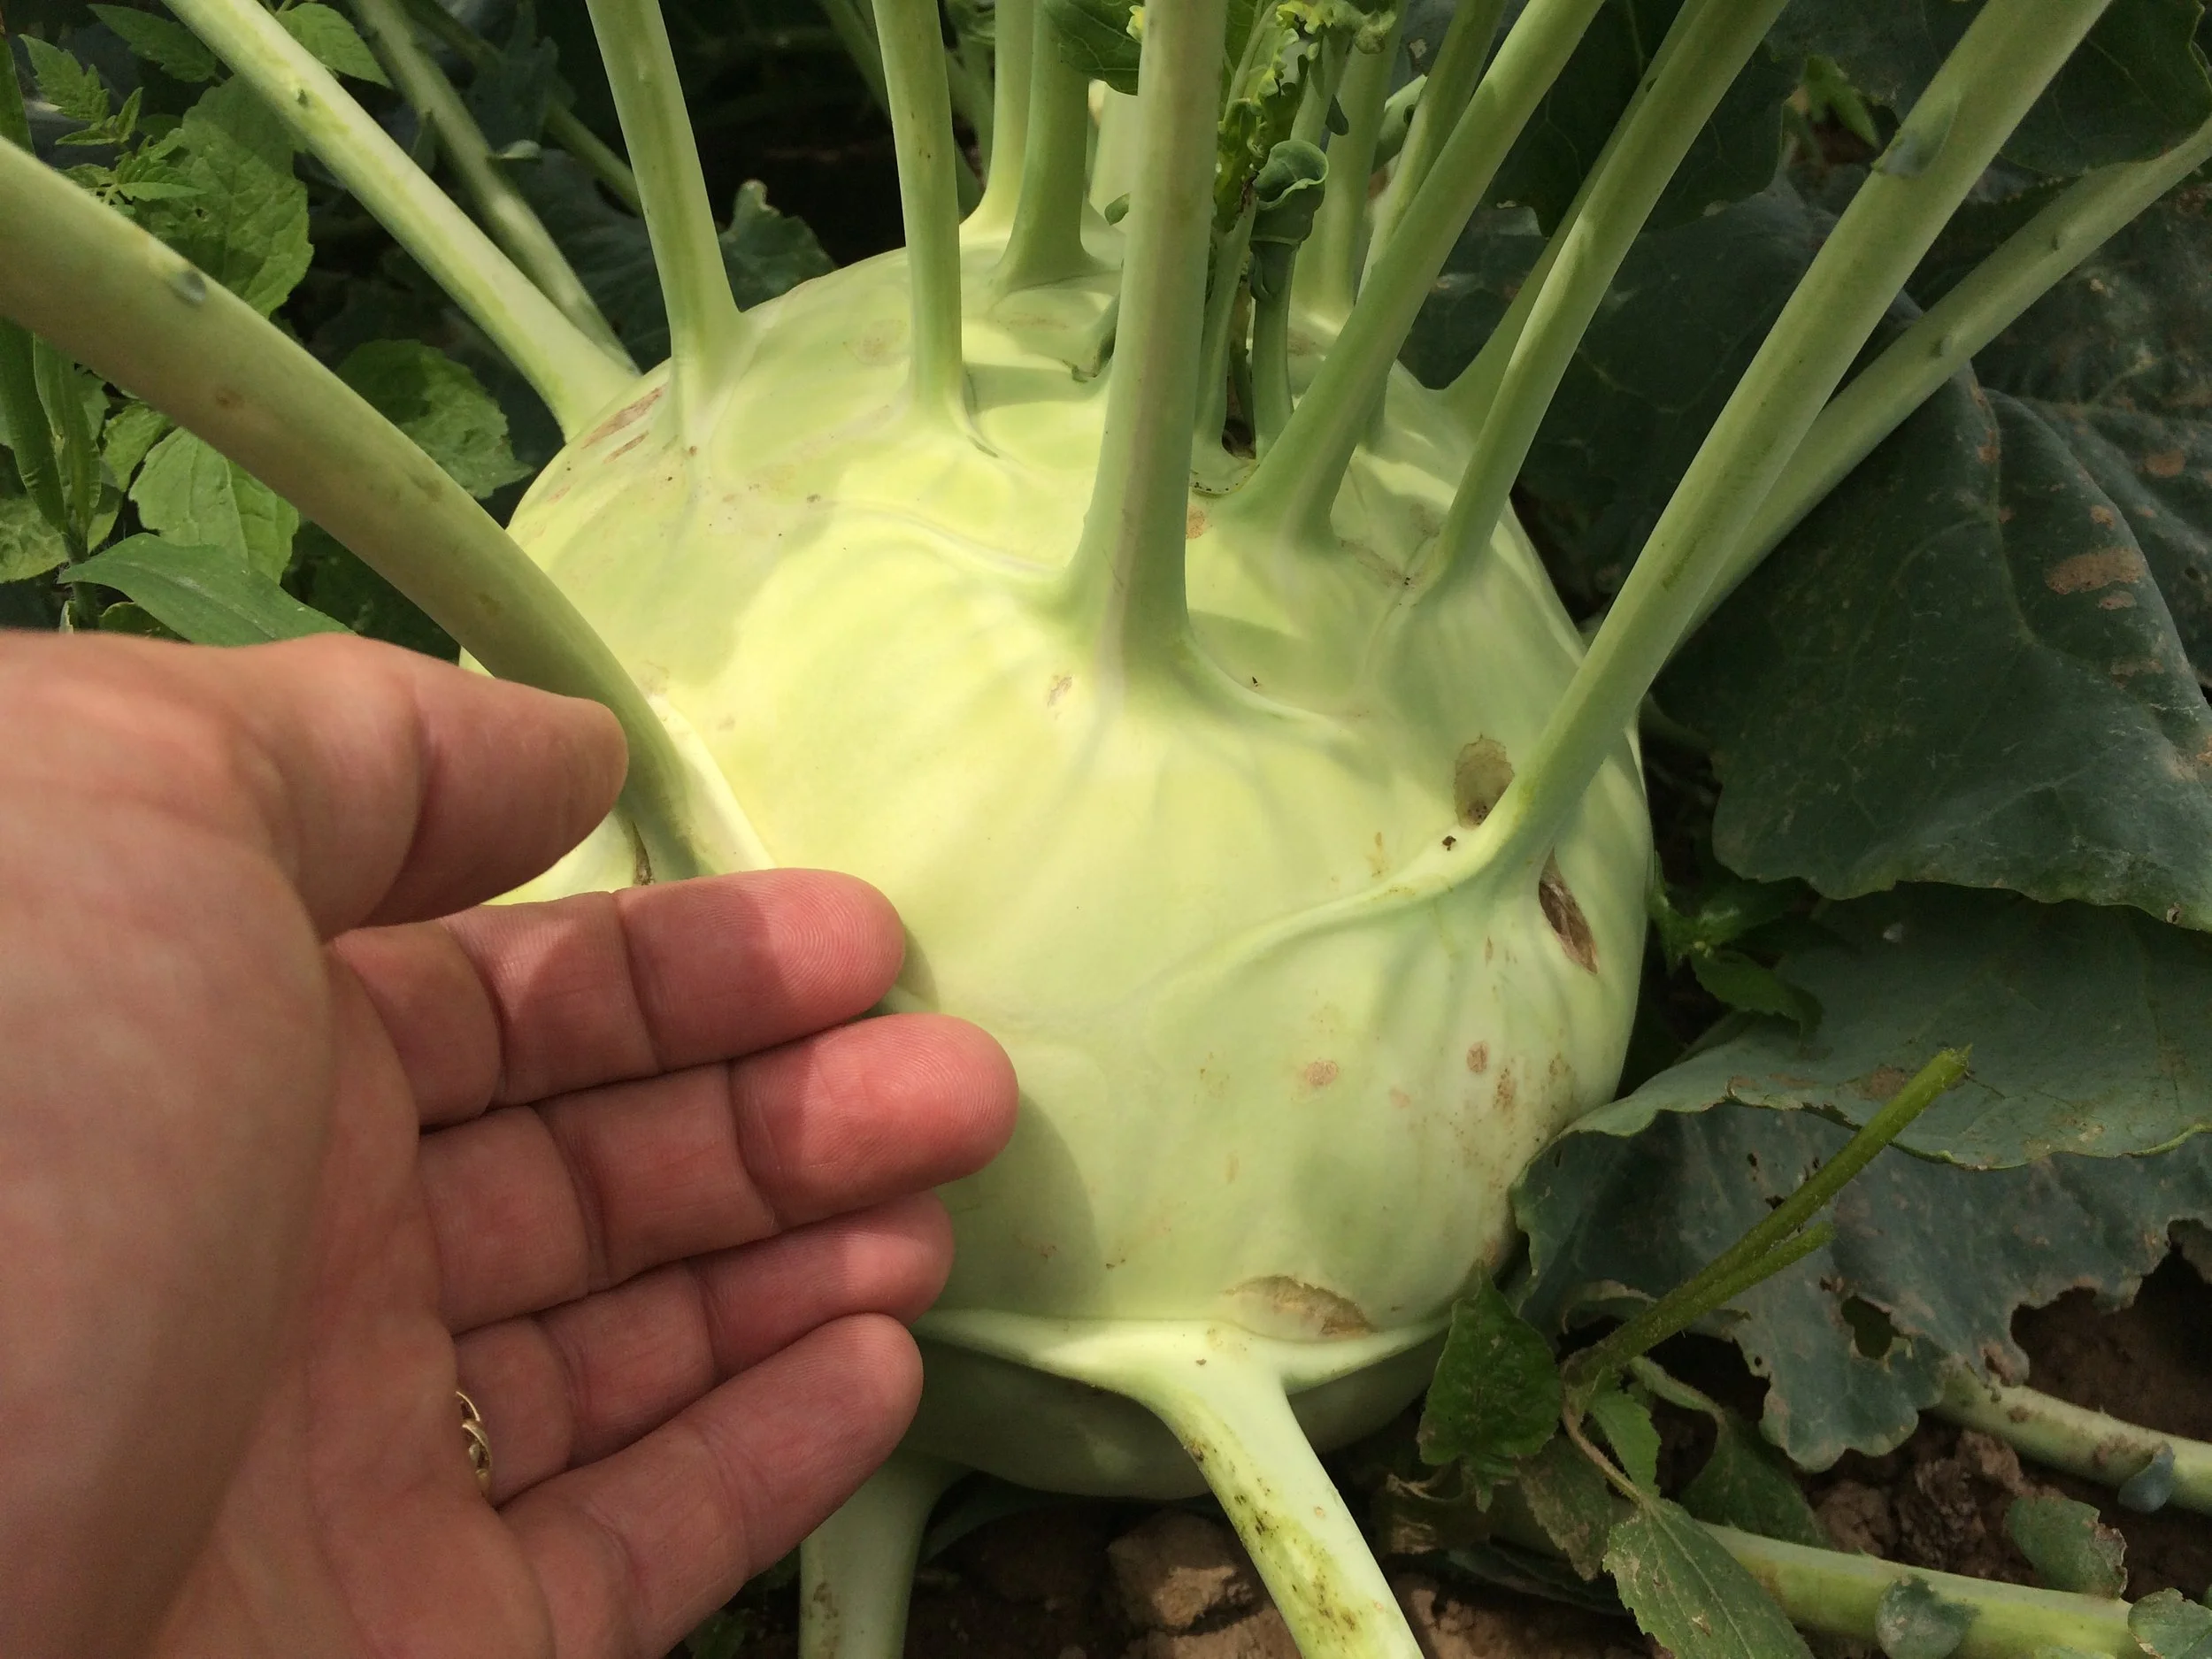
To my kids, kohlrabi looked like flying saucers. When I look at kohlrabi from the right angle I see a person having a bad hair day.
Whatever your imagination paints it as, it’s both attractive and unusual, making it a nice fit for an ornamental edible garden.
It’s also easy to grow, quick to mature, and versatile in the kitchen.
If you haven’t tasted it before, I’d describe the flavour as a cross between a mild apple and mild turnip. Let’s call it turnip light!
In this post I’ll talk about how to grow kohlrabi and how to fit it into your garden.
It Starts as a Rosette
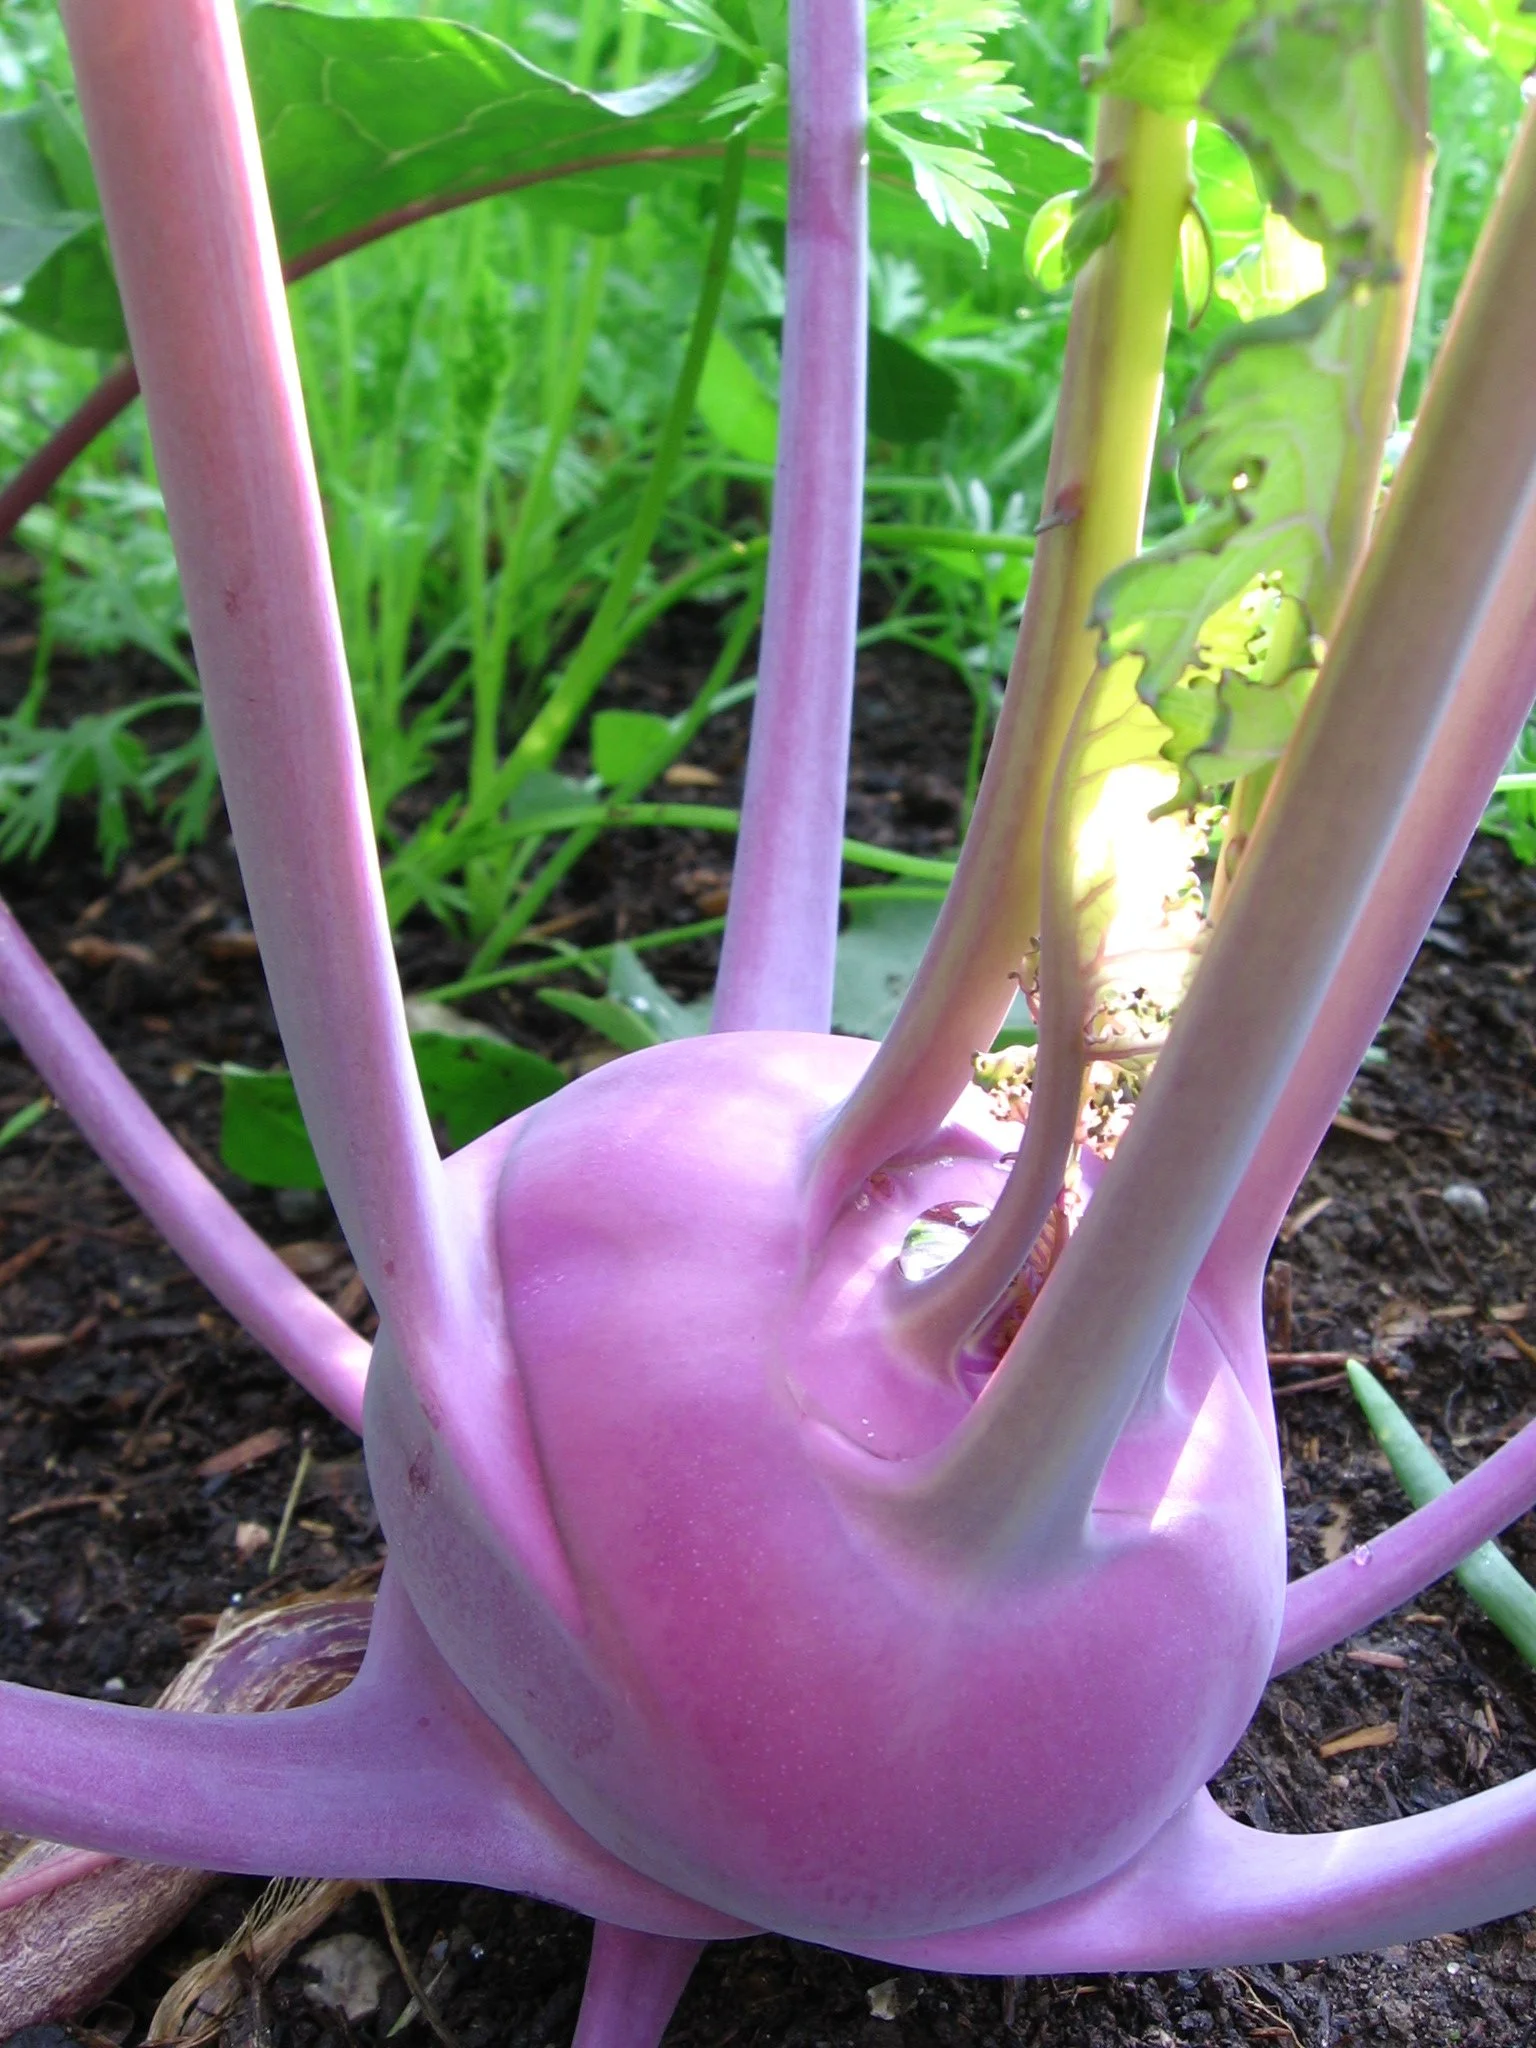
Kohlrabi is a member of the cabbage clan. It has an edible stem that fattens up right above the soil level. Before the stem plumps up, though, the plant is a rosette of leaves. As the stem thickens, the symmetry of that rosette remains, with leaves projecting out from the bulb-like stem.
Top Tip for Kohlrabi Success
Here’s the key to your kohlrabi success: Fast, uninterrupted growth.
To get that type of growth, grow it in well-fed soil, with cool temperatures and consistent moisture.
Site
Kohlrabi is an easy-to-grow vegetable that is versatile in the kitchen.
Like its cabbage cousins, kohlrabi grows best in soil with lots of organic matter
A spot with full sun is best (although I’ve had decent results growing kohlrabi in partial shade)
Grow Kohlrabi from Seed
Kohlrabi is easy to grow from seed, indoors or outdoors. I don’t usually bother starting them indoors in the spring, but it’s an option if you want the earliest possible harvest. If you start them indoors, there’s no need for a heat mat.
Sow seeds approximately 5 mm (1/4”) deep
Outdoors: Start sowing about 1 month before the last spring frost
Indoors: Start kohlrabi transplants about 1 month before you plant to move them to the garden
Here are a couple of ways to get a longer kohlrabi harvest:
Start additional seeds every 2-3 weeks
Grow more than one variety, choosing varieties that take different amounts of time to mature
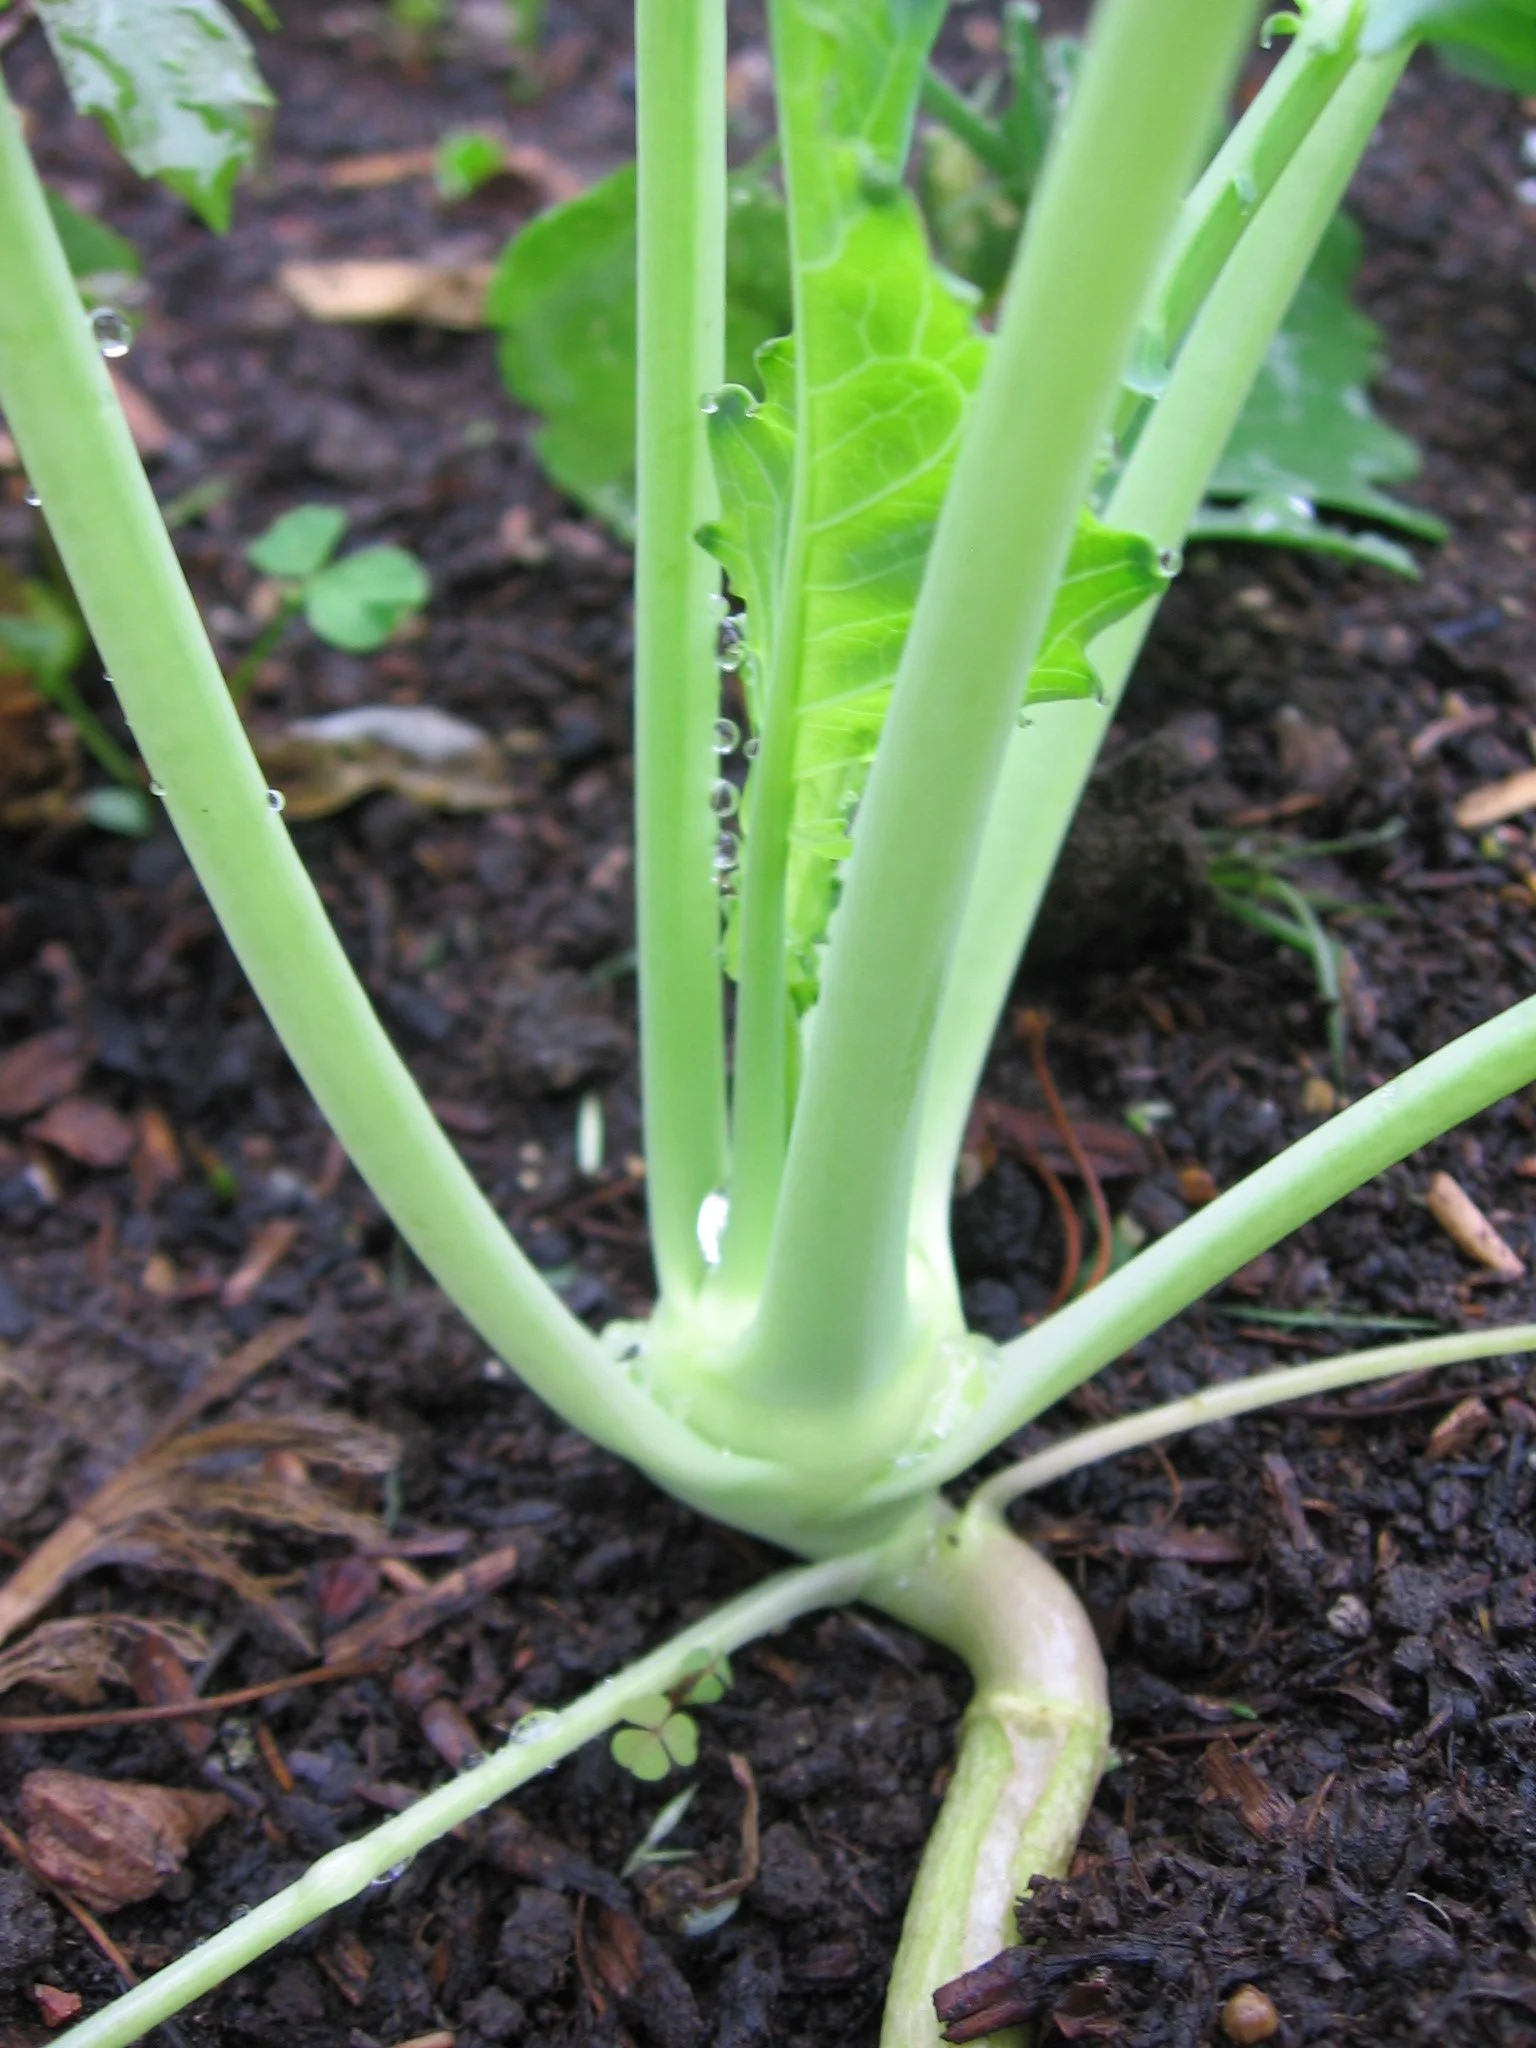
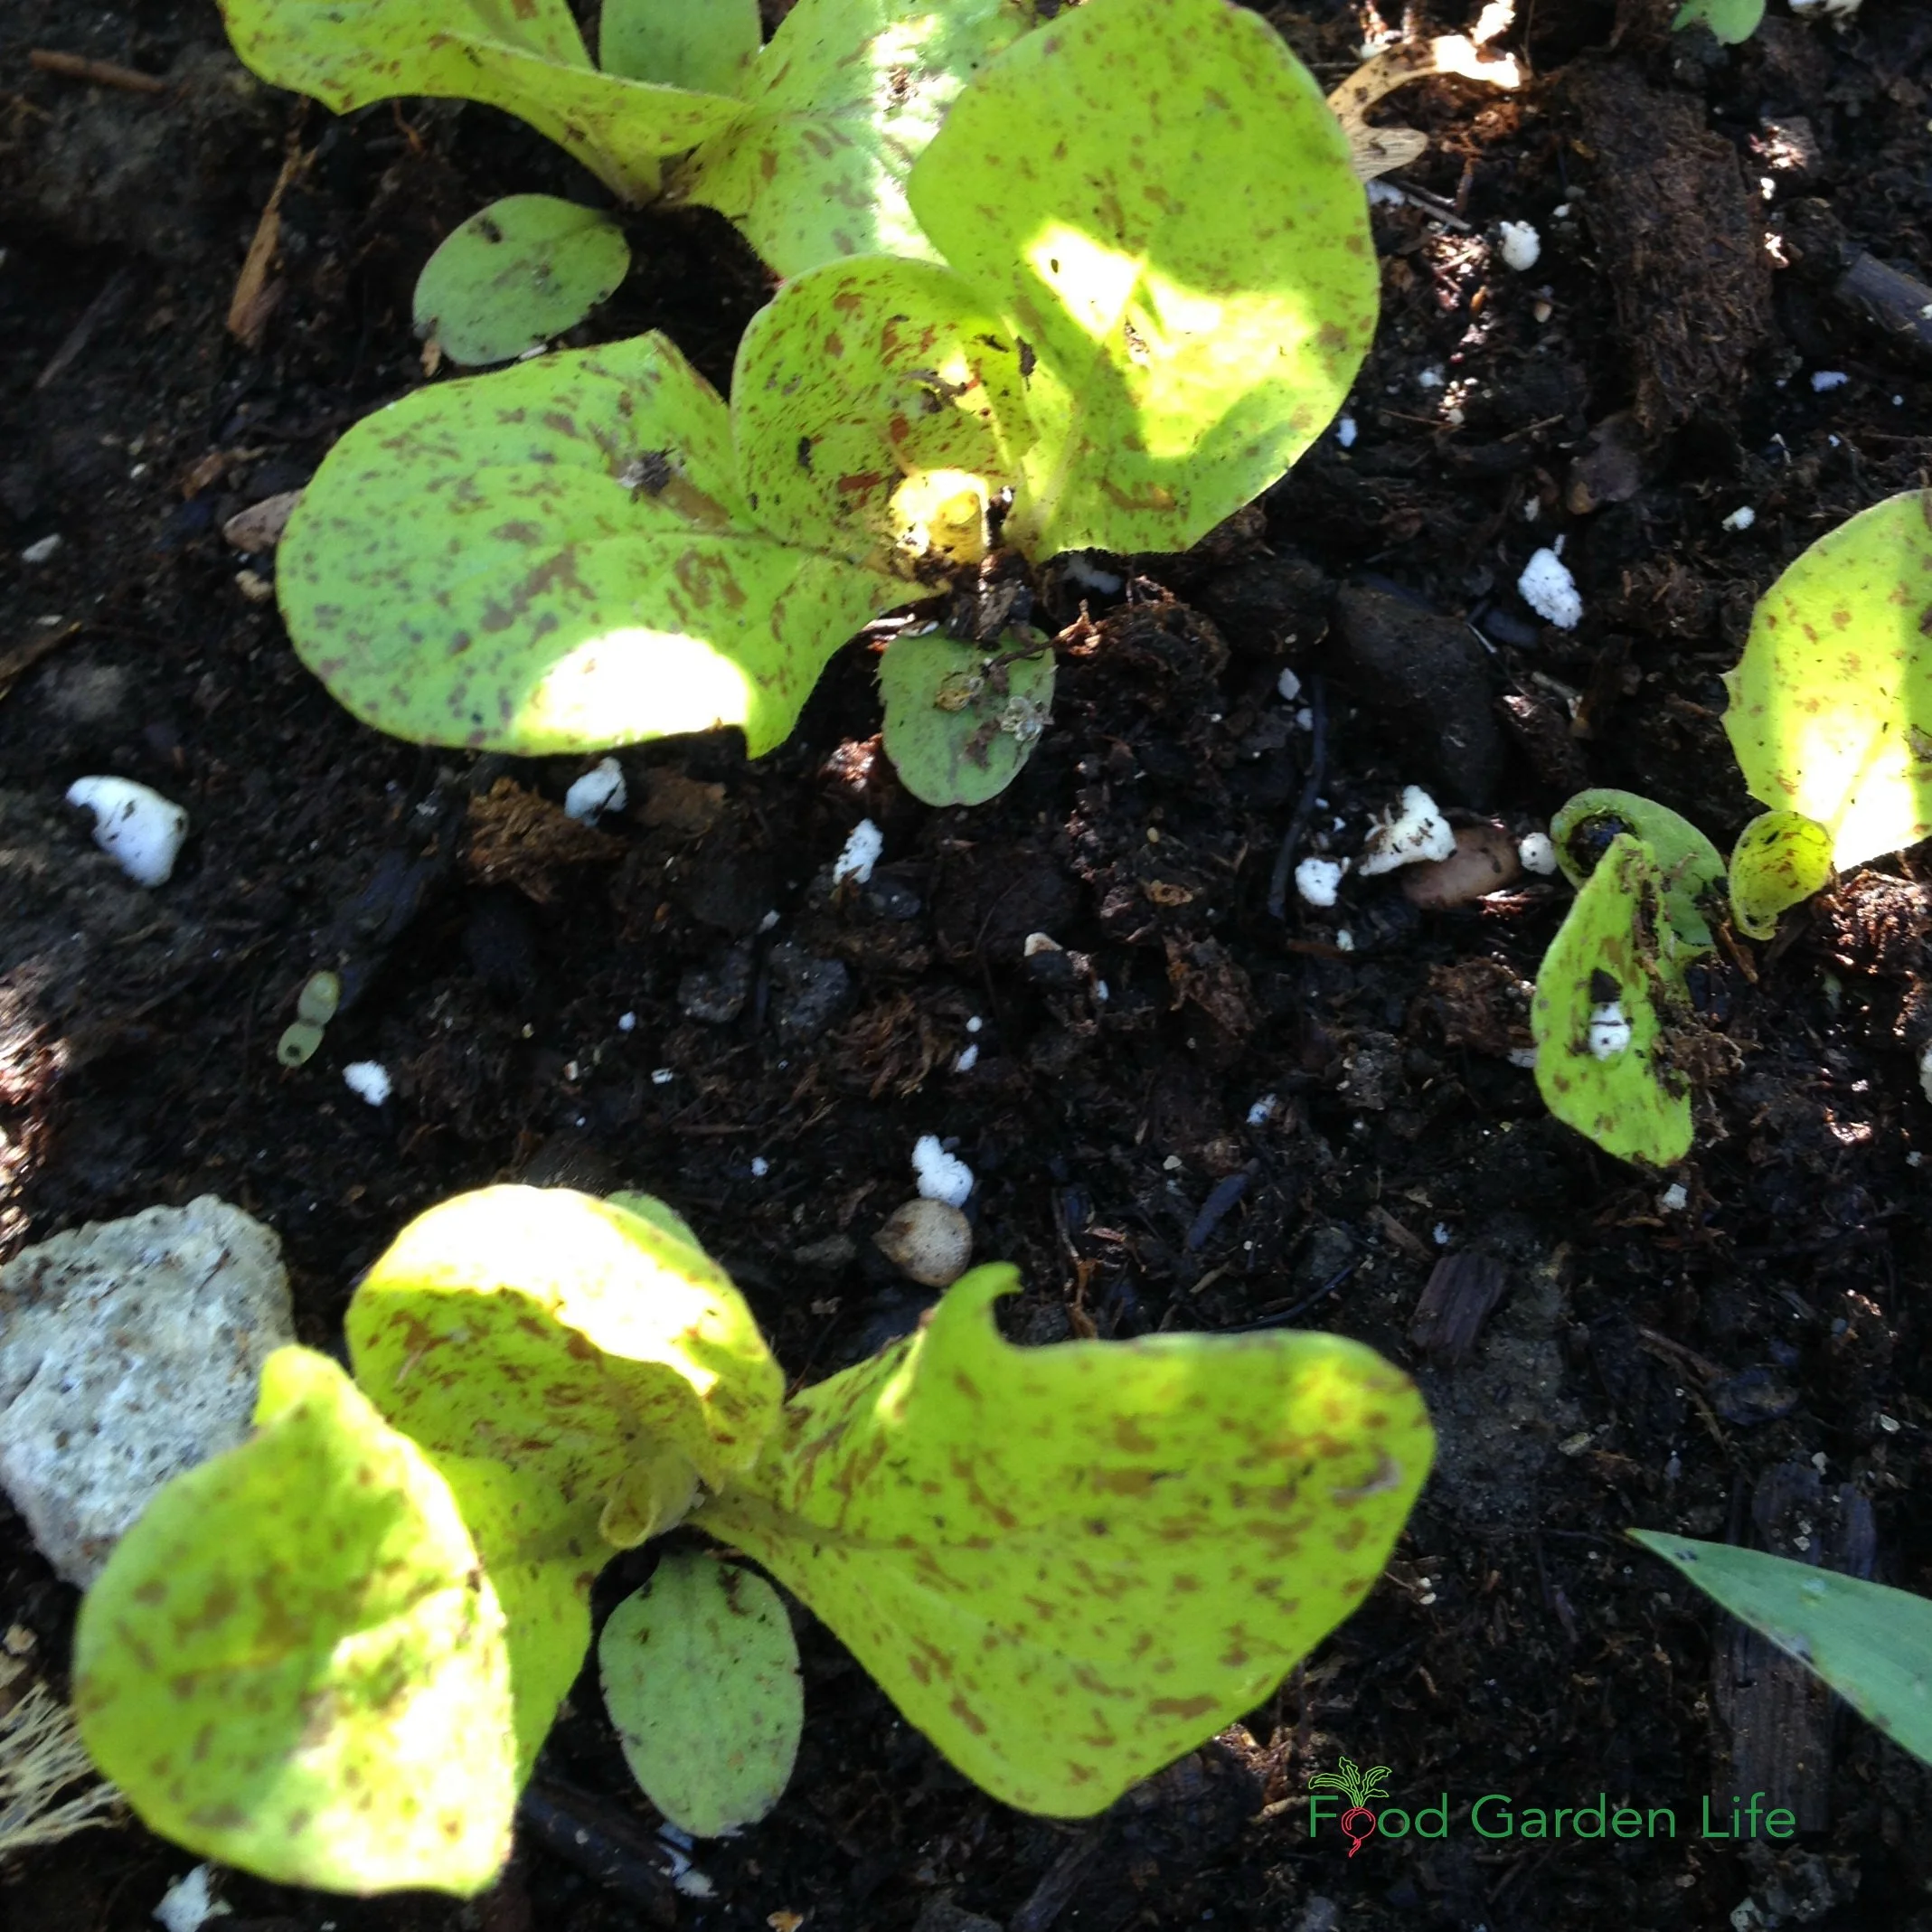
A young kohlrabi plant, before the stem has started to fatten up.
Note: While kohlrabi plants are tolerant of cold weather, a hard freeze can cause young plants to bolt – to jump right to the flowering stage. That would mean no thick edible stem. So there’s a limit to how early you can plant them out.
Kohlrabi as a Summer Succession Crop
When kohlrabi is a succession crop, I like to pre-start seedlings indoors (or outdoors, in another part of the garden). That way, I have transplants ready to go once the desired space opens up.
While I rarely start spring kohlrabi indoors in the spring, I find it’s the best way for me to grow kohlrabi for summer succession because:
It allows me to have a tighter succession...with larger plants ready as soon as the space is open
The hot, dry summer weather that I get here is not ideal for outdoor seeding
Note: Depending on growing conditions in your area – and how much attention you give your garden over the summer – kohlrabi might or might not be a suitable summer succession crop. Dry conditions can cause erratic growth and give a woody texture with a strong, bitter flavour.
Grow a Container Vegetable Garden
And get an early harvest of crops that usually take too long!
Spacing
Thin kohlrabi plants to give a spacing of approximately 10-15 cm (4-6”) apart.
With direct-seeded kohlrabi, I usually plant them more densely than recommended. Then I thin out the row as the stems begin to fatten, enjoying an early harvest of young kohlrabi.
Kohlrabi leaves are edible, so if I thin out any plants before the stems enlarge, I can still add the leaves to a salad!
Planting more densely is also cheap insurance against losses and poor germination.
If you’re aiming to grow larger kohlrabi, increase the spacing a bit – and look for a variety know for size.
Sow the seeds approximately 5 cm (2“) apart
Thin to 10 – 15 cm (4-6”) apart
Space rows 30cm (12”) apart
If you’re aiming to grow larger kohlrabi, increase the spacing a bit – and look for a variety know for size.
Challenges
I find the early crop is not bothered much by pests. But later sowings and summer-succession transplants are growing when there are more pest pressures in the garden. That means young seedlings can be vulnerable to flea beetles, cabbage worm, and cabbage looper. An easy solution is to cover young plants with a floating row cover.
Where possible, rotate crops to minimize pest and disease pressures. That means it’s best not to plant kohlrabi where you’ve had you’ve had related crops (broccoli, cauliflower, collards, kale, turnip, rutabaga, cabbage, bok choy, Brussels sprouts, and mustards) in last 4 years.
Harvest and Storage
Kohlrabi usually take a couple of months to mature. Pick when they’re anywhere between the size of a golf ball and a tennis balls. Remember: smaller will be more tender.
Kohlrabi is frost hardy, so there is no rush to harvest it in the fall.
In the Kitchen
Kohlrabi is versatile in the kitchen.
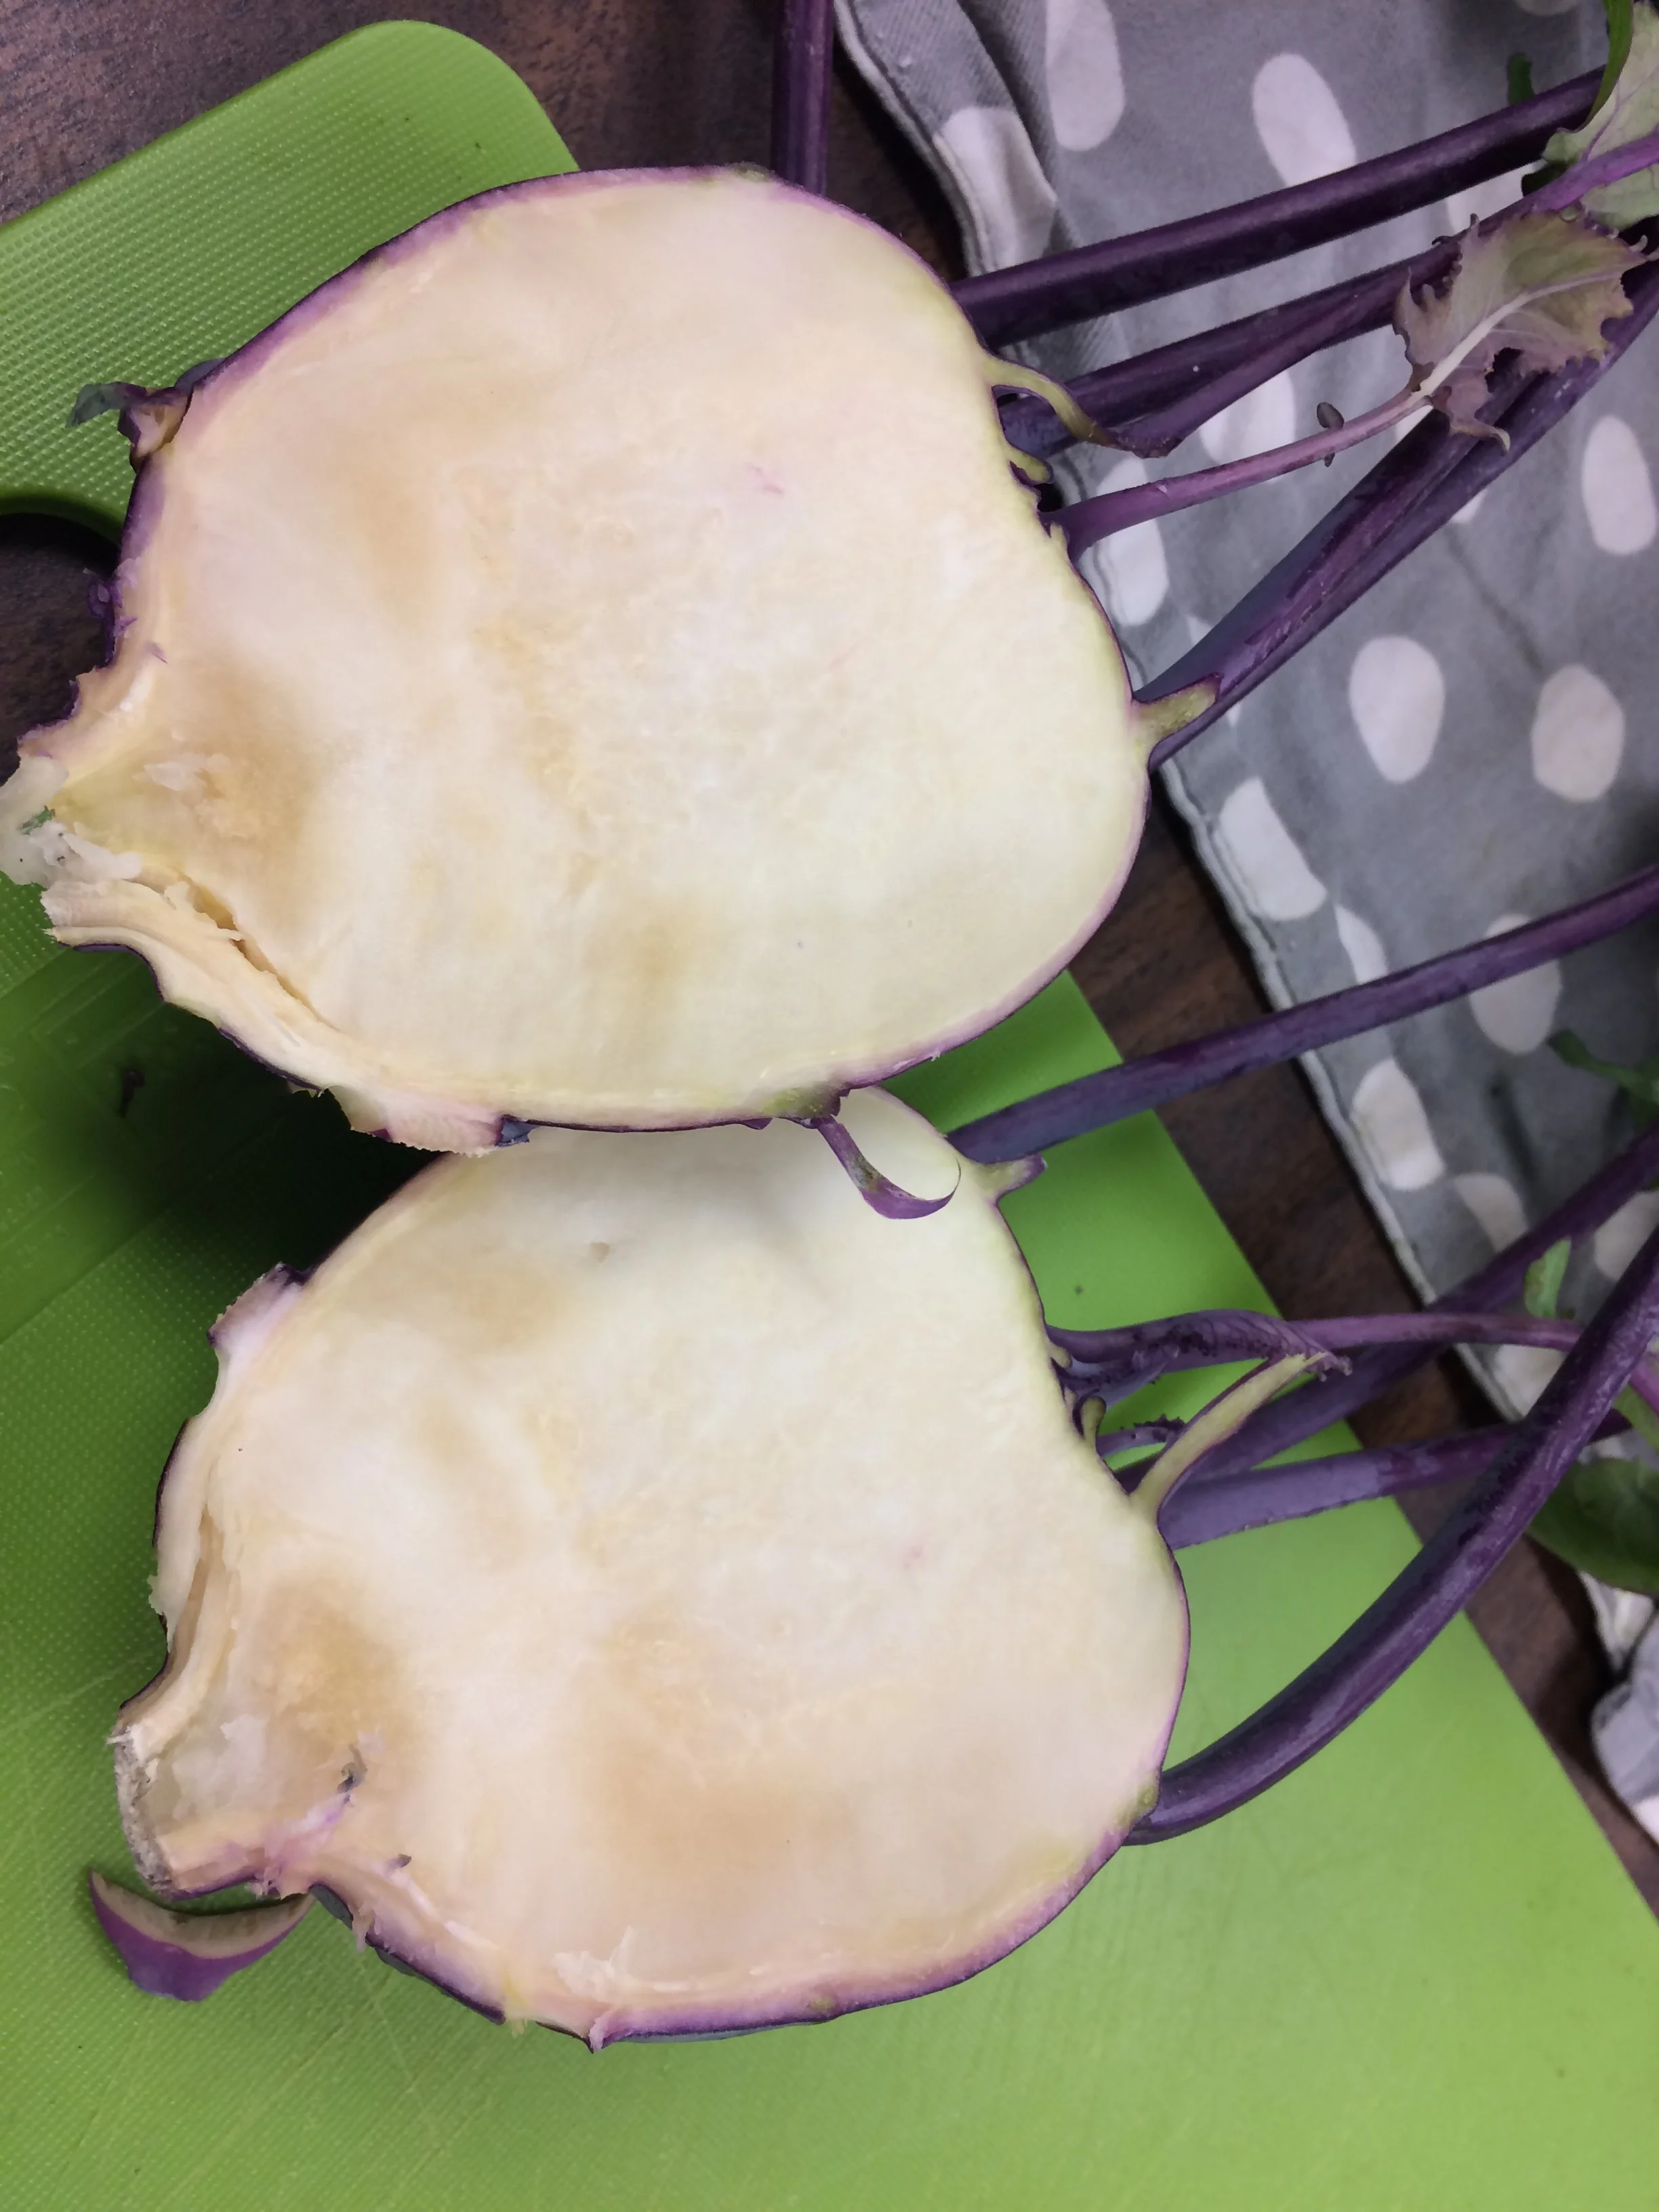
You can eat kohlrabi raw or cooked. Either way, peel it first, because the skin can be tough. I prefer to use a paring knife (sometimes a potato peeler gets stuck on the spots where the leaf joined the stem.)
Here are some ways I’ve enjoyed serving kohlrabi:
Sliced, on a veggie platter
Grated, in slaws and salads
Poached (in white wine with butter is nice!)
Cut into ribbons, and added to a stir fry
Cubed and added to curries
Remember: The young leaves and leaf stalks are edible too!
Not Sure Where to Start?
A simple way to use raw kohlrabi is to grate it and then make a slaw. Here’s how:
Mix together some grated kohlrabi with a grated apple
I peel the apple first, so the white flesh of the apple and kohlrabi blend together
Use a slow-to-brown apple variety if you have one (at the moment, Pink Lady is my favourite)
Add salt, a dash of red wine vinegar, and olive oil.
That’s it!
Find This Helpful?
Enjoy not being bombarded by annoying ads?
Appreciate the absence of junky affiliate links for products you don’t need?
It’s because we’re reader supported.
If we’ve helped in your food-gardening journey, we’re glad of support. You can high-five us below. Any amount welcome!
Guide: Olive Trees in Pots
Grow an olive tree in a pot if you live in a cold climate. They look great, and if you do it right, you can harvest your own olives. This article tells you what to do to help your potted olive tree thrive and give you olives.
By Steven Biggs
Growing Olive Trees in Containers
It was over two decades ago that I came home from a garden centre with a small potted olive tree. I was entranced by the shimmering light in olive groves in Italy—so when I saw that little potted tree here in Toronto, I grabbed it.
Olive trees are beautiful when the wind goes through them. The feathery leaves take on a silvery glow as they billow in a breeze.
My potted olive tree grew bigger and bigger. I shaped it into a nicely proportioned tree. When it sent up a sucker, I lopped off the sucker to make a second olive tree.
They were a beautiful touch of the Mediterranean in my cold-climate garden.
But they never gave me a single olive.
Not until I learned a couple of the simple but important things about potted olive trees that I share with you in this article.
A Bit About the Olive
The olive (Olea europaea) is a long-lived plant that you can shape into a bush or a tree. In climates where it is winter-hardy, it can become a small tree.
Gardeners in cold climates can grow olives in pots, where they do very well. They make fine potted patio plants because they are tough as nails.
Young branches with small, leathery, silvery-grey leaves move in the breeze, so if you're next to an olive tree on a breezy day there is a beautiful shimmering light.
Potted Olive Tree Summer Care
If it's an option, put your potted olive tree outside for the summer. It will do best with lots of sunlight. Full sun. The quality of light indoors, even near a bright window, is not as good as outdoors.
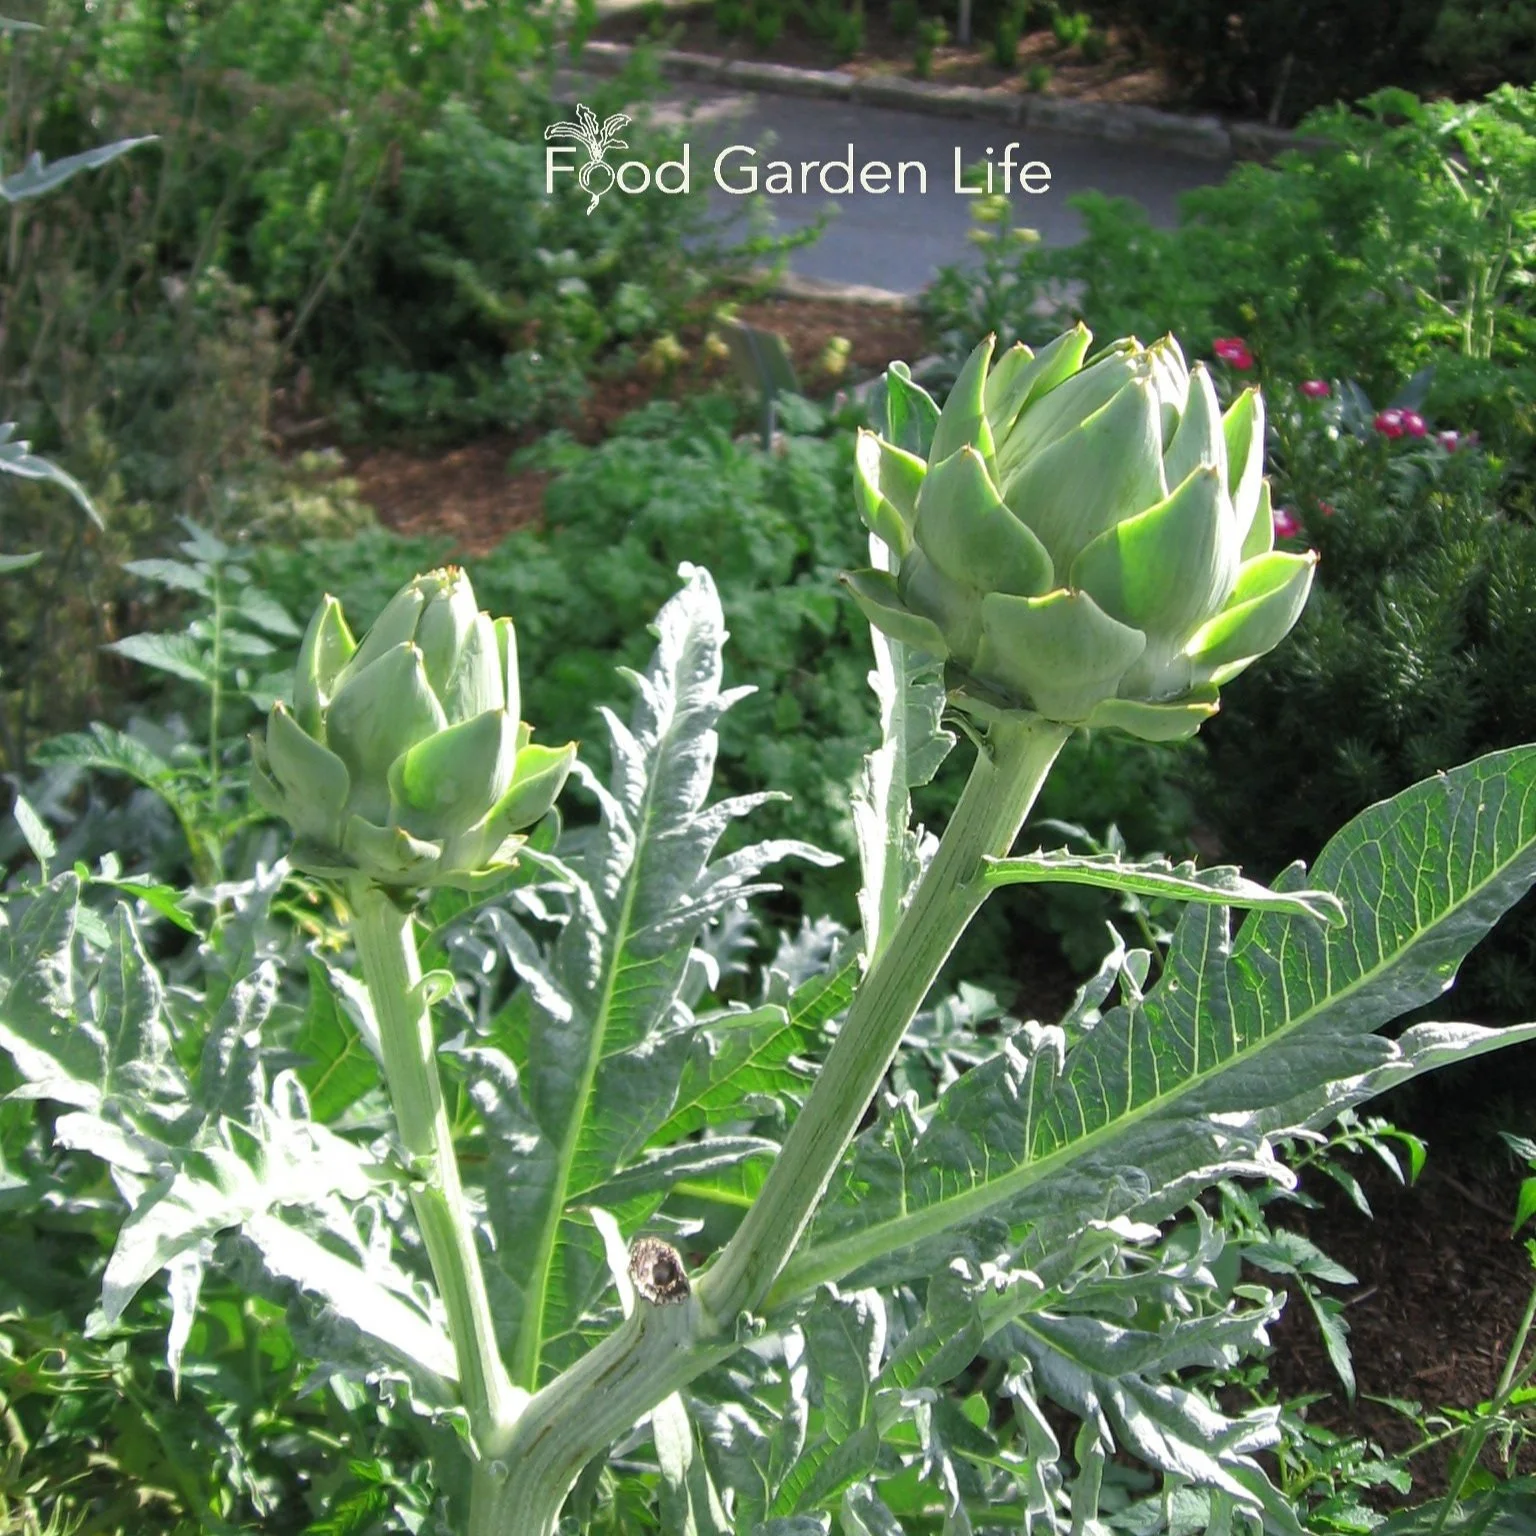
If you want to add silvery-grey tones to the garden, artichoke and cardoon have silvery-grey leaves too.
Winter Potted Olive Tree Care
Even if you live somewhere too cold for olive trees to survive the winter, you can enjoy the exotic touch of an olive tree in your garden. This book gives you what you need to know to grow an olive tree in a pot. (And get olives!) Buy at Amazon.ca and Amazon.com.
There are a number of ways to keep potted olive trees over the winter. Over the years, my mine have spent the winter in a number of settings:
Minimally heated sunroom
Insulated garage (kept just above freezing)
A cool greenhouse
My dining room
(When they were in the dining room, we put lights and decorations on the for Christmas!)
Olive trees prefer lots of sunlight. This olive tree is growing beside my deck.
If you have somewhere cool and bright, such as a sunroom, that's my recommendation. A temperature range of 5-10°C (41-50°F) is ideal.
Olives do tolerably well indoors, in centrally heated homes...but it's not ideal. The warm, dry conditions indoors are less than ideal for your olive tree.
Those warm, dry conditions in the house are:
Not conducive to flowering
Great for insect pests such as scale
But if the house is your only option, you can make it work. Choose a location with a bright window, or put the olive tree under grow lights.
The trench method is another way to keep an olive tree over the winter in a cold climate. Dig a trench, lay the olive tree in the trench, and then mulch heavily. The depth of the trench and amount of mulch you need will depend on where you are.
You can also lay over fig trees for winter. Find out how.
While in-ground trees are said to withstand -10°C (14°F), don't expose your potted olive tree to more than a light freeze. (See notes on hardiness, below.) That's because the root temperature of in-ground trees is moderated by the soil (the soil temperature doesn't swing back and forth like the air temperature). The roots of potted plants are subject to air temperature fluctuations.
Get Your Fig Trees Through Winter
And eat fresh homegrown figs!
How to get Fruit
This tree is budded up and ready to flower. Without a cool spell, the flowering cycle of the tree can be disrupted. Then it won't produce olives.
As I mentioned, while olive trees survive in a centrally heated home, growing indoors at room temperature is not ideal.
Pests aside, the main reason is that with warm conditions over the winter, your olive tree might not gear up to flower. That's because they need “winter chill” to induce flowering. It just means that the plant makes flower buds in response to cool temperatures.
Without a cool spell, the flowering cycle of the tree can be disrupted. (Some people refer to this period of cold temperature as “chill hours.”)
My original two trees—clones from the same plant—looked great but didn't produce fruit for years when I kept them over the winter in warm conditions. When I tweaked my overwintering technique to give them cool temperatures over the winter in a sunroom that almost hit the freezing mark on cold nights, they bloomed. They were covered in blooms!
So if you overwinter olive trees at room temperature, you might not get flowers.
And no flowers means no olive fruit.
Pollination
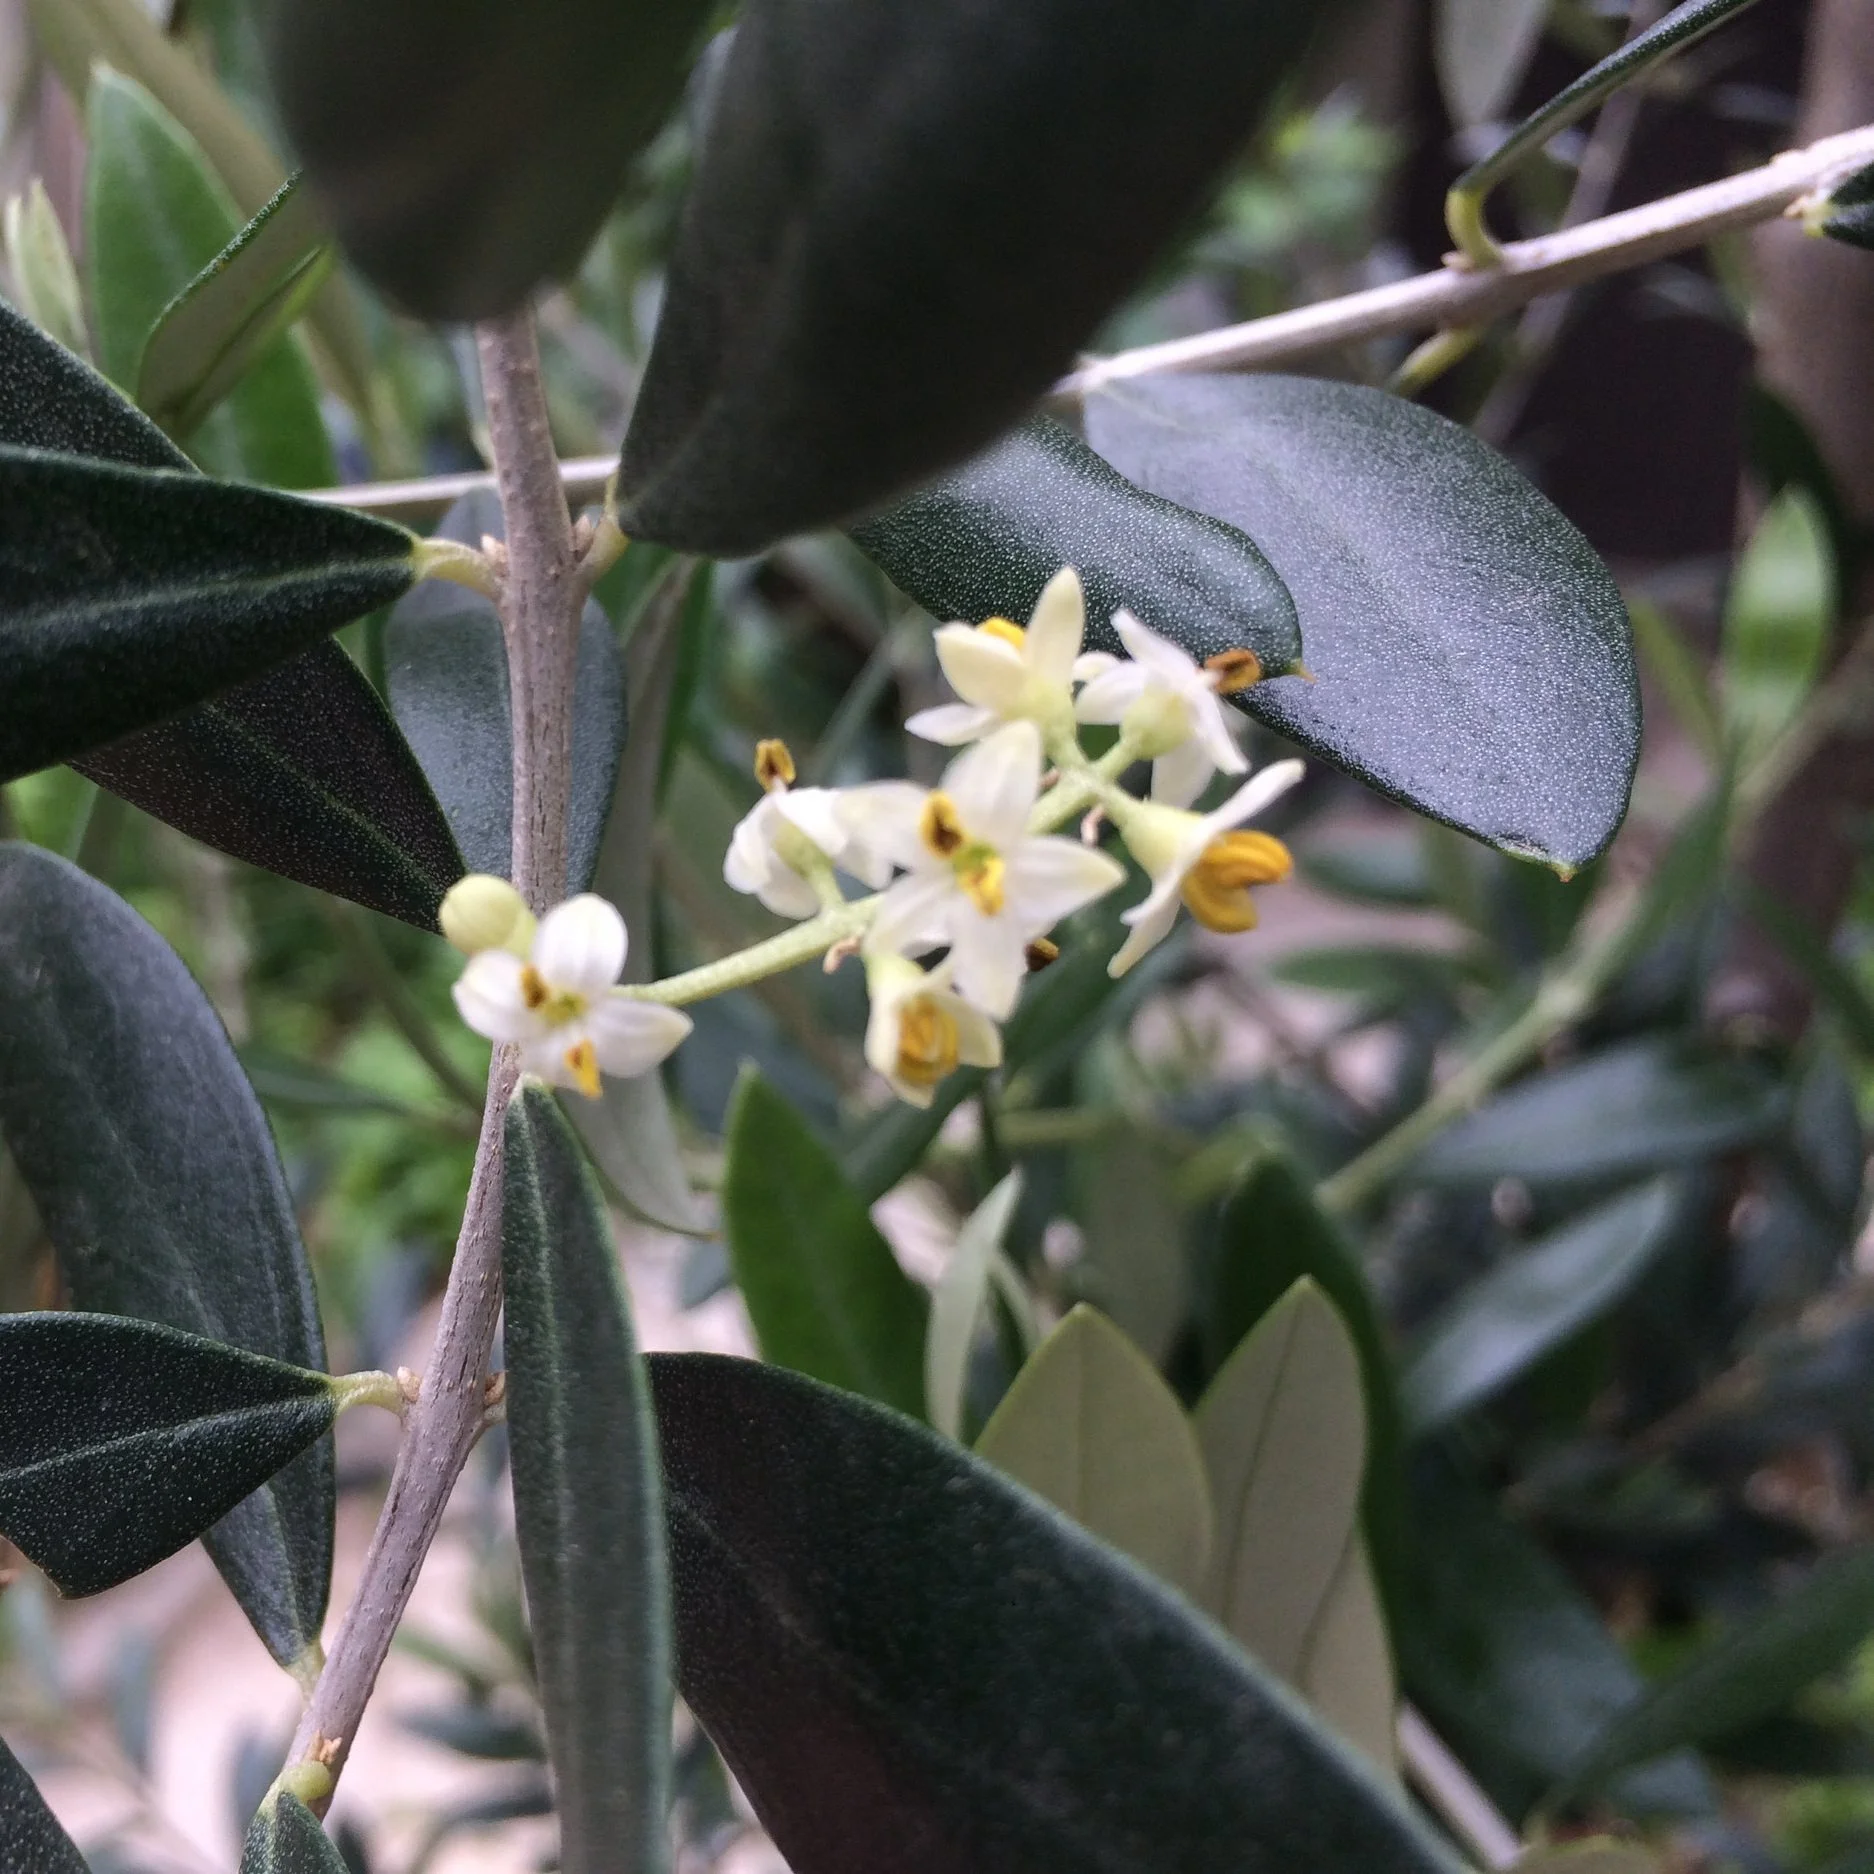
Olive flowers. When your olive tree blooms, expect lots of pollen. It's everywhere.
Olive trees are not reliably self-fertile. That means that some olive varieties require pollen from another plant, of a different variety, for successful pollination.
Even if you have an olive variety that is self-fertile, crops can be larger if there is cross-pollination with another variety.
When your olive tree blooms, expect lots of pollen. It's everywhere.
That yellow dusting of pollen is normal because olives are wind-pollinated. If you want to help the process of pollination, you can use a feather duster, or a vacuum set on reverse to blow. (I let nature take its course, and don't help with the pollination.)
Harvest
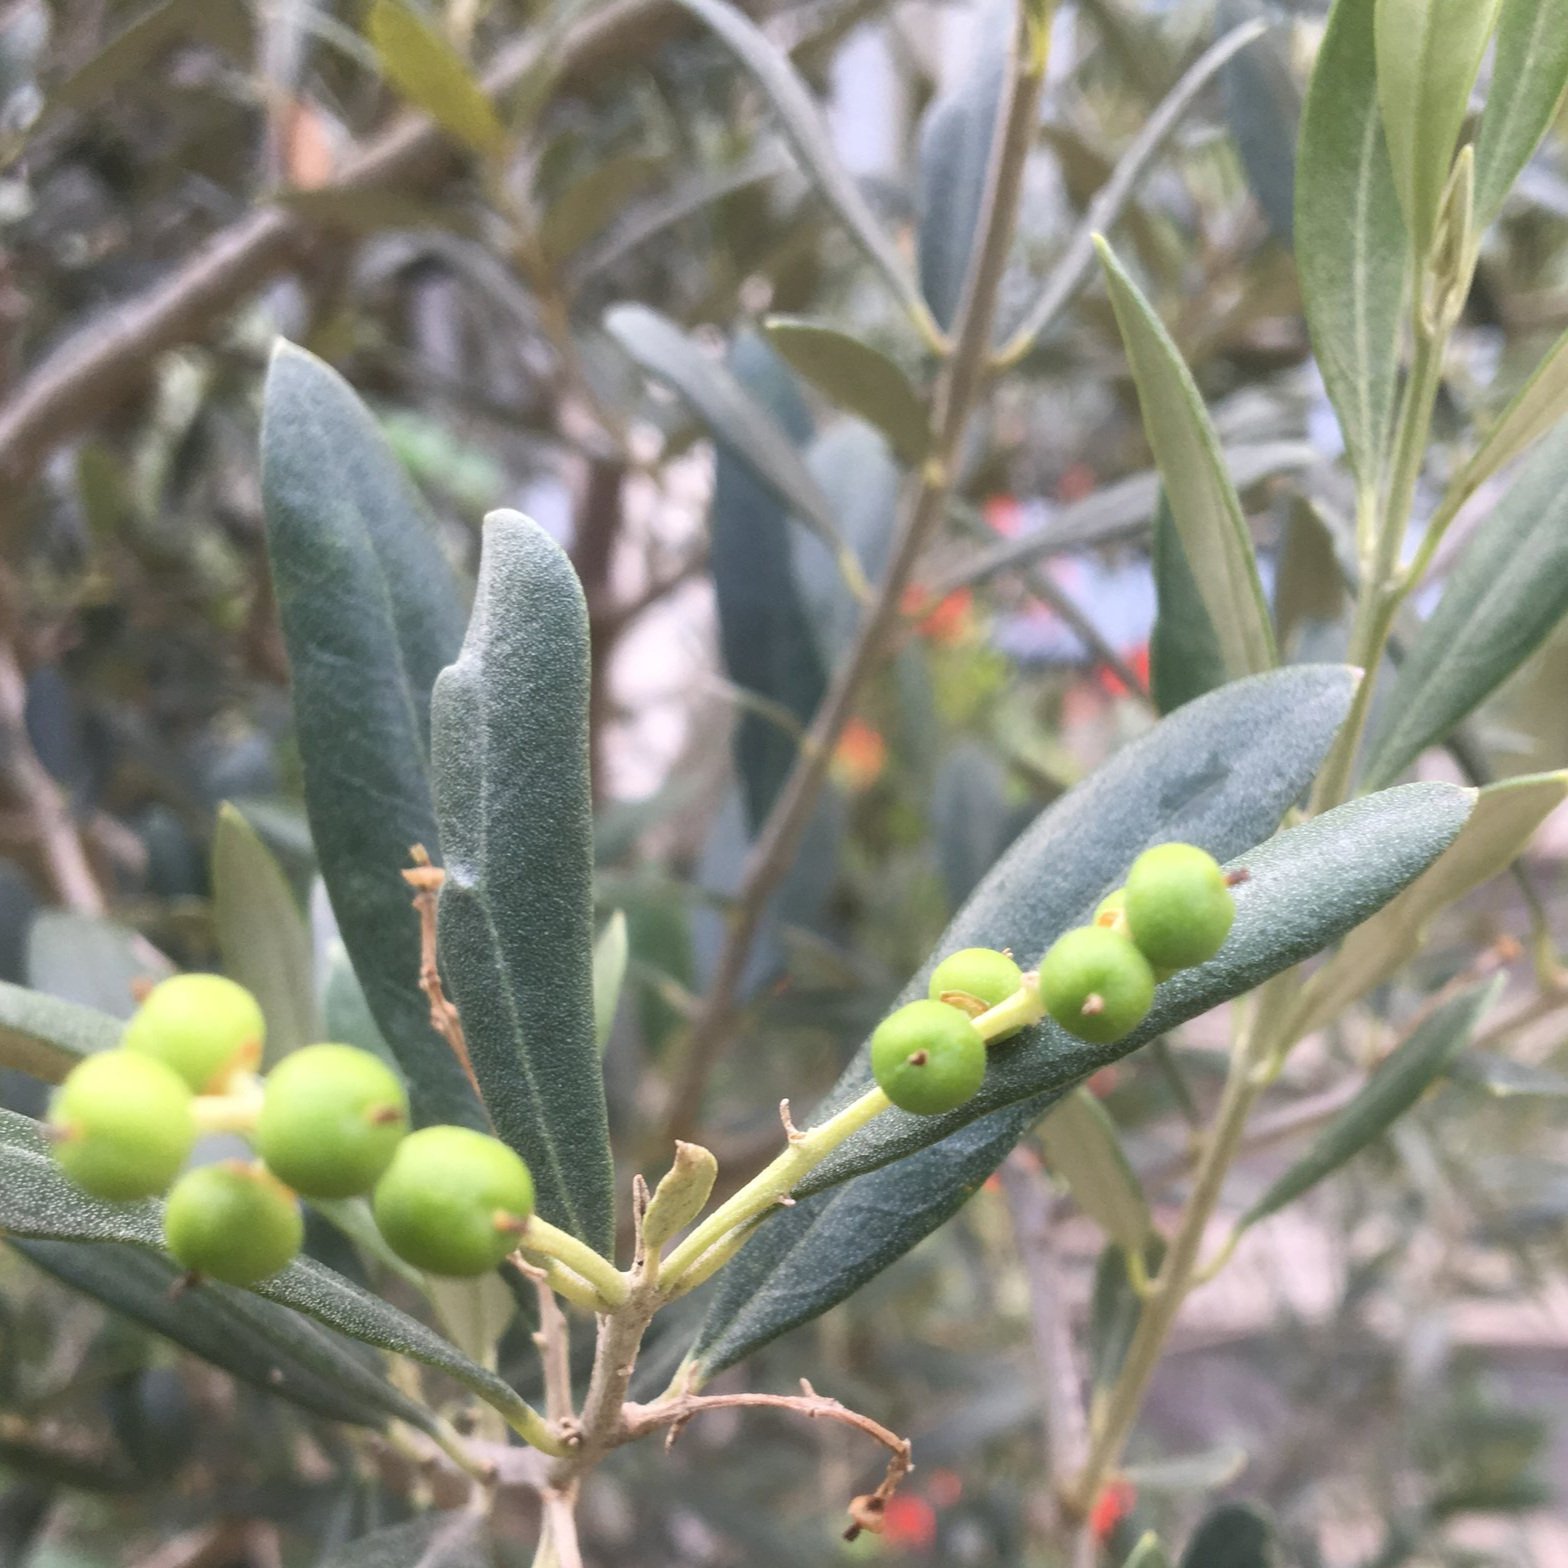
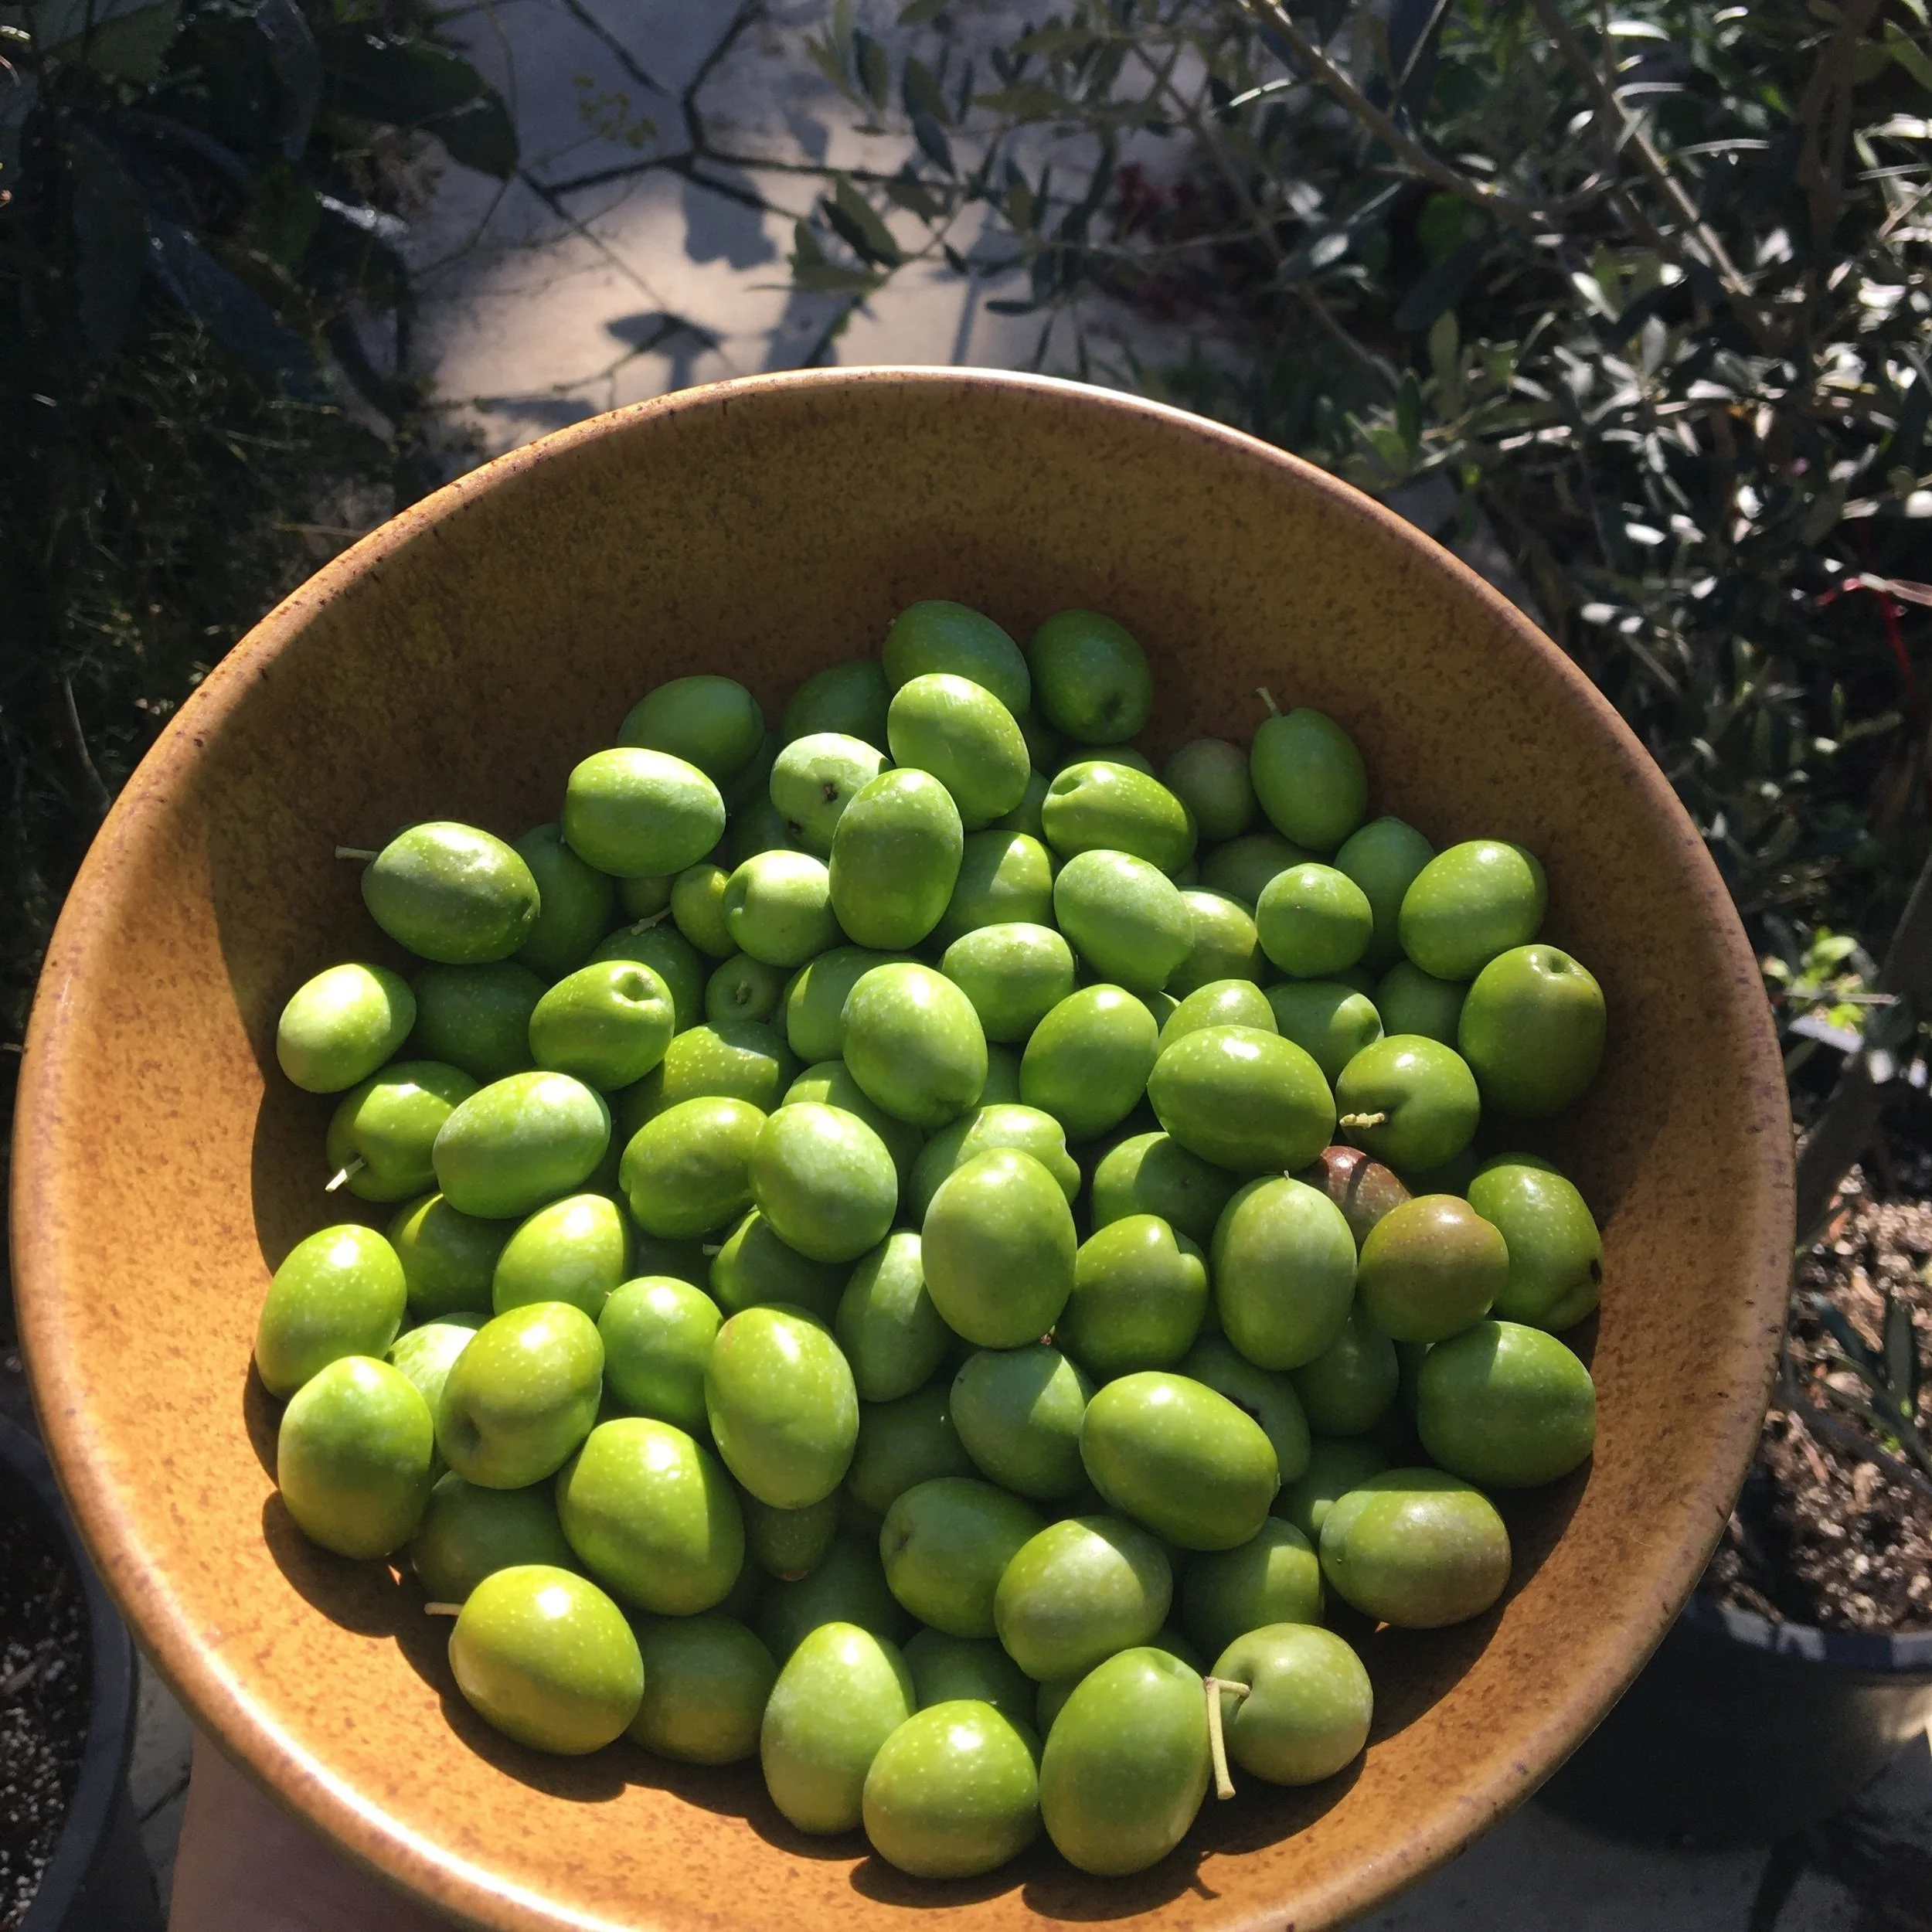
Olive harvest time depends on the growing season, the variety, and stage of ripeness. These green olives haven't fully sized up — so even if I wanted green olives, I would wait longer, until they get to their final size and the sap inside is milky.
Harvest time depends on the growing season, the variety, and stage of ripeness.
Olives can be picked at different stages of ripeness:
Green (wait until the juice inside goes from clear to milky)
As they start to develop colour
When fully coloured (the longer you leave the olives, the more colour they will develop—and the final colour depends on the variety)
Care for Olive Trees in Pots
Soil
Use a well draining soil.
For small plants that I move up to a bigger pot each year, I just use an off-the-shelf potting mix.
For my full-size olive trees, which I repot every 3-4 years, I use a loam-based potting soil such as a John Innes mix. The soil portion of this sort of potting mix is stable in the long term. I like the combination of moisture retention and weight that the soil provides. (Weight is important so that the trees do not tip over in the wind.)
Water
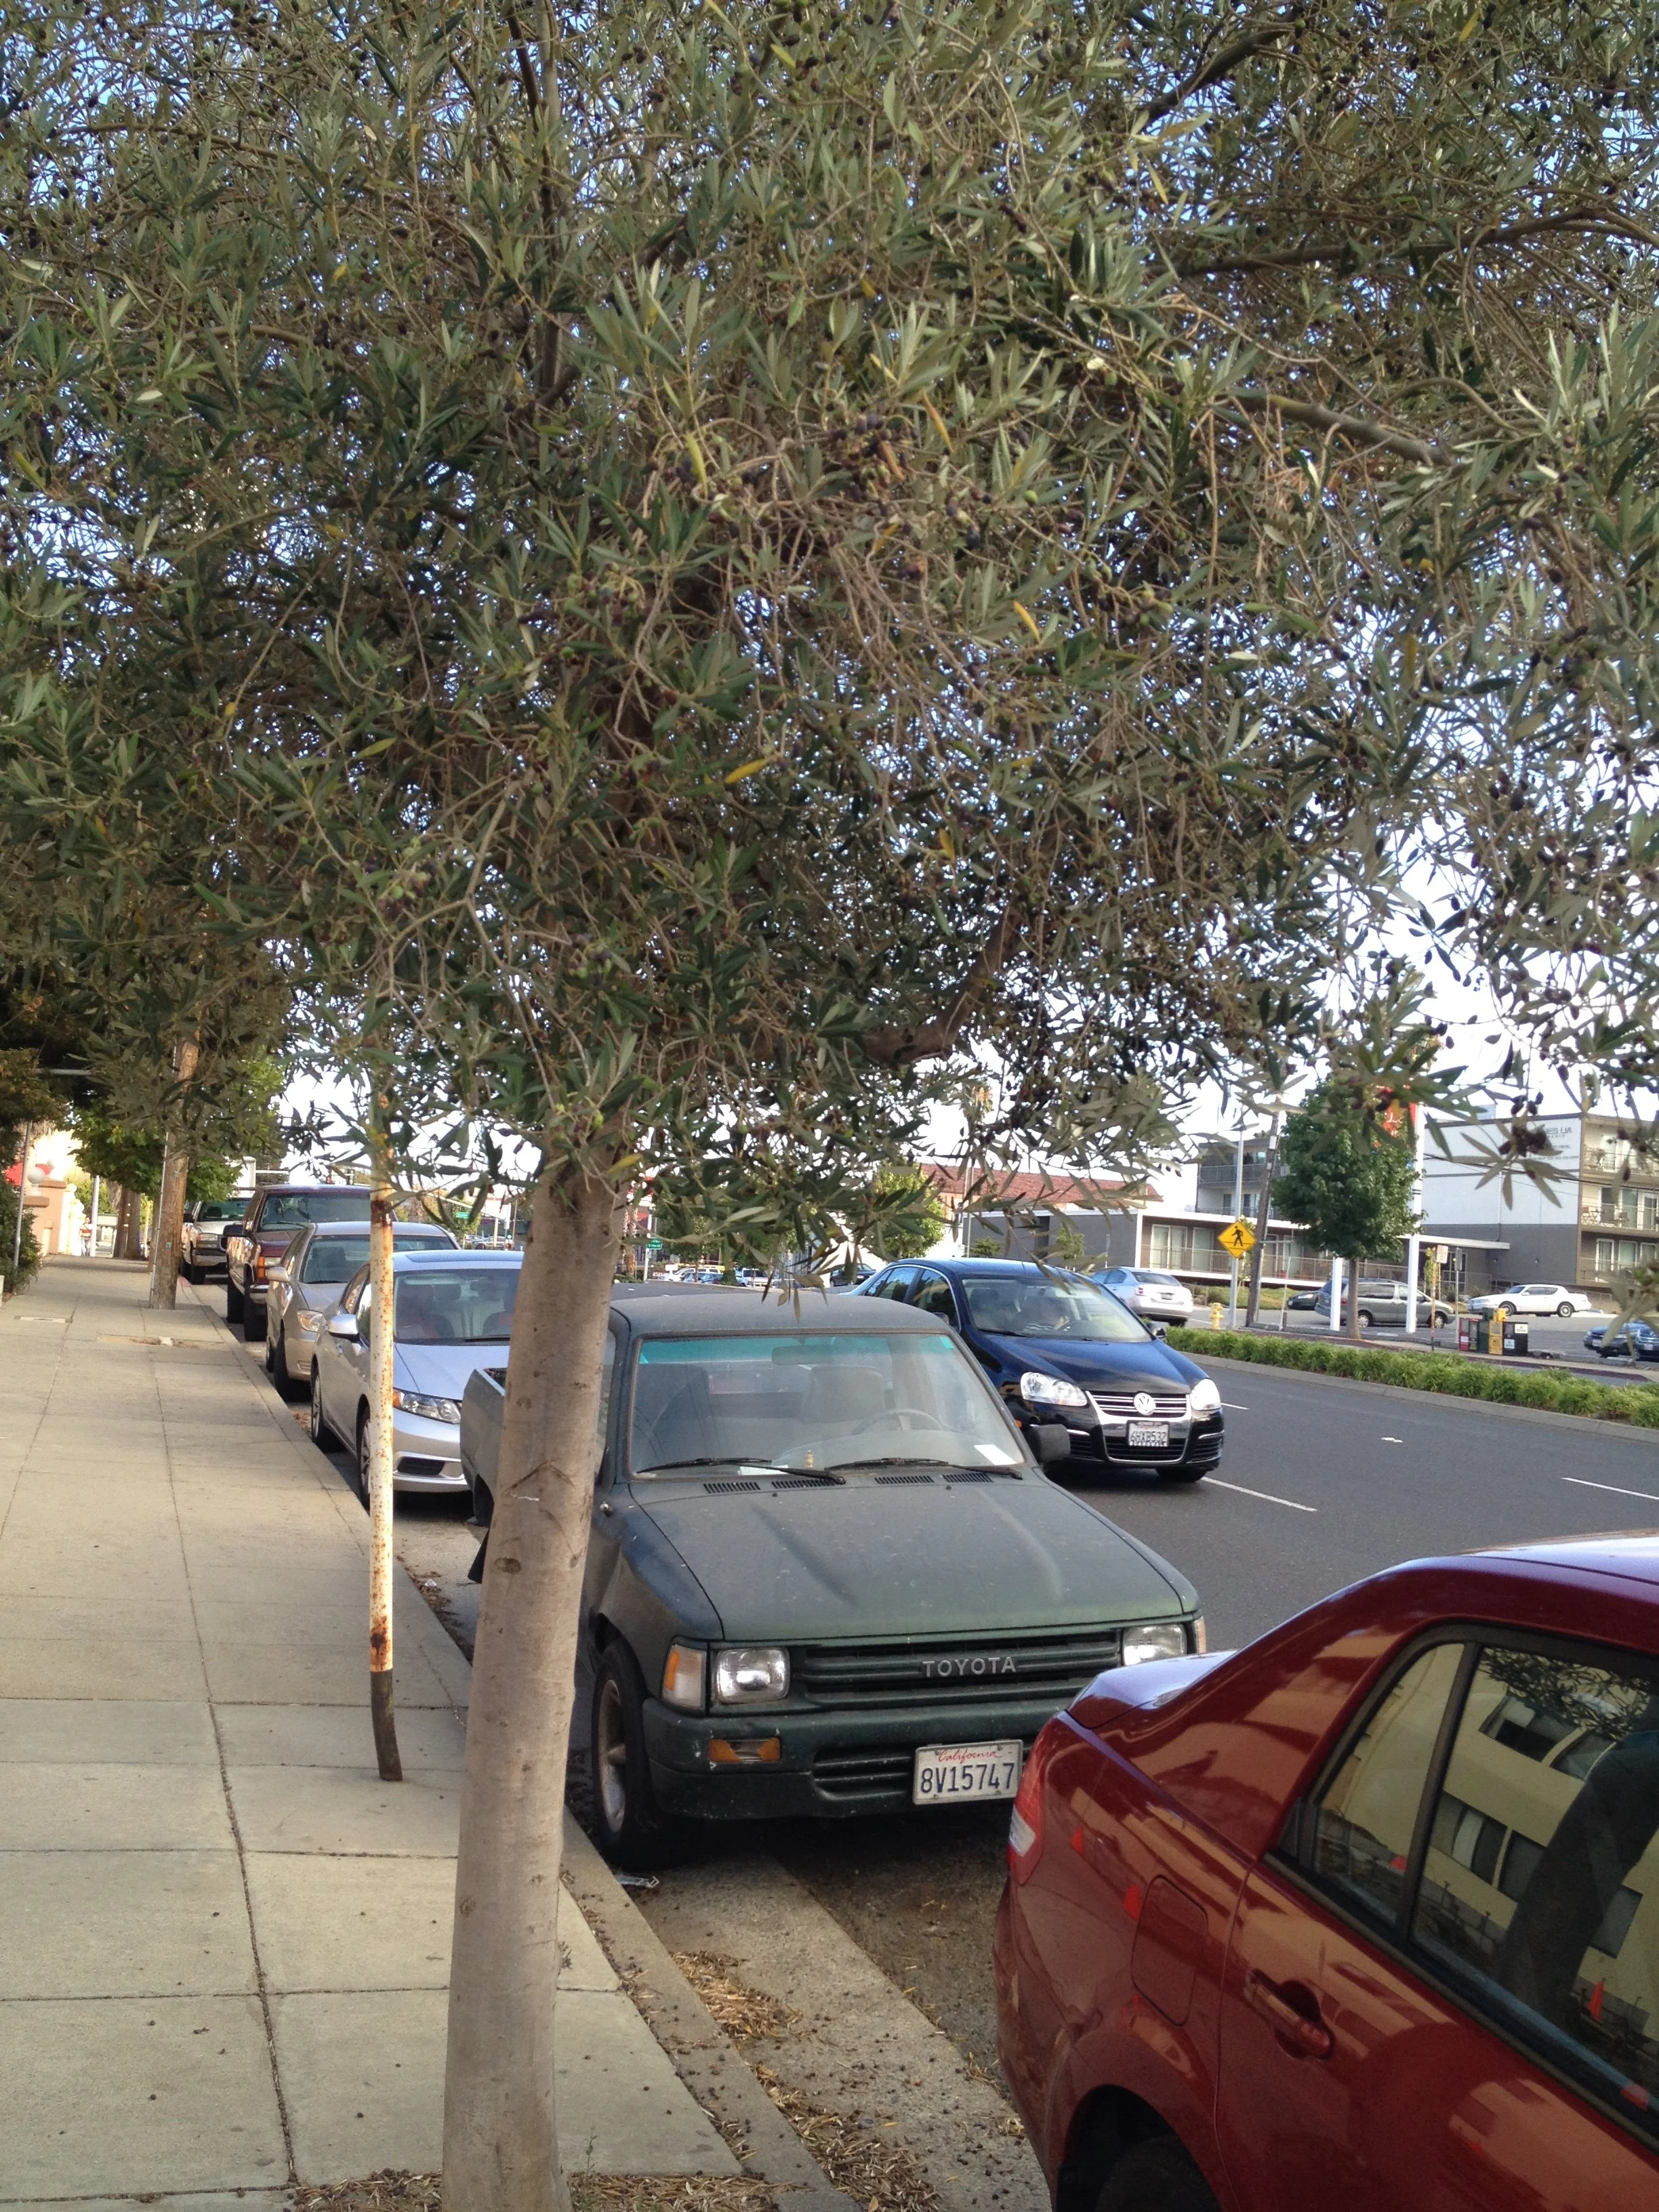
Olive used as a street tree in California. Just because they tolerate dry conditions doesn't mean that you can skip watering…especially olive trees in pots.
Just because olive trees tolerate dry conditions doesn't mean that you can skip watering!
Keep potted plants well watered, but not constantly wet. If that sounds like a contradiction to you, it just means let the soil get dryish—on the dry side of moist—before you water again.
Don't let the bottom of the pot stand in water; for example, keeping it in a low spot where water collects after rain, or keeping a saucer under the pot. Olive trees don't like to have “wet feet.”
Feeding
Feed your potted olive tree with an all-purpose fertilizer that has micronutrients in spring and summer. Stop fertilizing over the fall and winter.
Potted Olive Tree Autumn Care
There's no rush to bring the plants indoors in the fall. I leave mine out even as we get light frosts.
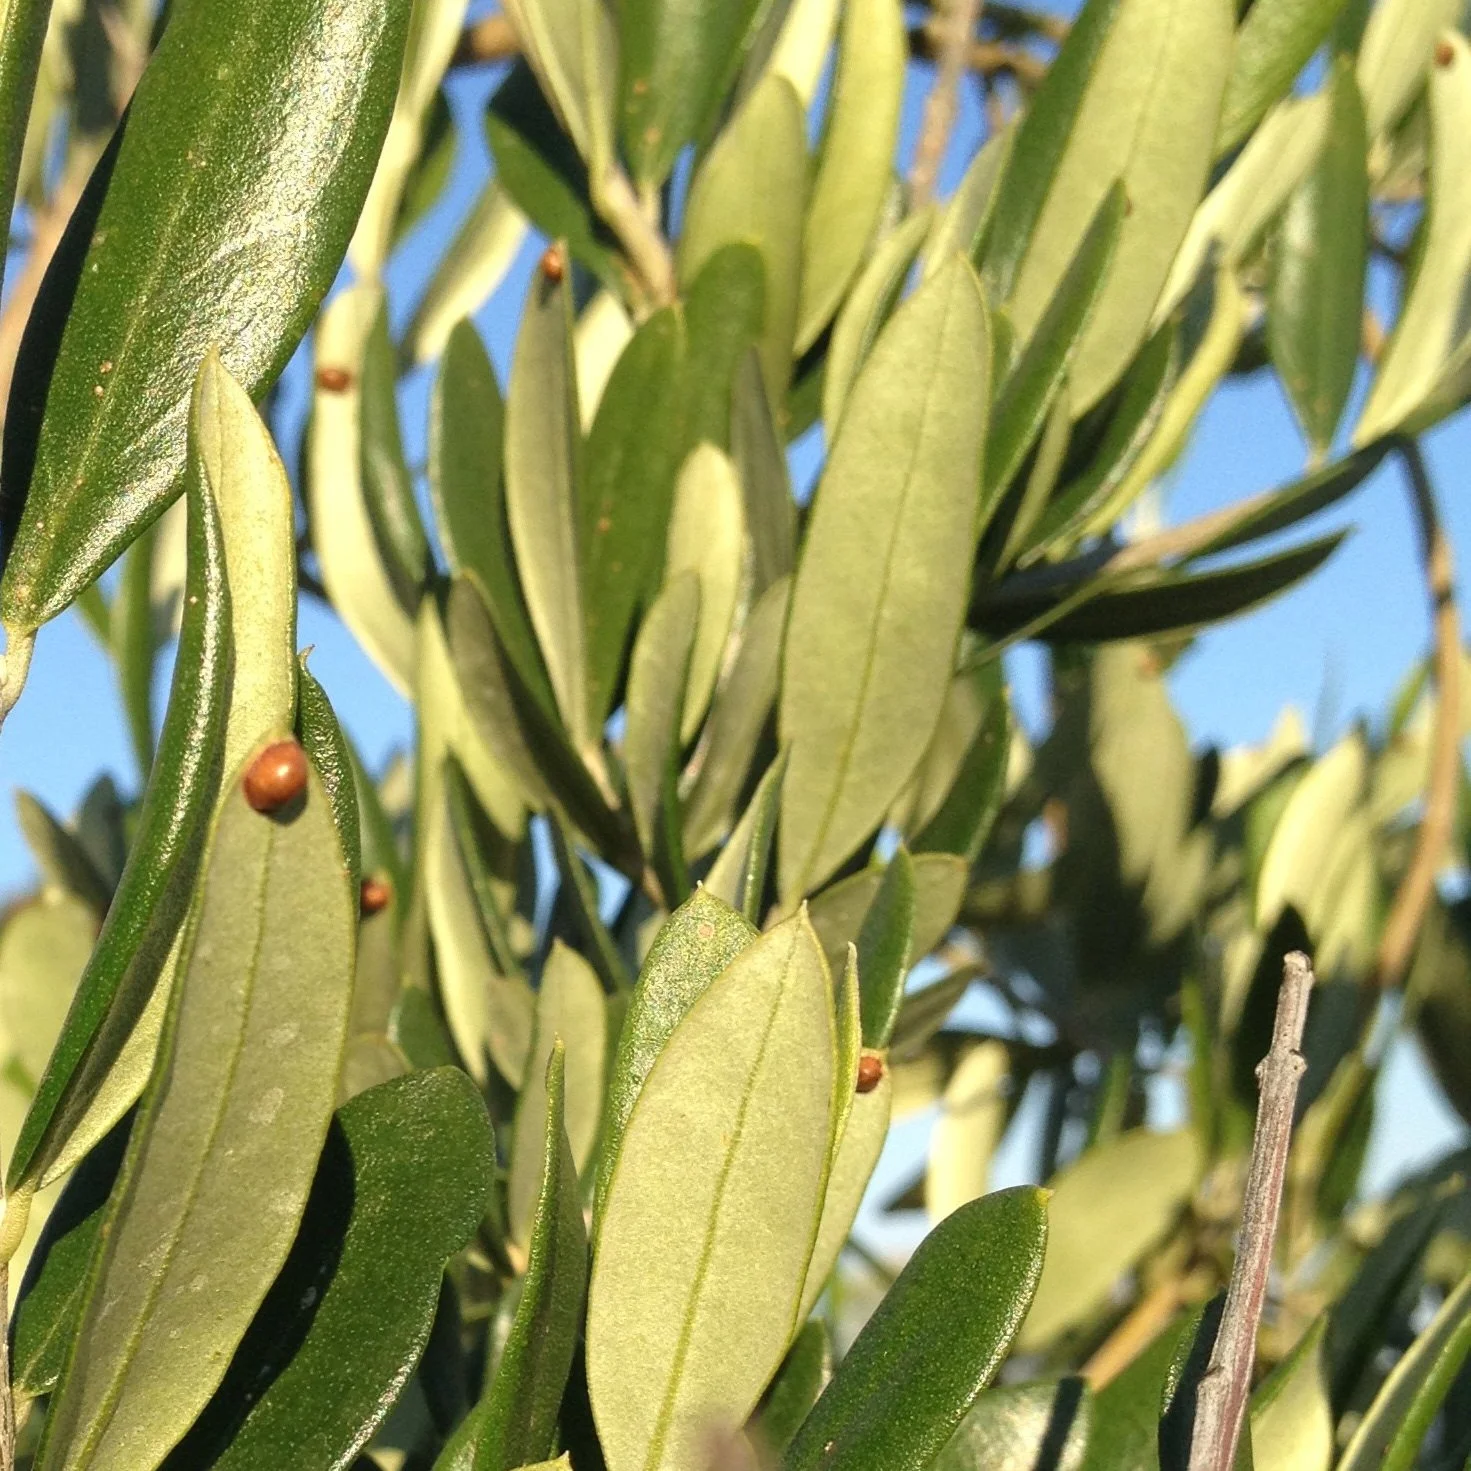
As you get them ready to bring indoors, check for pests. Scale is the most common olive tree pests indoors.
Keep Your Lemon Tree Through the Winter
And enjoy fresh homegrown lemons!
Pruning Potted Olive Trees
Shape a Young Olive Tree
Scale is the most common pest of potted olive trees indoors.
(Formative Pruning for a Young Olive Tree)
A young tree might need support until its stem thickens. Tie it loosely to a stake. As the trunk thickens, you can remove the stake.
Plants that are grown from cuttings (as are most commercially available plants) are “physiologically” mature and can fruit while quite small. Twelve-inch trees might start to flower and fruit (teenage olive plants thinking they're adults!)
Resist the temptation to let the fruit develop: While the plants are this small, you want to encourage stem growth. Fruit will slow down stem growth. Remove fruit from small trees and focus on building a permanent framework of branches.
If you're developing your young olive plant into a tree, at a certain height you will want “scaffold” branches – like arms coming out horizontally from your main trunk. Aim for 3-5 scaffold branches. If you want your olive tree to be about as tall as a person, allowing these to form at about 3' from the ground is a good starting point.
The size of potted plants is determined by the gardener. I prune the plants to six feet in height so they are easily carried through a doorway. Once the tree has reached the biggest size you can deal with, think of it like a big bonsai – and keep it at that size.
Young plants can be set back by heavy pruning, so, unless necessary, keep pruning of young plants to a minimum.
Maintenance Pruning for Established Plants
The first thing to keep in mind as you prune your olive tree is that fruit forms on growth from the previous season. So if you give the tree a haircut all around and prune off new wood, you won't get much fruit.
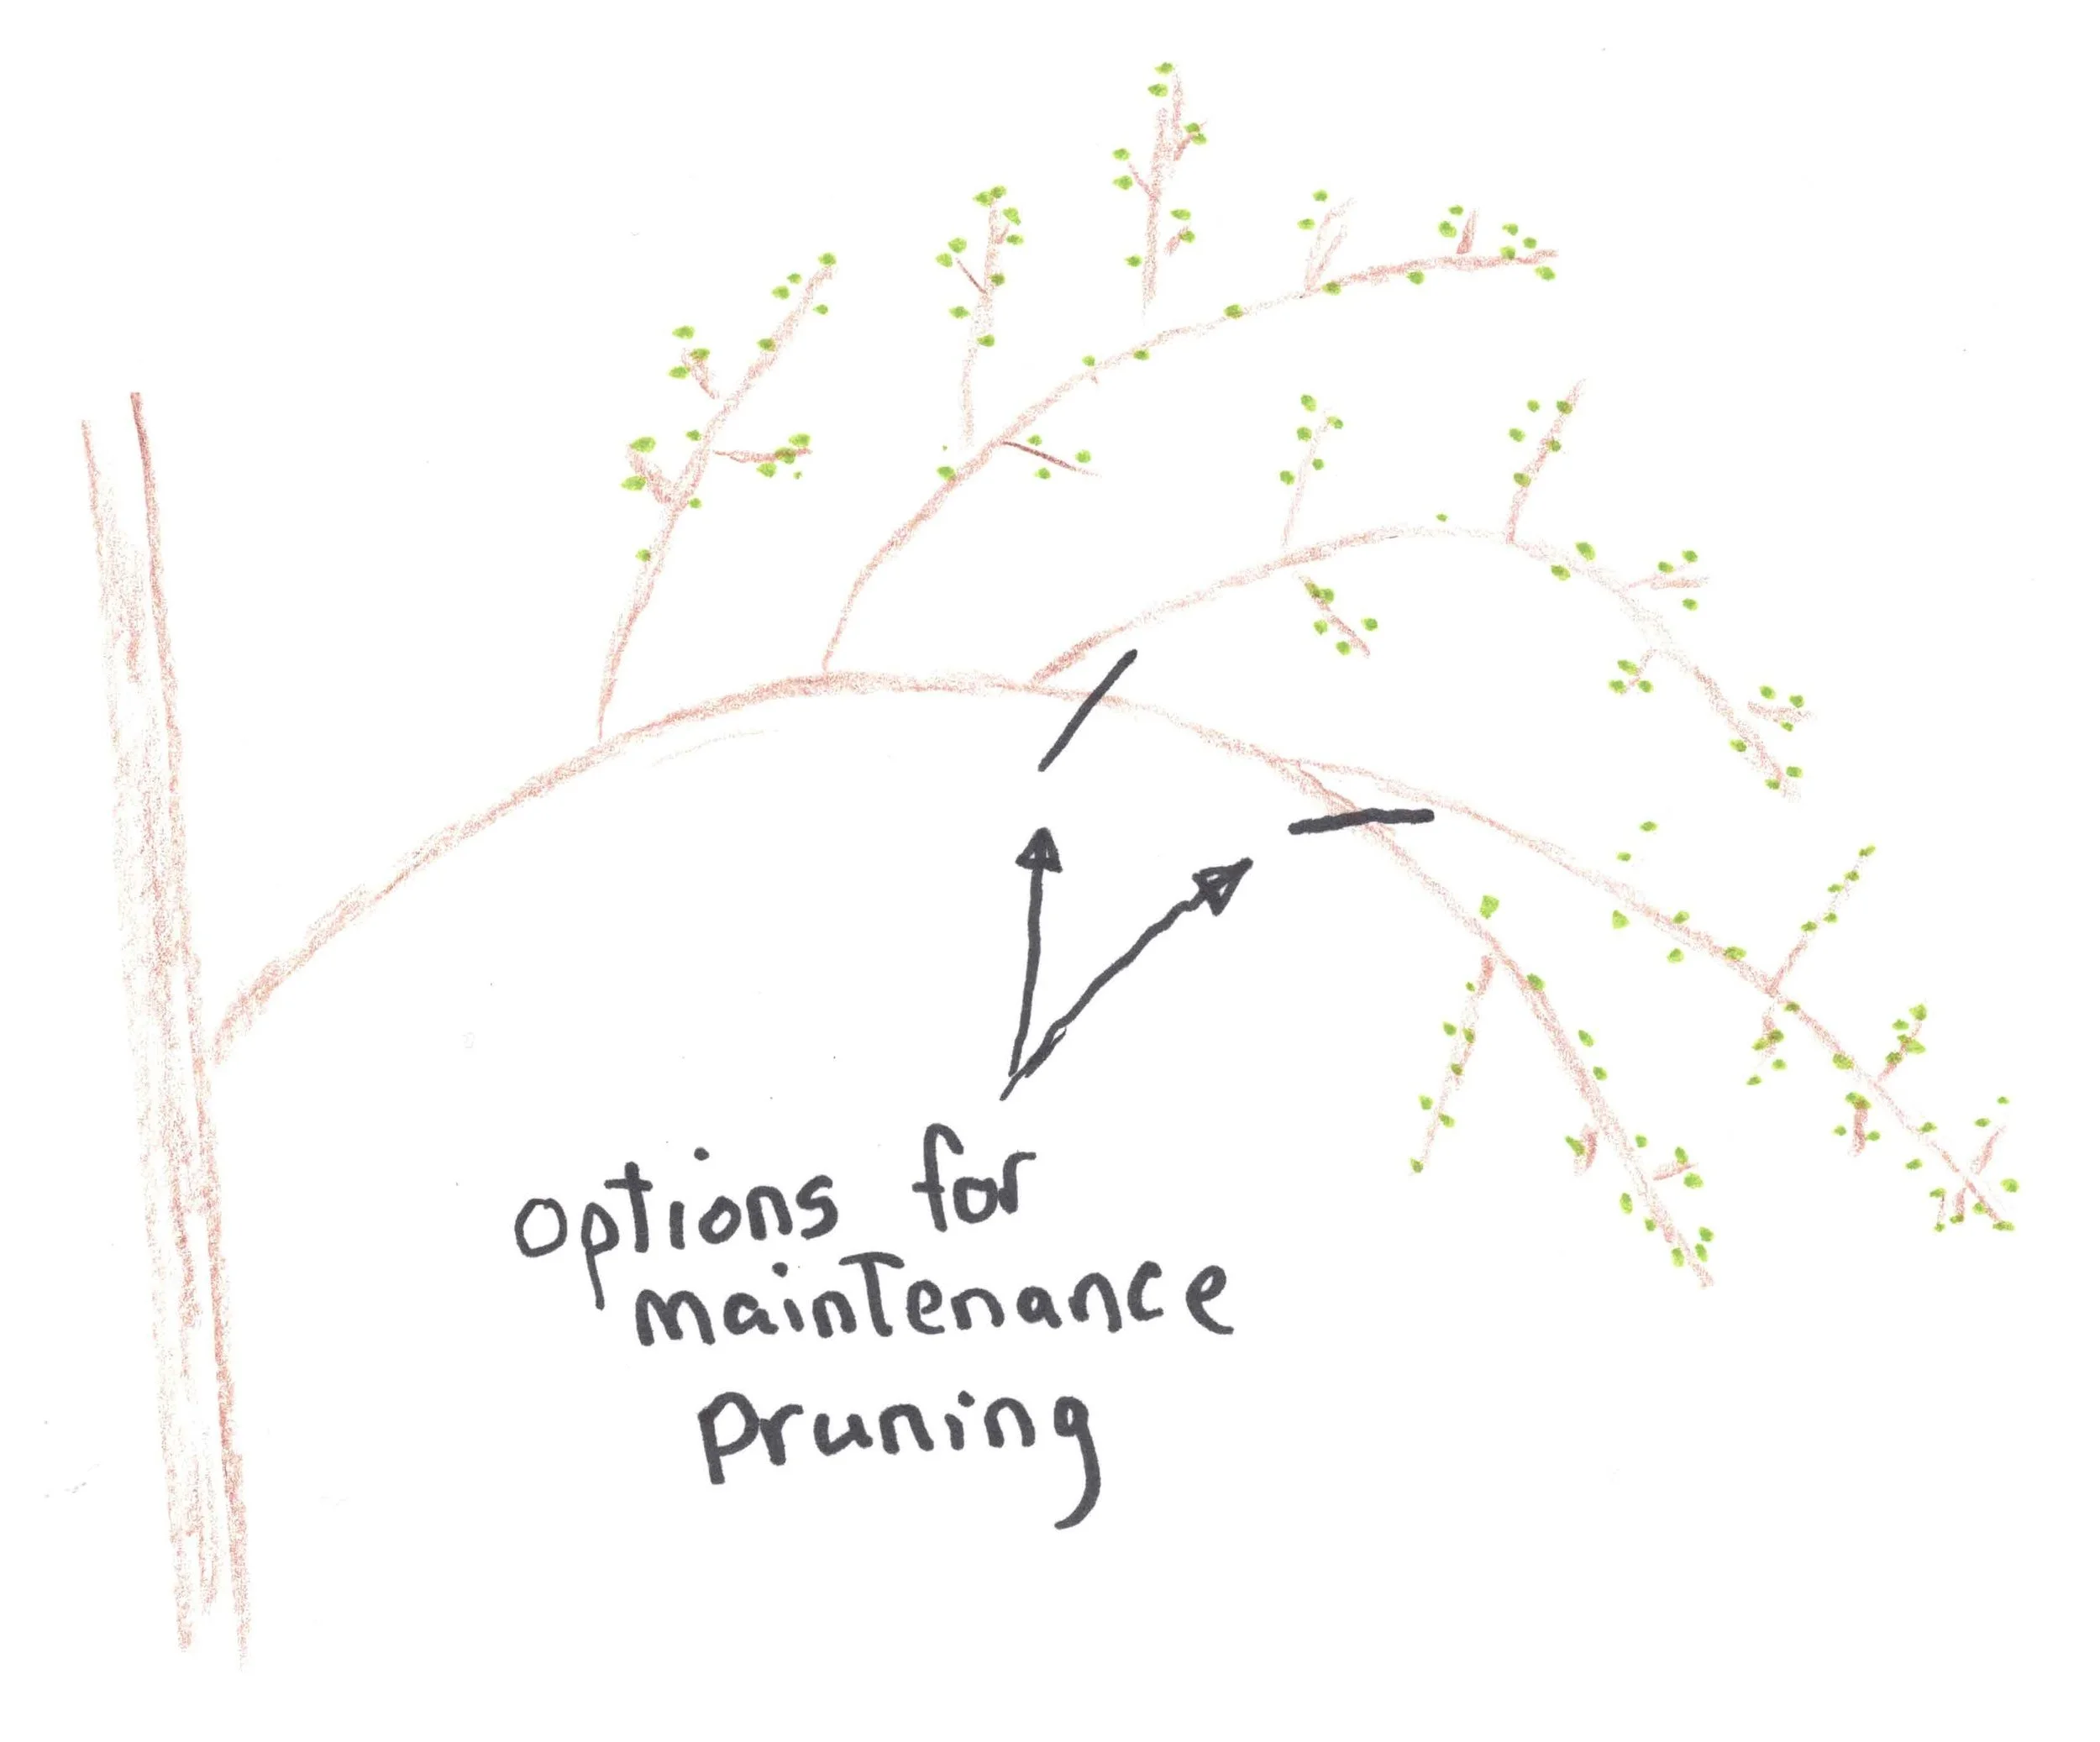
The second thing about olive pruning is that the plants have a growth habit which, after you develop and eye for it, actually makes them simple to prune. Branches bend under their own weight, sagging more and more as time goes on.
As the branch gets longer and the end sags, there are new branches growing upwards from it, closer to the centre of the tree. Prune off the sagging end of the branch, leaving these replacement branches. The new growth on these replacement branches gives olives.
Prune off the sagging end of the branch in the fall. This leaves the branches above as replacement branches.
Here are things to keep in mind as you prune your olive tree:
Prune to the size and shape you want
Remove crossing branches
Remove branches growing inwards, towards the centre of the bush or tree
Remove suckers that grow from the base of the plant
Remove vigorous shoots growing upwards as these are not usually very fruitful
Rejuvenation Pruning
Olive trees have an amazing ability to make new shoots from old parts of the plant. This means that if you have a tree or bush that is very overgrown, you can prune heavily, right back to major branches, and still have replacement branches grow.
When you make a major pruning like this, the response of the plant will be to send up lots and lots of new shoots.
Here's the trick: Don't leave all those new shoots until you prune the following year. Letting them all grow will let the plant waste lots of energy. Only leave the ones that you want—and snip off the rest.
One other thing if you're renovating an older tree: Avoid tearing the bark as you cut and remove bigger branches. You don't want to leave a little bit of bark attached, and then, as you pull away the pruned branch, tear a strip of bark from your tree.
When to Prune
I do the main pruning in the fall, before moving them into winter storage. My winter storage space is small, so I need to keep trees on the small size.
Potting and Repotting
Repot olive trees in the late winter or spring, just before new growth begins.
Your choice of final pot size depends on how large you want your olive trees to grow. My own olive trees are in pots that are 36 cm (14”) wide — and that's big enough for the two-metre-high trees (6' high). Because you're moving the trees around spring and fall, select a size that isn't too heavy for you.
When you're getting started with a small olive plant, like the little one I originally brought home from the garden centre, move it to a slightly bigger pot each spring.
Larger trees do not need to be repotted every year. In years that you don't repot them, top up the potting soil with some fresh potting soil and compost.
I've seen fantastic specimens in half-barrel sized pots…but that's too big for my setup.
Olive Varieties
My original two olive trees are an unnamed variety with olives that are large, plump, and green when I pick them here in Toronto in October.
There are many olive varieties. They differ in the size, shape, flavour, texture, colour, and oil content of the olives. The winter chill requirements also vary.
Different varieties also have different amounts of cold tolerance. While cold tolerance is important for in-ground olive cultivation in borderline zones, it's not an issue for potted olives that are moved to a protected space over the winter.
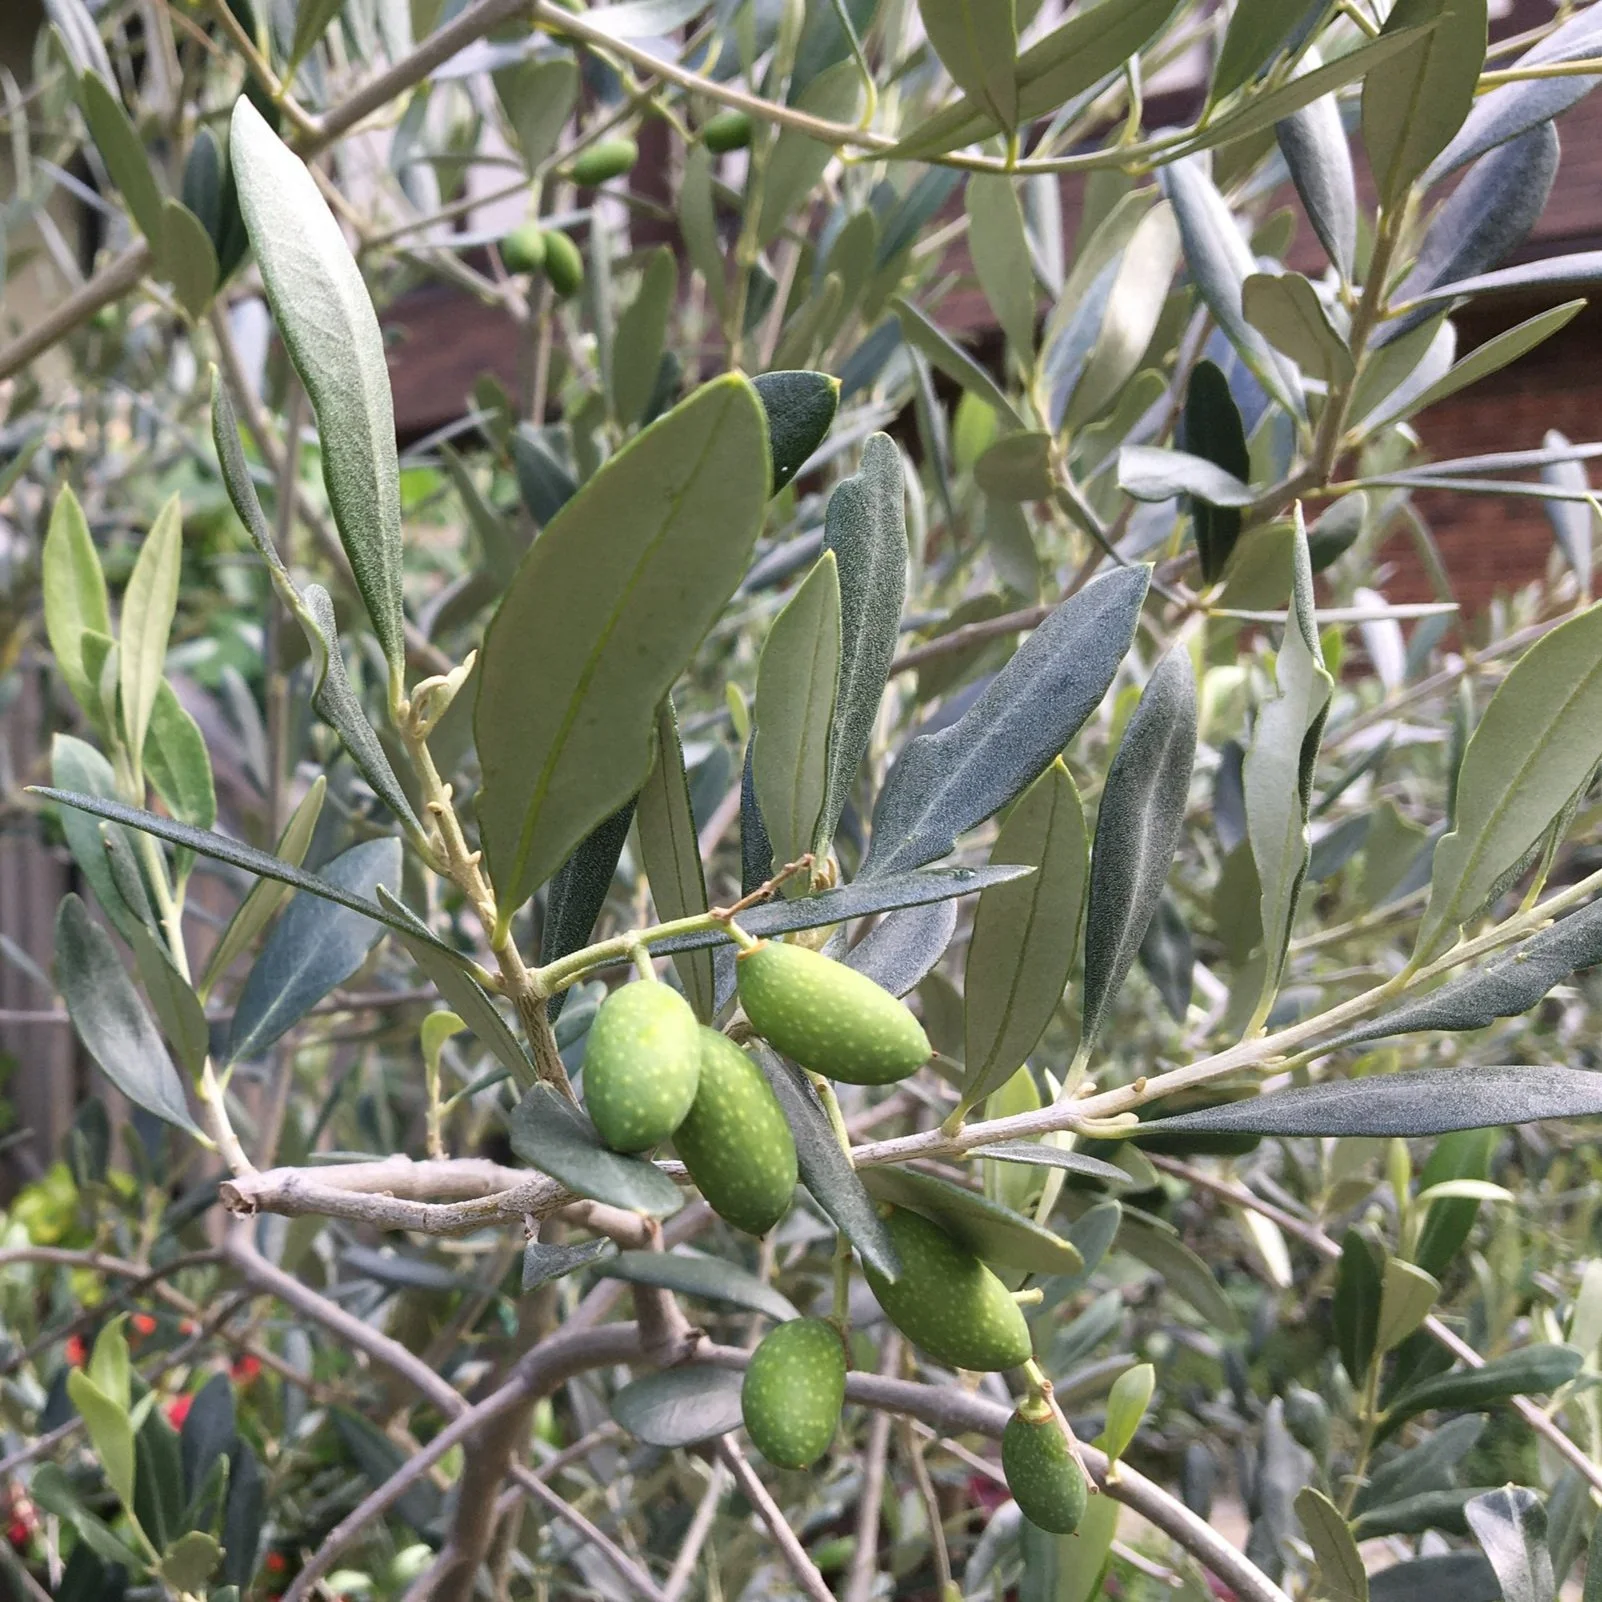
My original two olive trees are an unnamed variety with olives that are large, plump, and green when I pick them here in Toronto in October. My third olive is a self-fertile variety called ‘Frantoio.' It has smaller olives that are just starting to colour up as I pick before putting away my olives for winter.
Olive Tree Hardiness
Hardiness is never an exact science. It varies by variety; and is affected by the timing of the cold, the duration, and if there are large temperature swings.
The fruit can't withstand temperatures as cold as the tree.
Different sources give different minimum temperatures. The key thing to keep in mind with a potted olive tree is that potted trees can't take as much cold as in-ground plants.
So forget the exact numbers and just play it safe.
I use -2°C (28°F) as a safe minimum temperature for my potted olive trees. (I'm sure some gardeners have had potted olive trees survive temperatures colder than this — but there's no need to take a chance if you're going to all the trouble of growing a plant in a pot.)
If your olive tree is exposed to temperatures that are too cold, you will see damage to leaf and branch tips, and newer leaves that are around the outside of the tree canopy.
Are you in a borderline hardiness zone and wondering whether there's a way to grow olive trees in the ground? Read this article about growing olives outdoors in Canada.
If you're interested in the things that affect hardiness, here's a post on fig tree hardiness.
FAQ Grow an Olive Tree
The easiest way for a home gardener to propagate olive trees is to look for a sucker coming up from the base of the plant. I removed this sucker, along with roots, using a pair of secateurs.
Why does my olive only have fruit every second year?
This is called “alternate bearing” and is common with many fruiting plants. Apples are a good example. The tree uses lots of energy to develop a big crop, so no energy is used to make flower buds for the following year. This is solved by pruning and fruit thinning. If you prune your potted olive every year, you can minimize alternate bearing.
When should I bring my olive tree indoors?
It's not an exact science. I leave my olive trees outdoors for a couple of weeks of temperatures near freezing before moving them to a protected space. This helps to satisfy winter chill requirements.
Can you grow an olive tree from a pit?
Yes. My neighbour Joe had a seed-grown olive tree that he liked to show me. If you enjoy the challenge of growing from seed, try it. But know that, like apples, olive seeds won't give you a plant like the parent plant. If you want an olive with known properties, start with a cutting or a graft from a known variety.
Why can't you eat olives off the tree?
You can do it once, but I guarantee that you won't try it a second time.
Fresh olives contain alkaloid compounds that make them jarringly bitter. You'll contort your face and say something rude. And then know better next time.
How do you brine an olive?
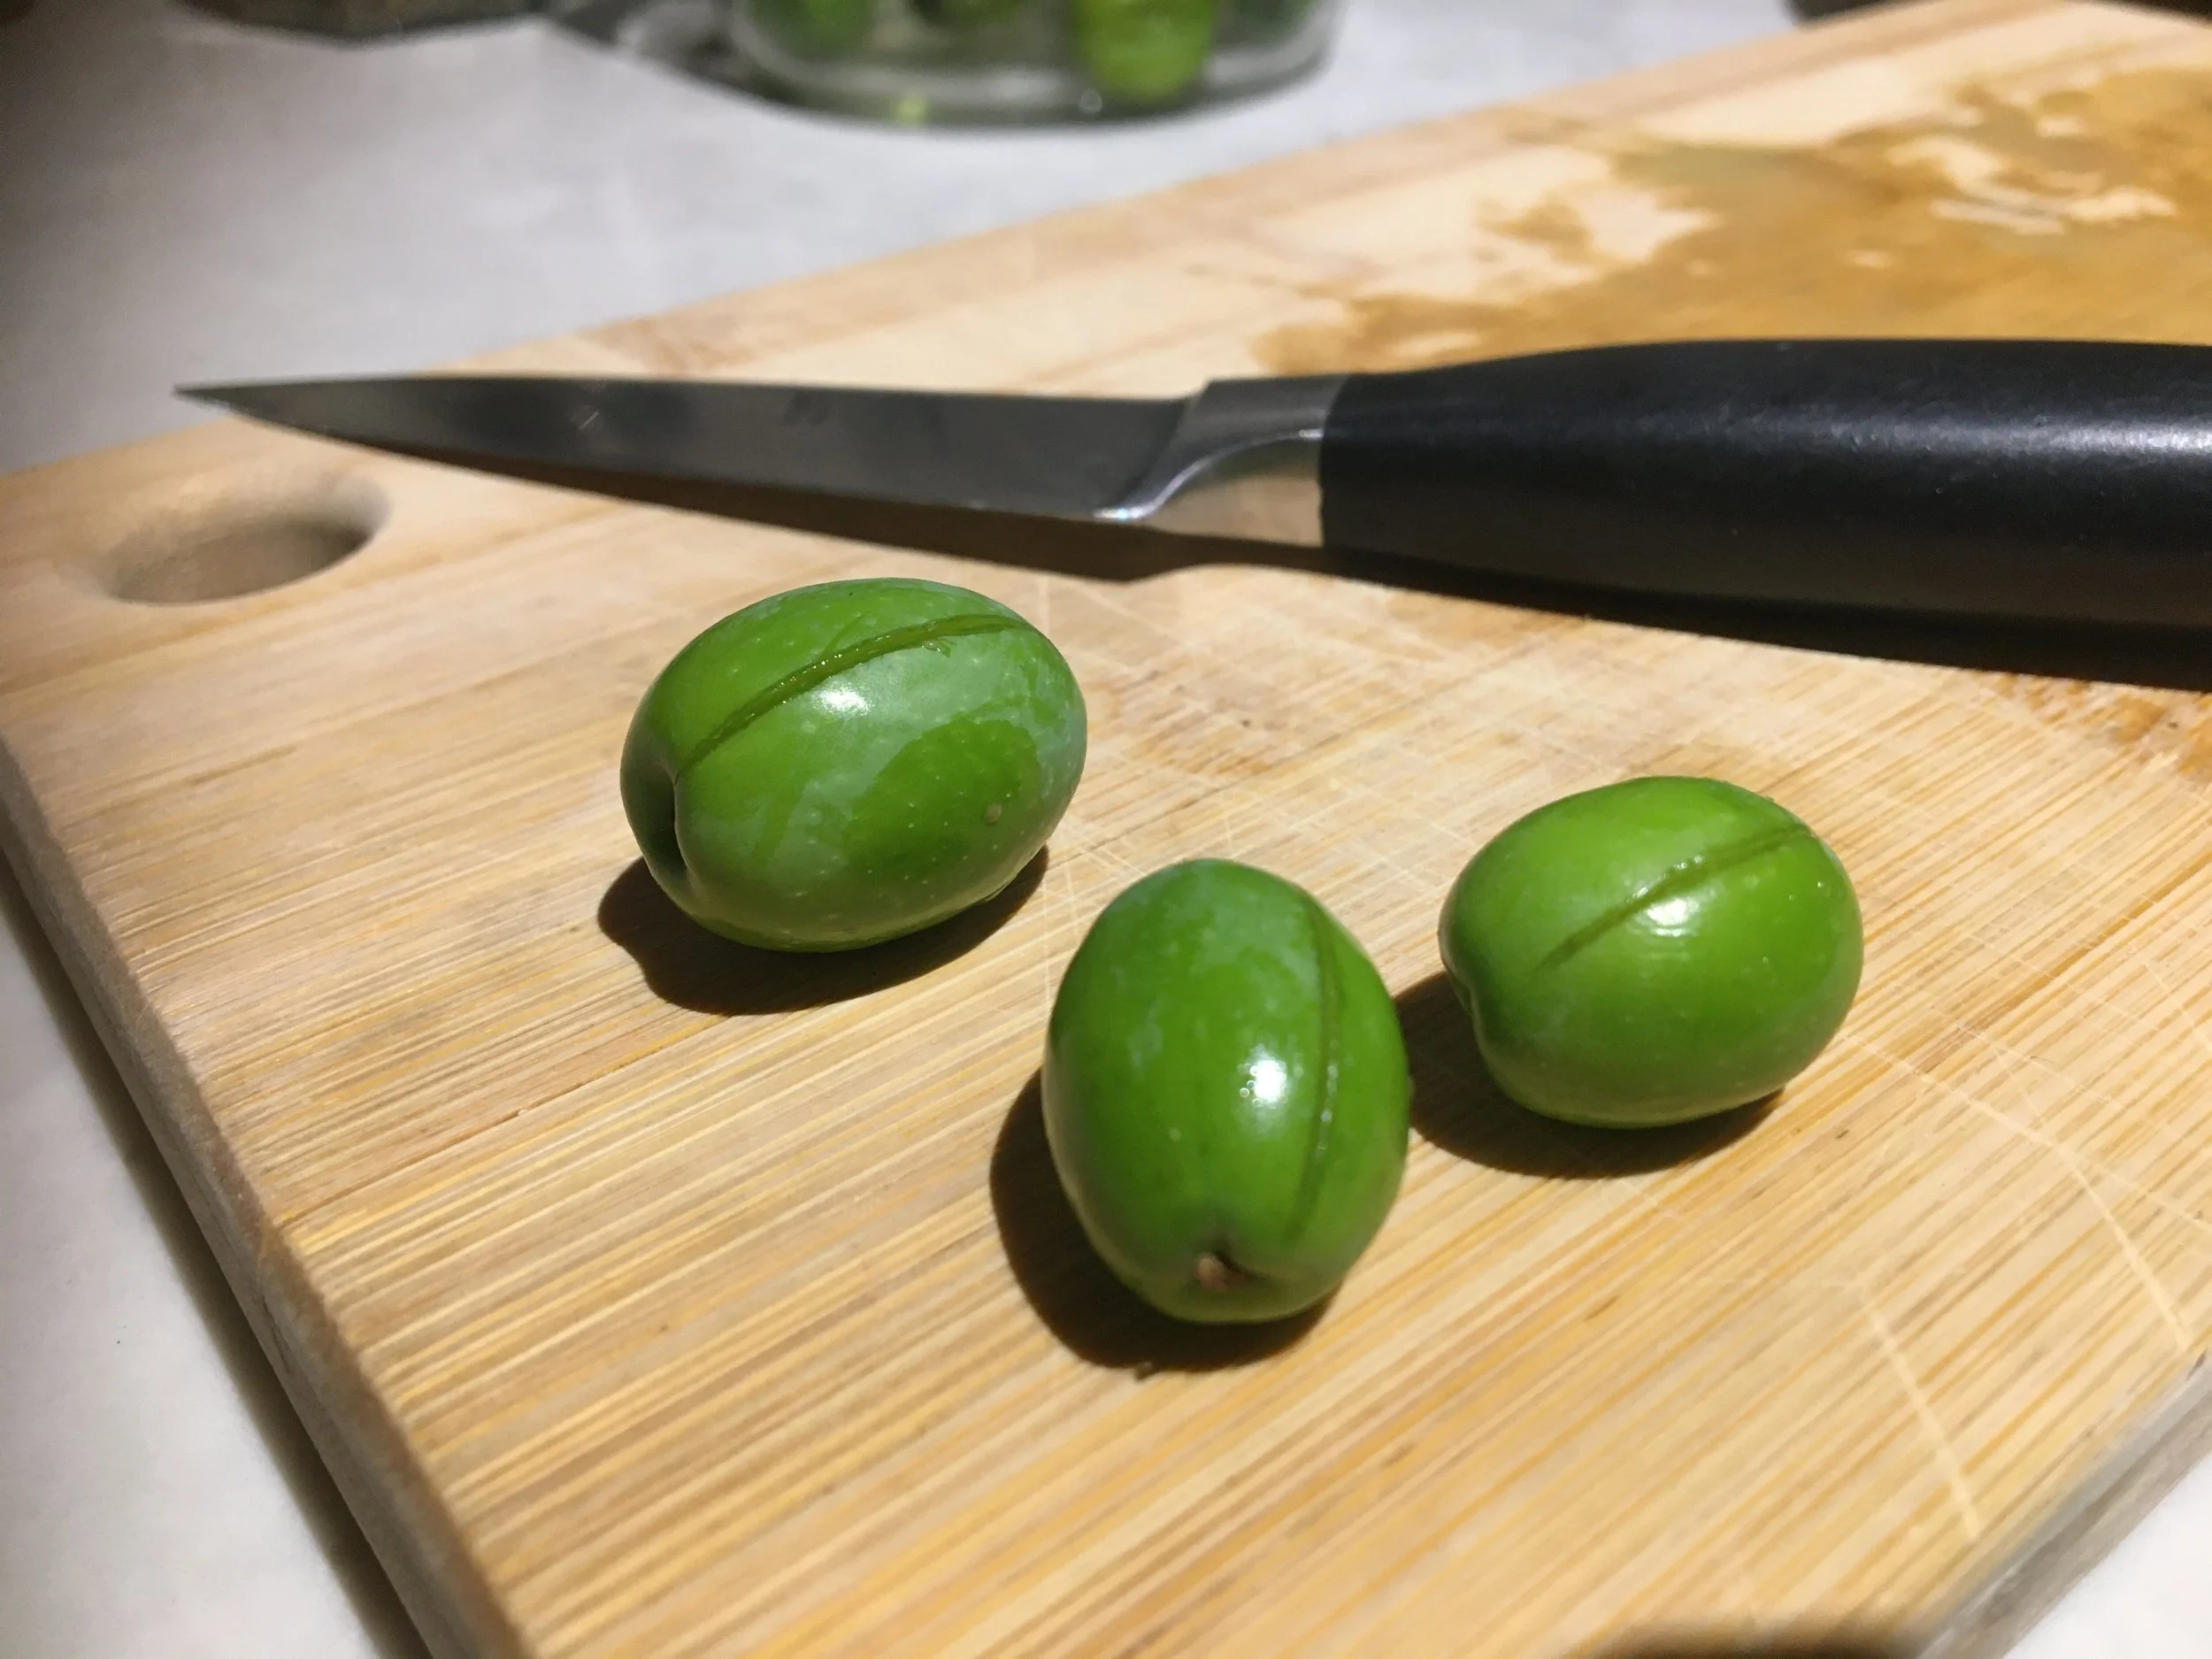
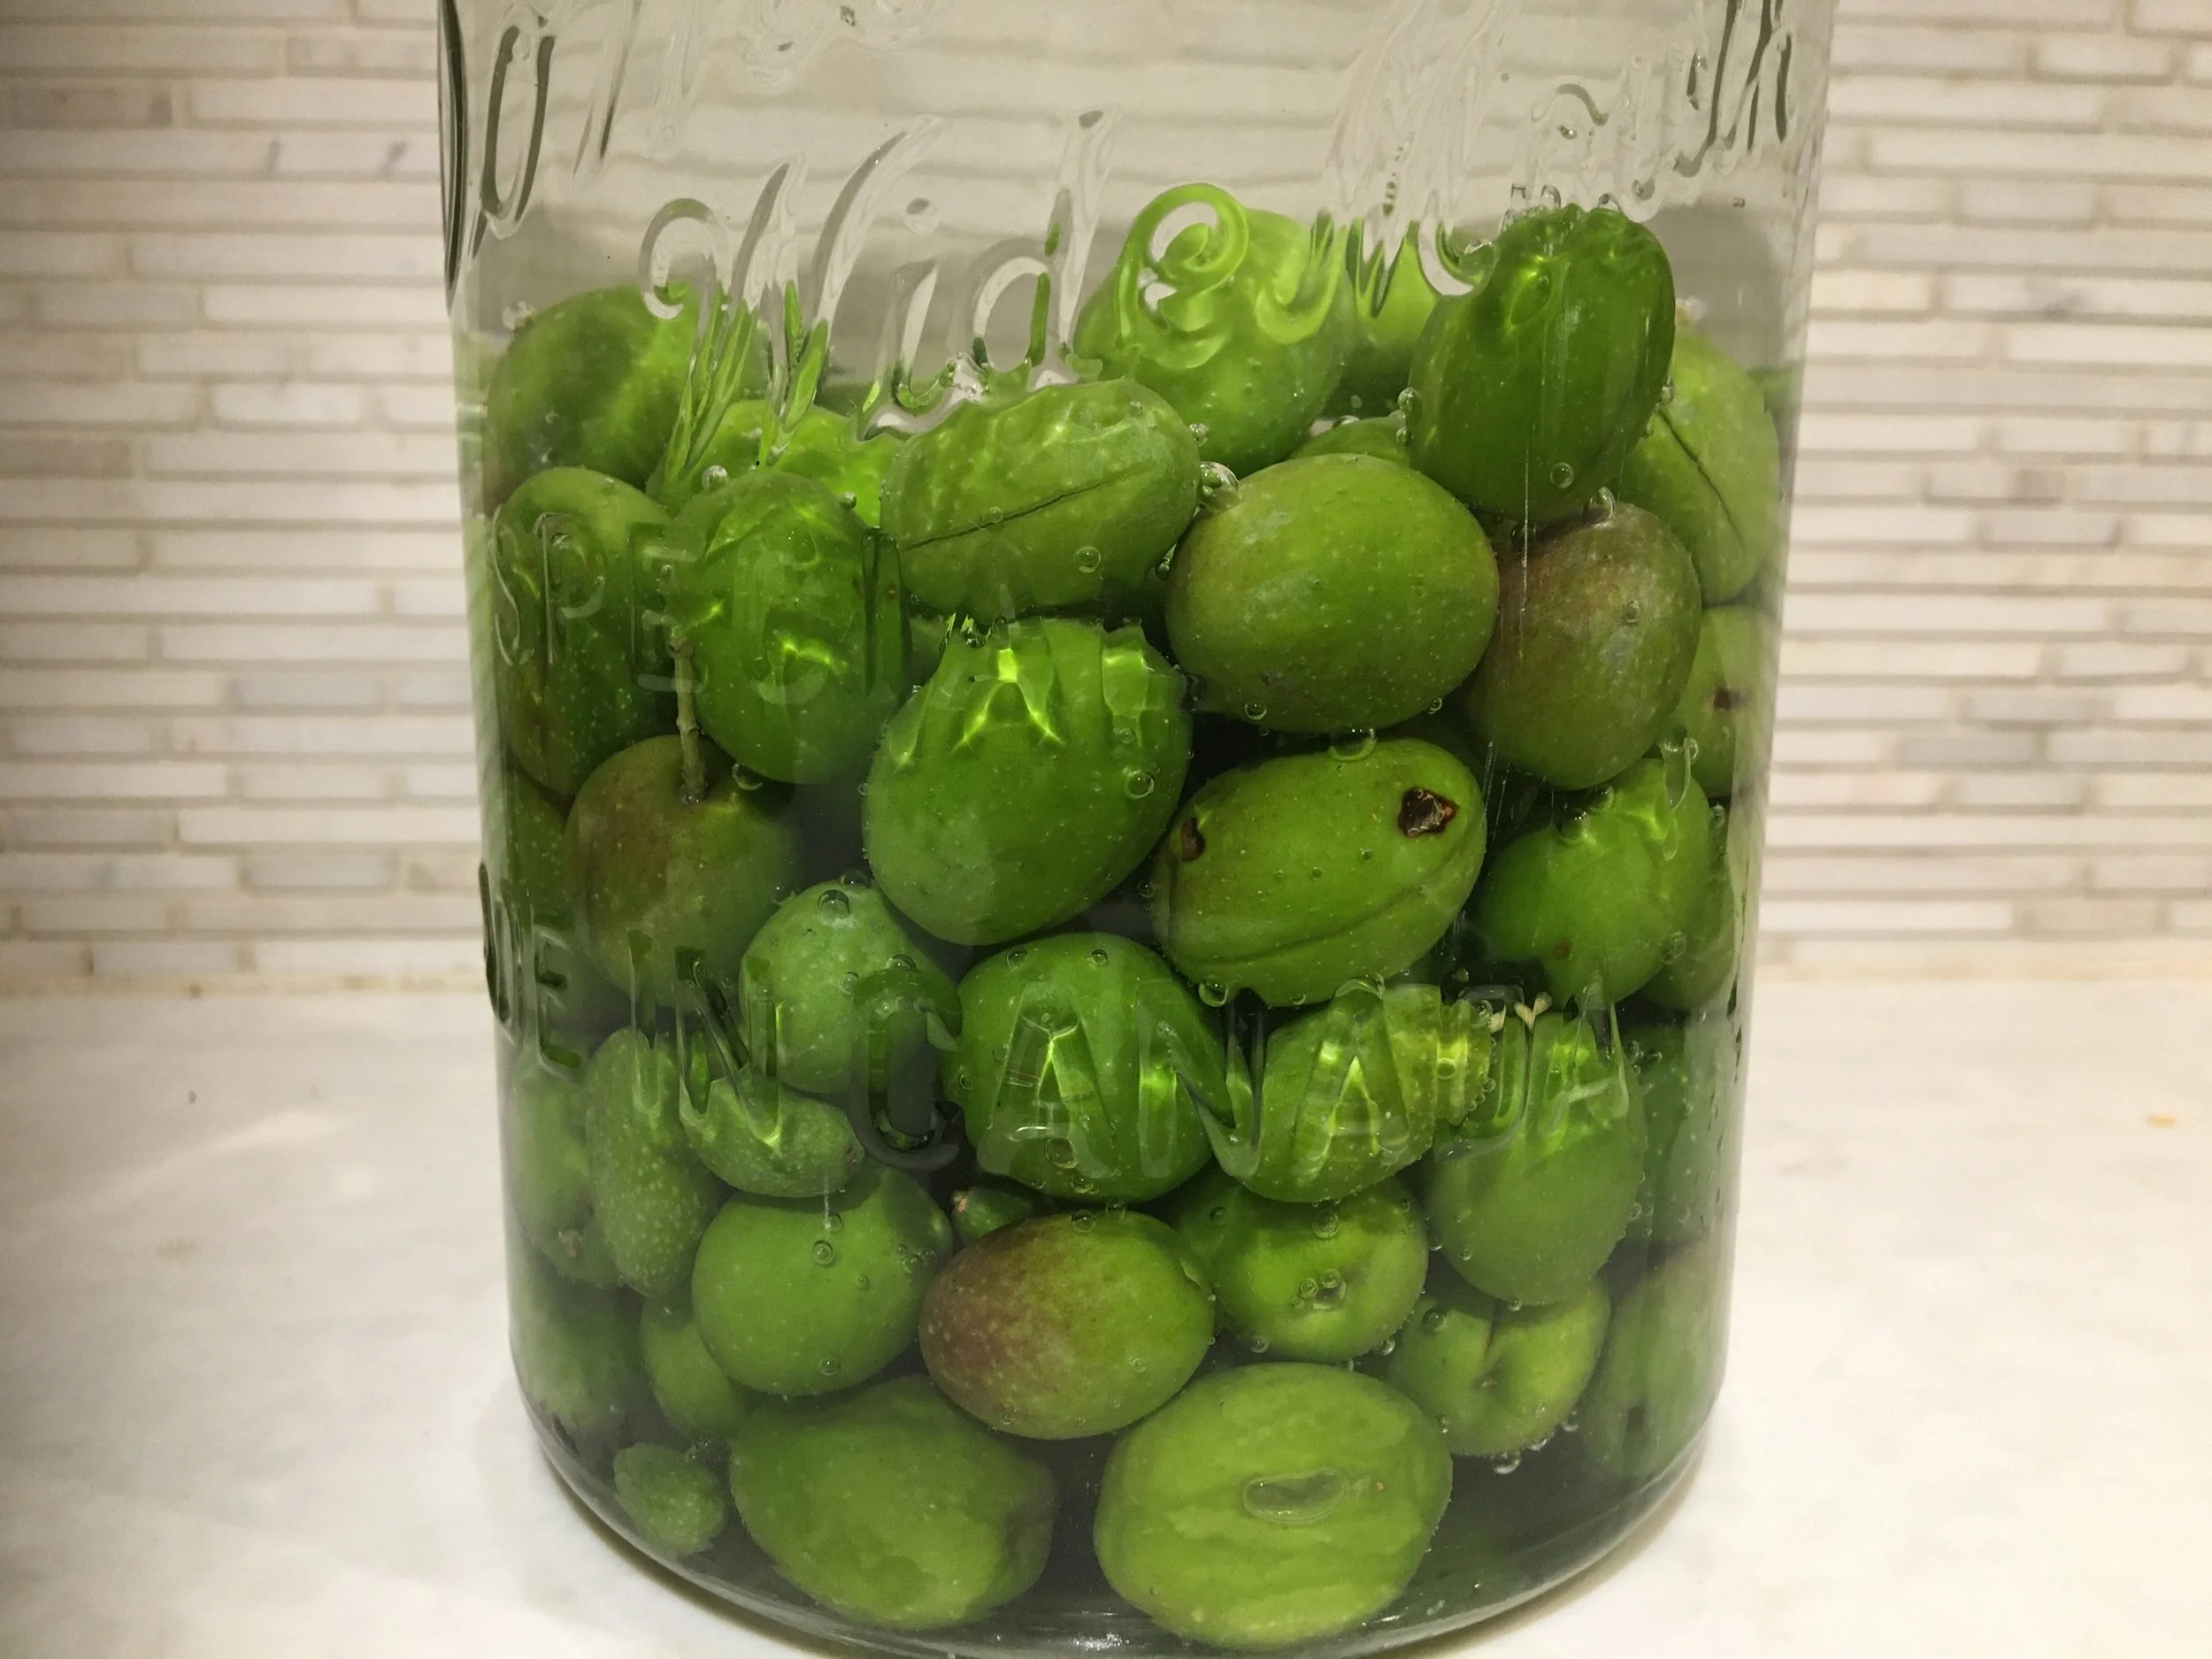
I just slit olives lengthwise with a knife as I prepare them for brining.
There is more than one way to do this. The goal is to remove the bitterness.
Here's what I do, thanks to the guidance from friends from olive-growing regions:
I just slit olives lengthwise with a knife as I prepare them for brining.
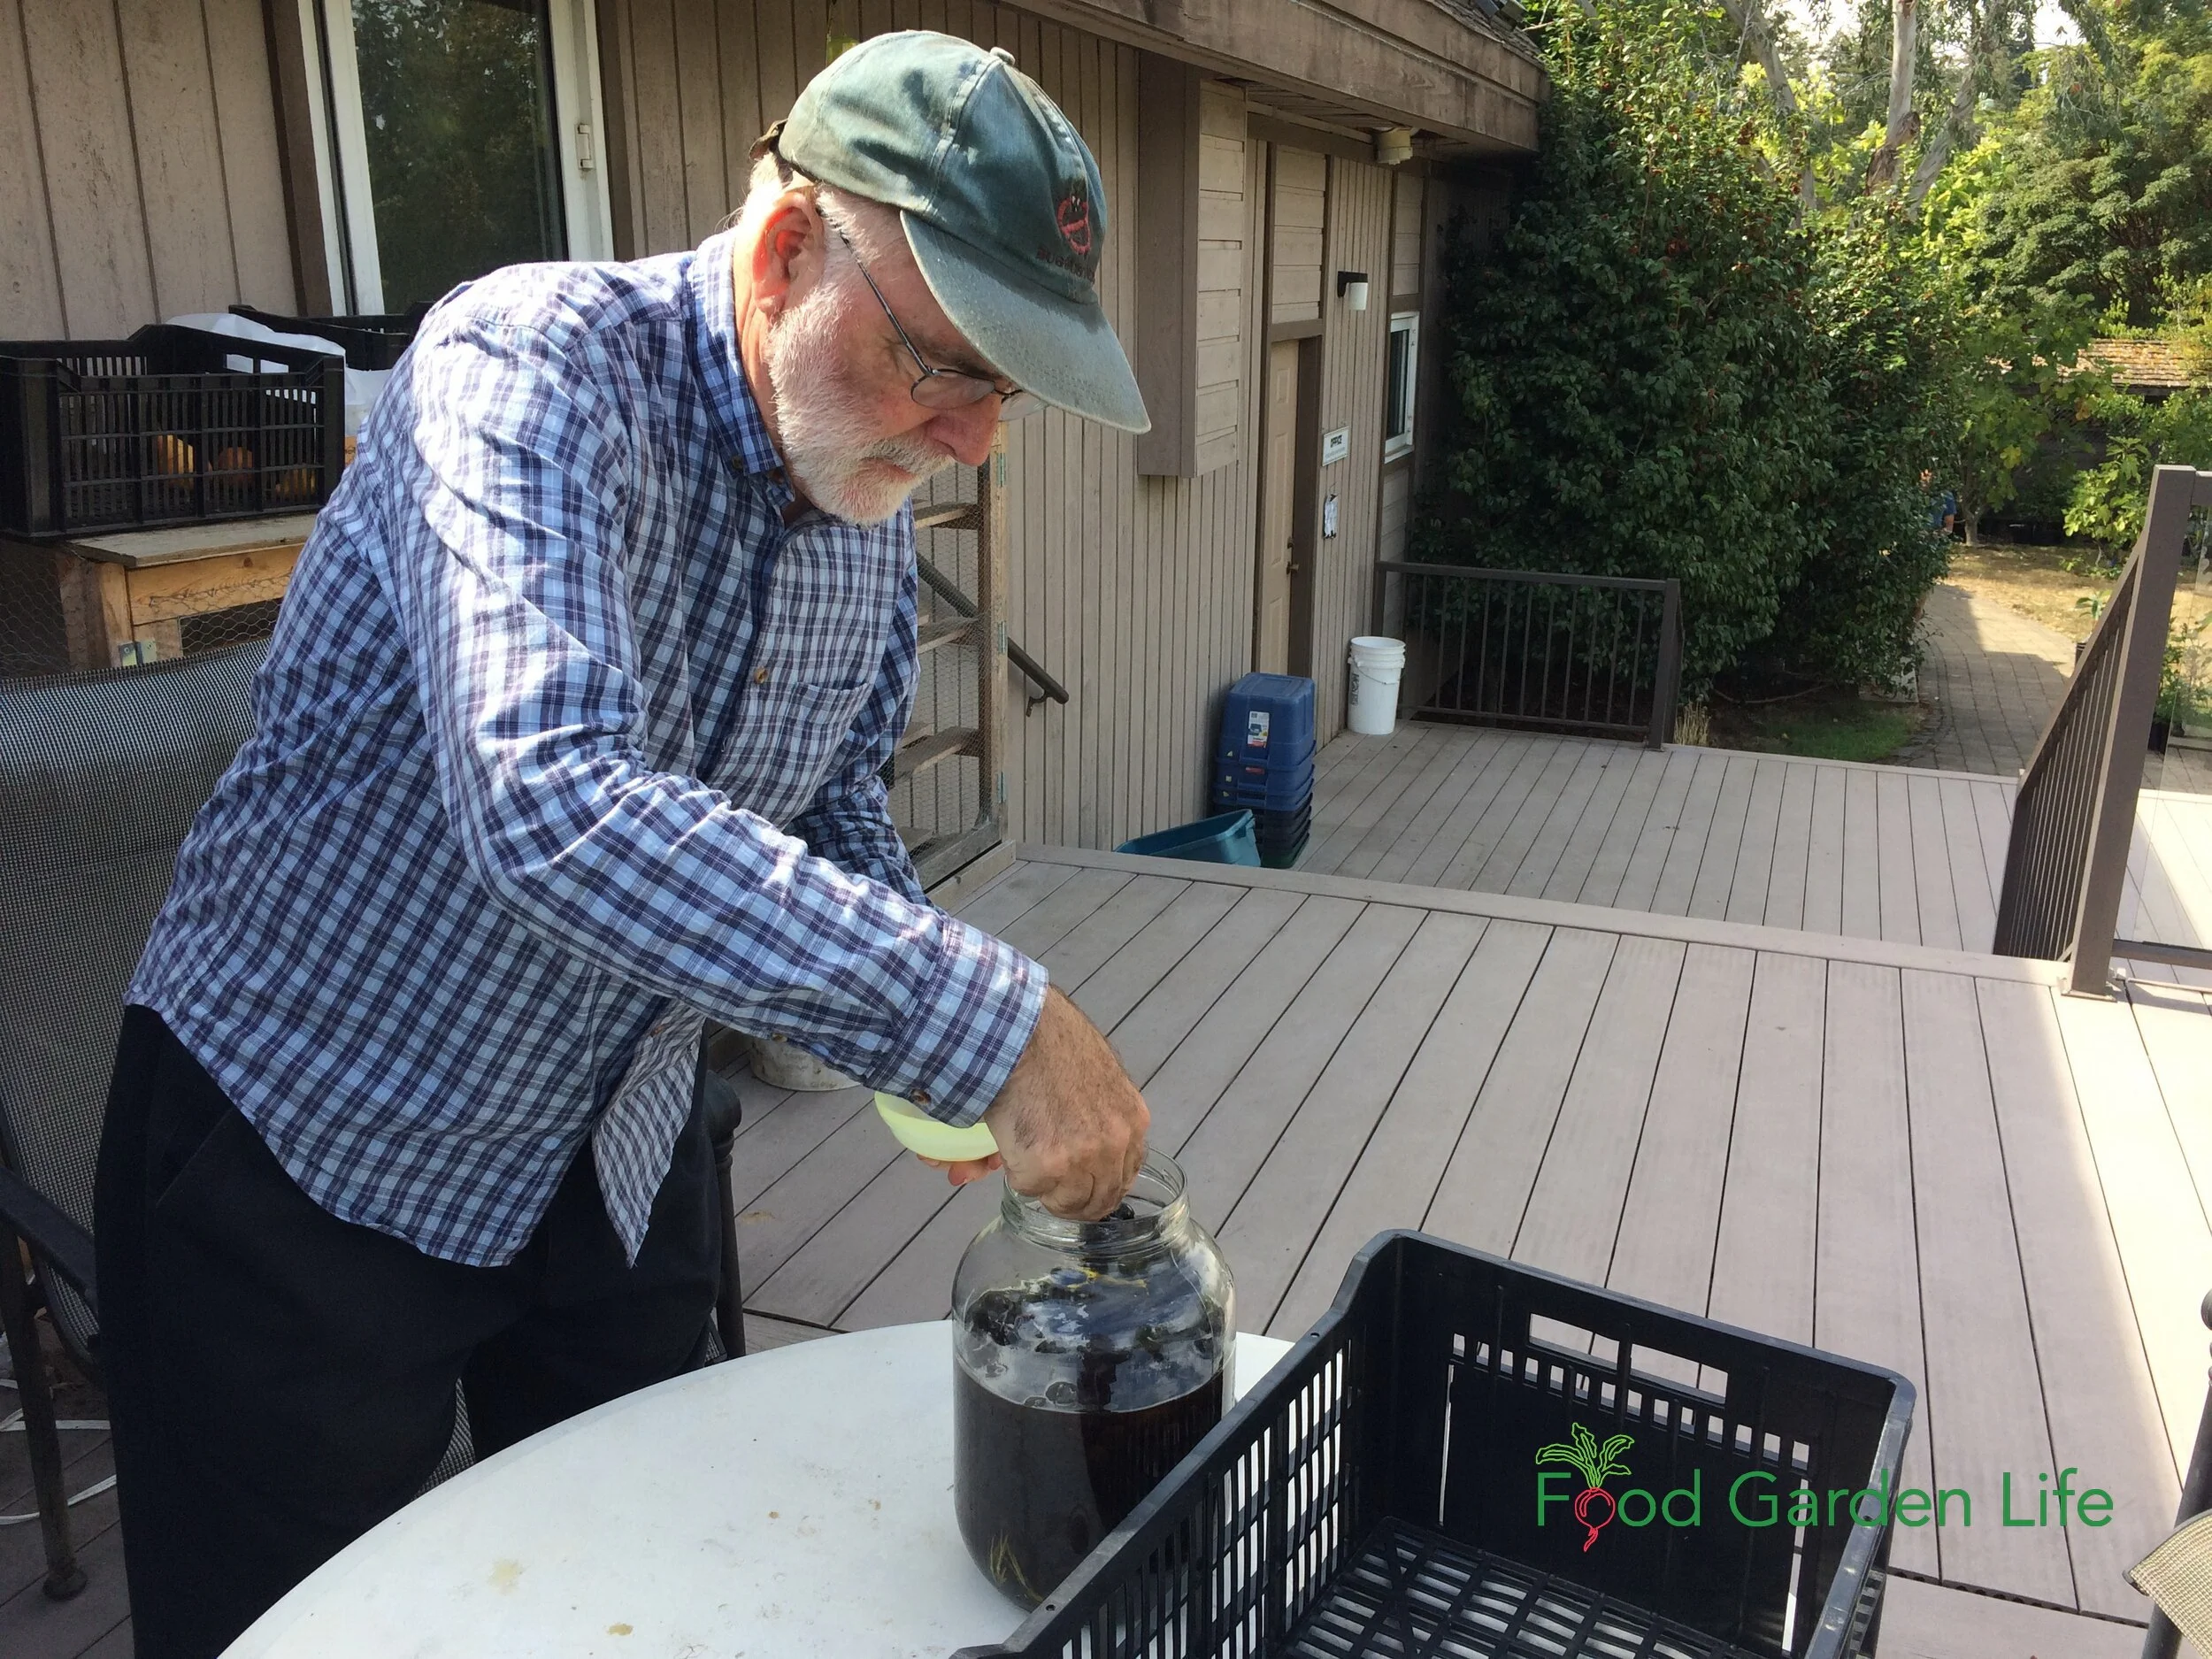
First, break the skin so that the brine can better penetrate the olive. Some people crush the olive with a mallet or the end of a knife handle, and some people prick them with a fork. I just slit them lengthwise with a knife.
Then I put the olives in a jar or bowl of water to soak for 10 days, changing the water twice a day.
After that the olives go into a brine of 100 grams of salt per litre of water.
Leave the olives in the brine for at least 2 weeks, probably longer. Taste one, and if it's too bitter for your liking, brine the olives longer.
When I think they're ready, I put pour off the brine, and then marinate them with red wine vinegar, lemon zest and juice, a bit of olive oil, crushed garlic, rosemary, and ground pepper.
Put the olives in a jar or bowl of water to soak for 10 days, changing the water twice a day.
Find This Helpful?
Enjoy not being bombarded by annoying ads?
Appreciate the absence of junky affiliate links for products you don’t need?
It’s because we’re reader supported.
If we’ve helped in your food-gardening journey, we’re glad of support. You can high-five us below. Any amount welcome!
More on Olives
Find out about olive growers in Canada.
More Mediterranean Crops for Cold Climates
Push the Limits!
If you get a kick out of growing things where they don’t normally survive, find out about how to harvest figs and lemons in cold climates.
Articles and Interview About Figs and Lemons
Here are articles to help you grow figs and lemons in cold climates:
Courses on Figs and Lemons in Cold Climates
Here are self-paced masterclasses to help you grow figs and lemons:
Books on Mediterranean Crops
Even if you live somewhere too cold for olive trees to survive the winter, you can enjoy the exotic touch of an olive tree in your garden. This book gives you what you need to know to grow an olive tree in a pot. (And get olives!) Buy at Amazon.ca and Amazon.com.
Guide to Fruits and Vegetables that Grow in Shade
Looking for fruits, vegetables, and herbs that grow well in a shady garden. This article has partial-sun crop ideas for you.
By Steven Biggs
Shade-Tolerant Vegetables and Fruits for the Edible Landscape and Food Garden
Don’t have full sun? Think your garden needs full sun? Find out about shade-garden vegetables, fruit, and herbs.
Not enough sunny growing space in your yard? Lots of partial sun? Light shade? You're not alone.
When I first landscaped my place, my neighbour Bob asked, "Steve, why is your patio so far from your house?"
"It's all about the vegetables,” I replied.
I reserved as much direct sunlight for my vegetables as possible. And used the shady spot for the patio."
There are lots of things around a home garden that cast shade: There’s the house, garage, fence, shed, trees, and hedges.
Not all fruits and vegetables grow well in shade. Lots of crops need "full sun" (6-8 hours of direct sunlight every day) to grow optimally.
But there are fruits, vegetables, and herbs that do nicely in a shady garden. Keep reading if you want to learn about vegetable plants that grow in shade, growing herbs in shade, shade-tolerant fruit, and how to plan your garden for shade.
Perfectionism Meets Shade Garden
Don’t have a sunny field for growing vegetables? That’s fine, when planting a garden there are many shade-tolerant crops.
Before we get to shade-tolerant crops, let's start with the elephant in the room.
Perfectionism.
Many seed packets suggest full sun...and many yards don't have full sun. You might be contrasting your semi-shaded yard to bright, sunny fields of vegetables.
Your space doesn't compare...
So what?
So what if your plants don't look as good as what a commercial grower would grow! If you're a home gardener, you're growing edible plants for yourself, not to sell.
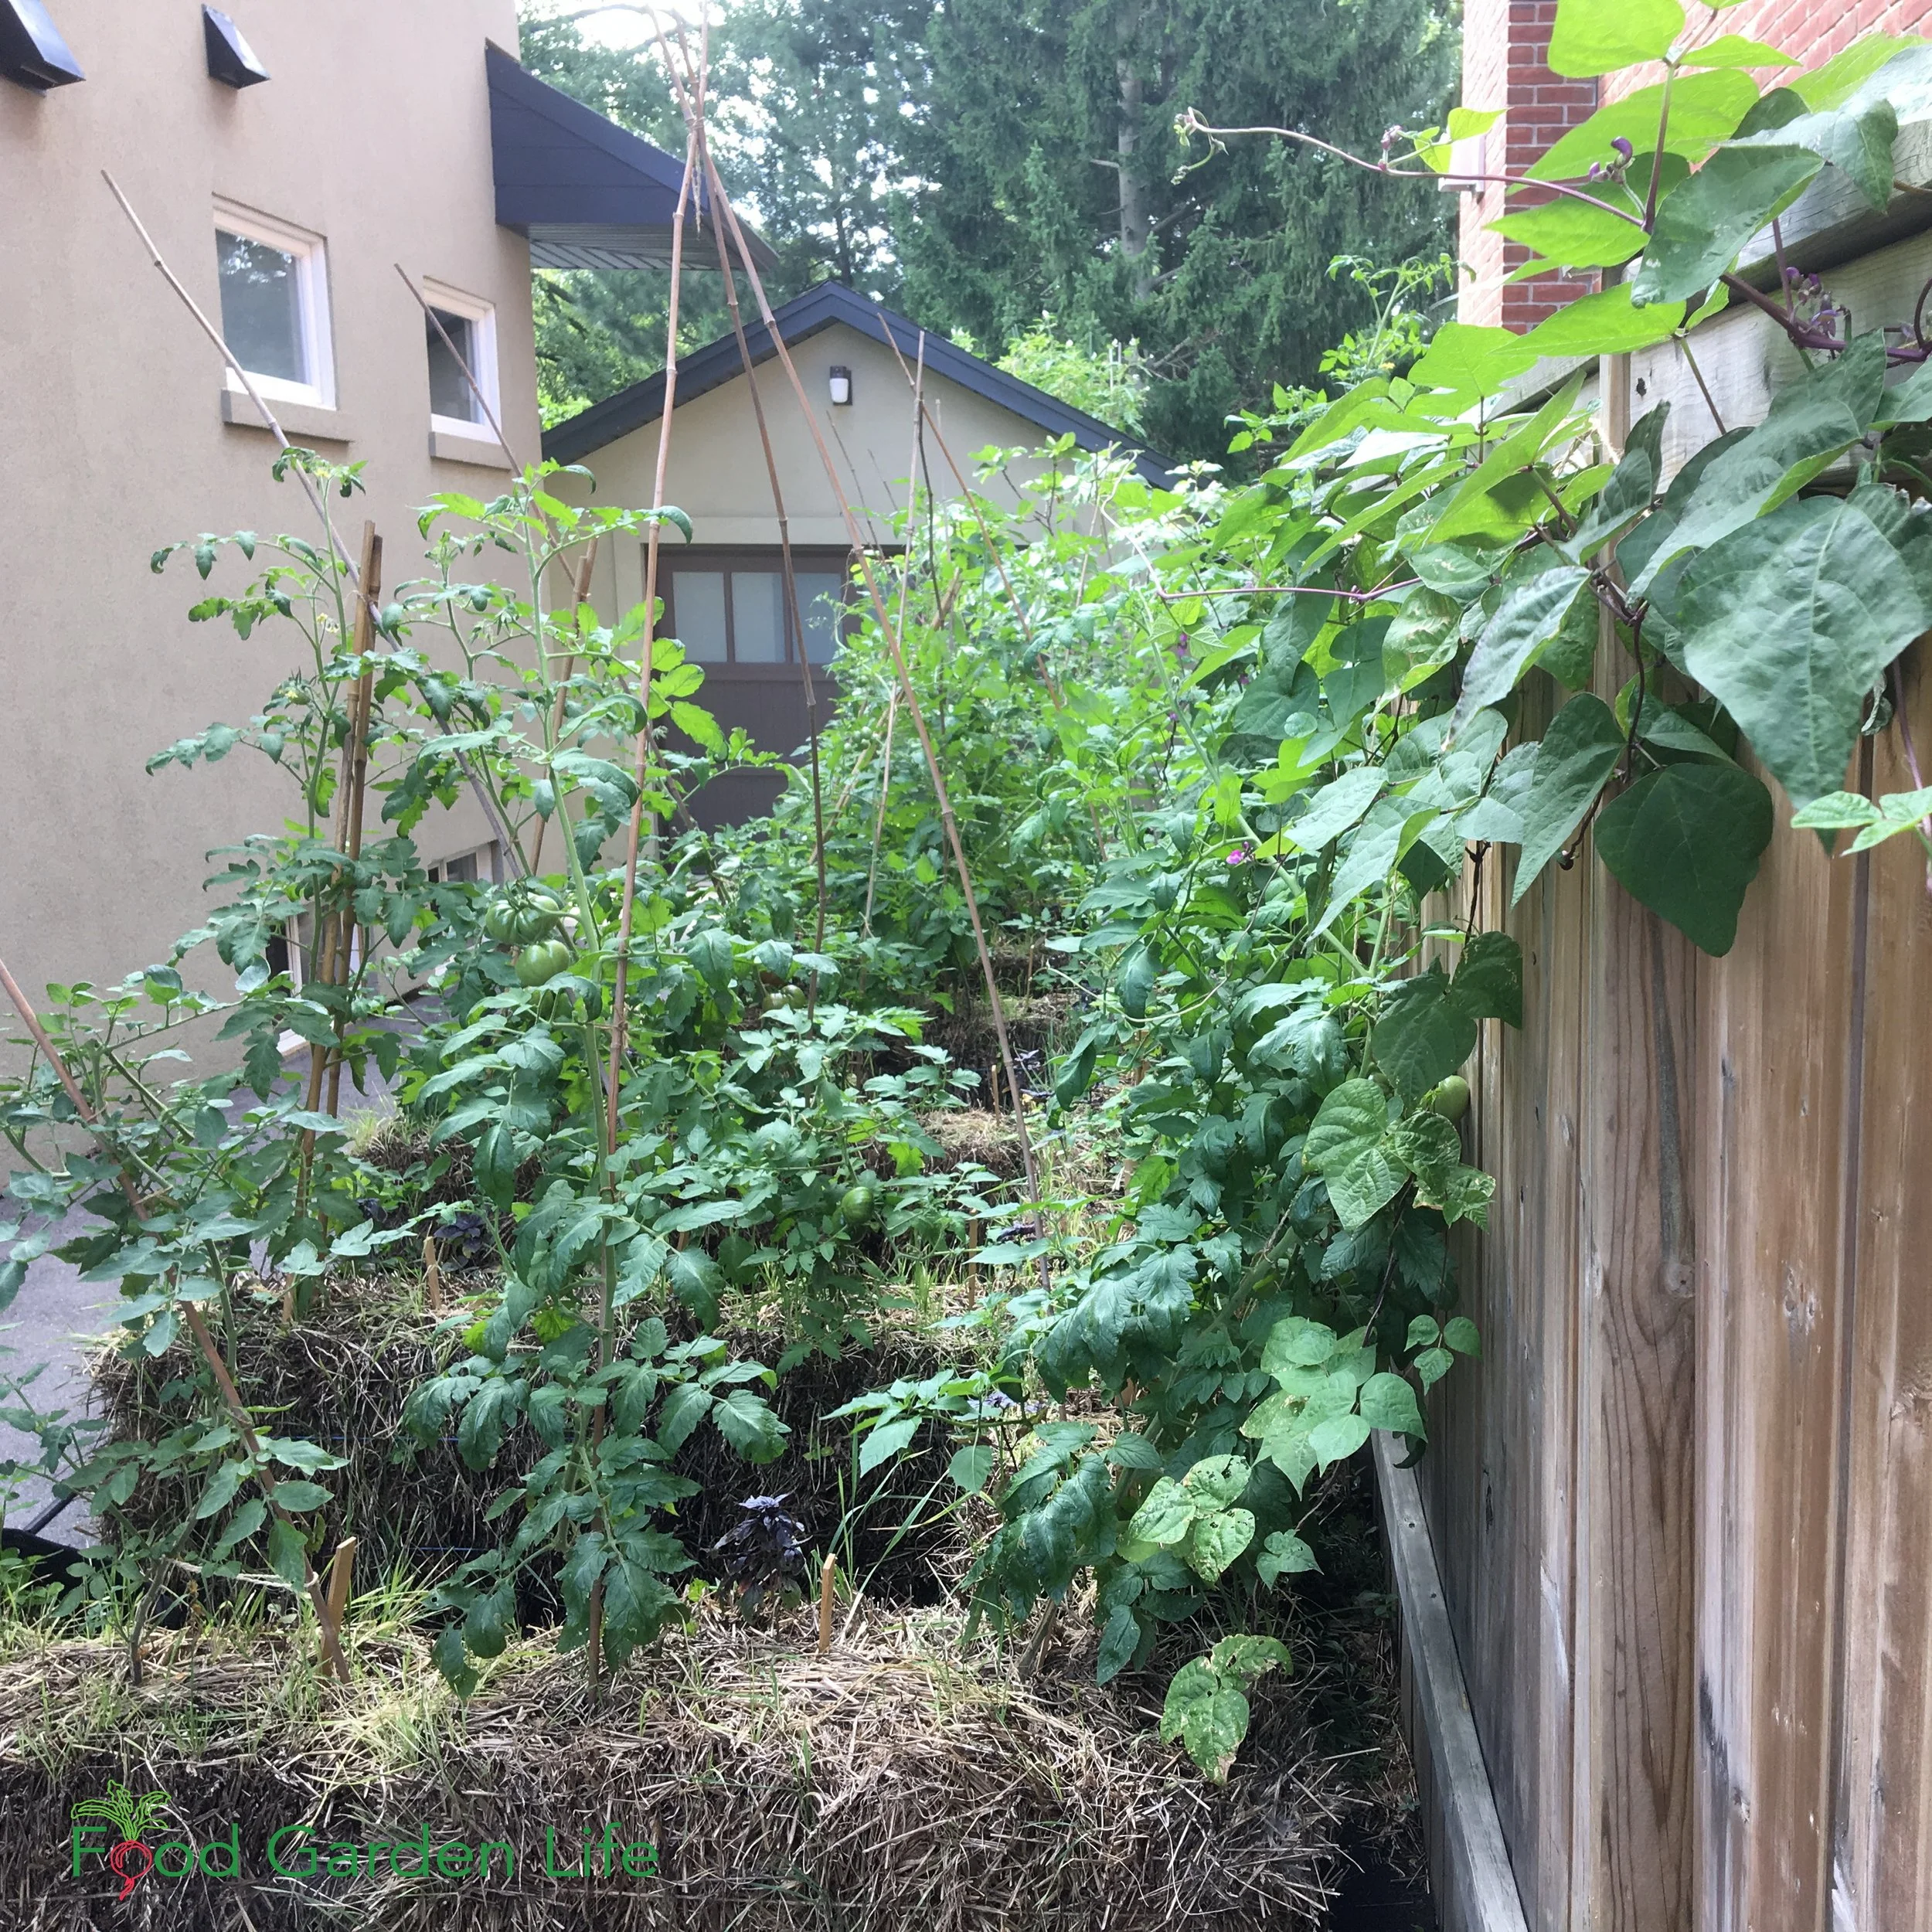
When I needed more growing space, I decided to reclaim the end of my driveway as a straw-bale garden. (Find out more about straw-bale gardens here.)
My driveway garden is in partial sun, nestled between two houses. You can still enjoy vegetable gardening if you have some shade.
The driveway is nestled between two houses. It gets less than six hours of sun exposure. But it’s better to have less-than-perfect tomato plants on that driveway and get a decent harvest than not to harvest any tomatoes from the driveway.
Five hours of sun isn't perfect. So what? The results are fine. It’s a successful garden. Even though I don’t have full sun.
A vegetable garden is a great cure for perfectionism. In home gardens we often have less-than-perfect conditions. So what!
A Word on Shade
Not all sun (and not all shade) is created equal. Here are things to consider as you look at the shady spots and sunny spots around a yard:
Dappled shade. Think of the shade under a locust tree, spotted with little flecks of light.
Heavy shade. This is where no light is gets through or is reflected, like next to buildings or under trees with dense canopies. (Norway maple...I'm talking about you!)
Afternoon shade. A.k.a. morning sun...and morning sun isn't as strong as afternoon sun.
Morning shade. Or afternoon sun.
Create Your Own Unique Edible Landscape
That fits for your yard, and your style!
Crops for Partial Shade
Grow Leafy Greens in Shade
Start with greens when gardening in partial shade.
The reason partial shade is fine for leafy greens is that we're not trying to grow a perfect crop: All we want is the leaves. We're not growing for flowers or fruit or seeds. We don’t care if the plant completes it’s life cycle.
(And with a bit of shade, leaves are often bigger and more tender!)
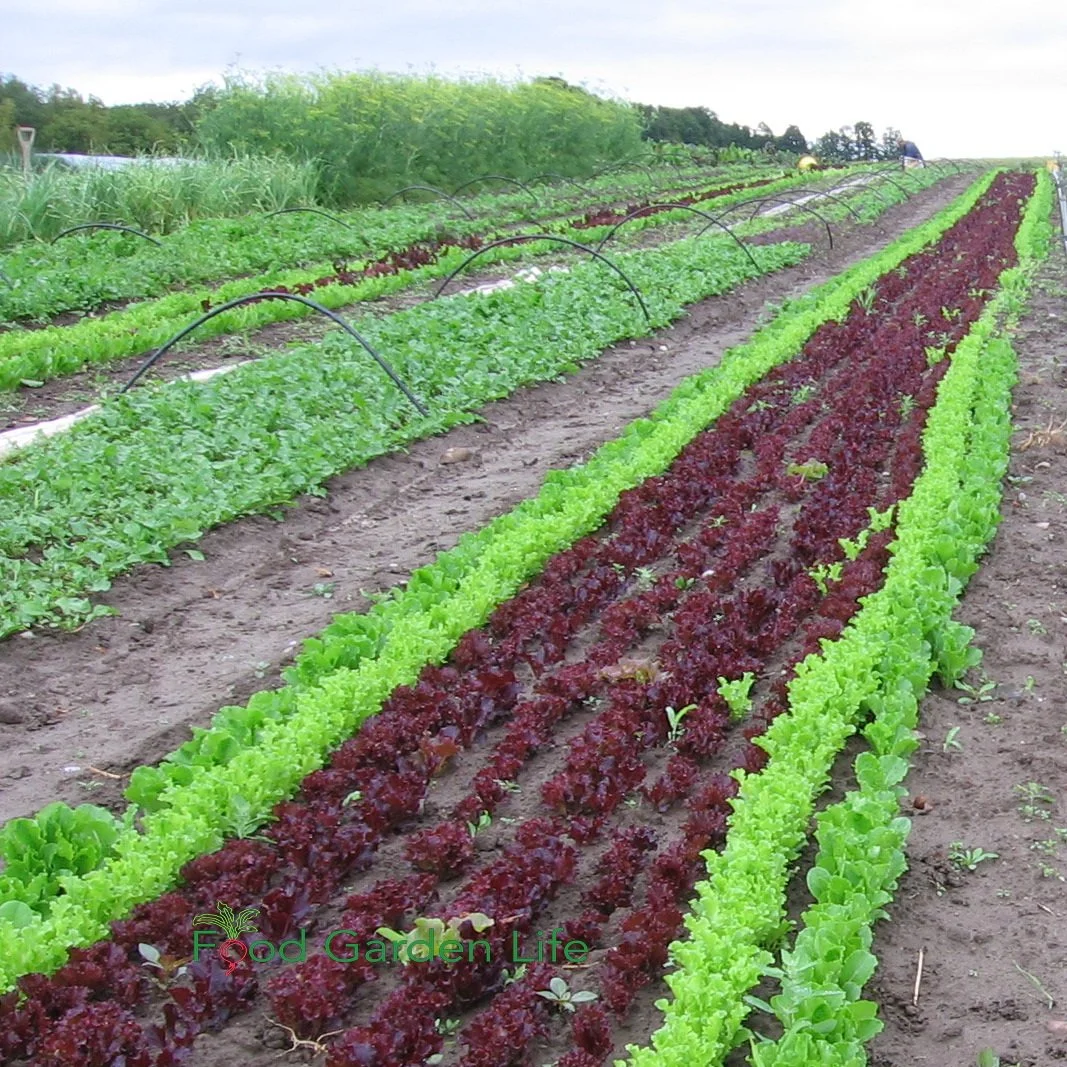
Many of the greens crops (e.g. arugula, lettuce, and spinach) have a short life cycle that's less that the length of the growing season. And that means that at some point they give up making tender leaves, and send up a flower stalk. (This is called "bolting.")
Bolting happens more quickly in hot, sunny locations. By growing leafy green crops in partial shade during intense summer heat, they'll bolt more slowly, and make tender leaves for longer time.
Here’s more about how to prevent lettuce from bolting.
Vegetable Plants that Grow in Shade
Here are a few greens that do very nicely in partial shade:
These lettuce plants will do well in this dappled light over the summer. It’s cooler than in direct sun.
Amaranth
Arugula
Beets (for the edible leaves…don’t expect as much from the roots as you would get in a sunny location)
Bok choy
Claytonia
Collards
Corn salad
Cress
Endive
Kale
Lettuce
Mizuna
Mustard greens
Spinach
Swiss chard
If you have a favourite green that's not on this list, try it. Leafy greens usually do very nicely in partial shade.
One more crop that I don't think of as a leafy vegetable (even though we eat the leaves) is green onions. With green onions, we're not trying to encourage bulb development...we're just trying to get tender leaves. So partial shade is fine.
Vine Crops as Shade-Garden Vegetables
Vine crops can grow up and into the sunlight.
If you have a partially shaded area where vining crops could grow up into a sunnier location, this can be a useful strategy.
Not only do they tolerate partial shade: You can train them up a trellis, arbour, hedge, or tree into sunnier conditions.
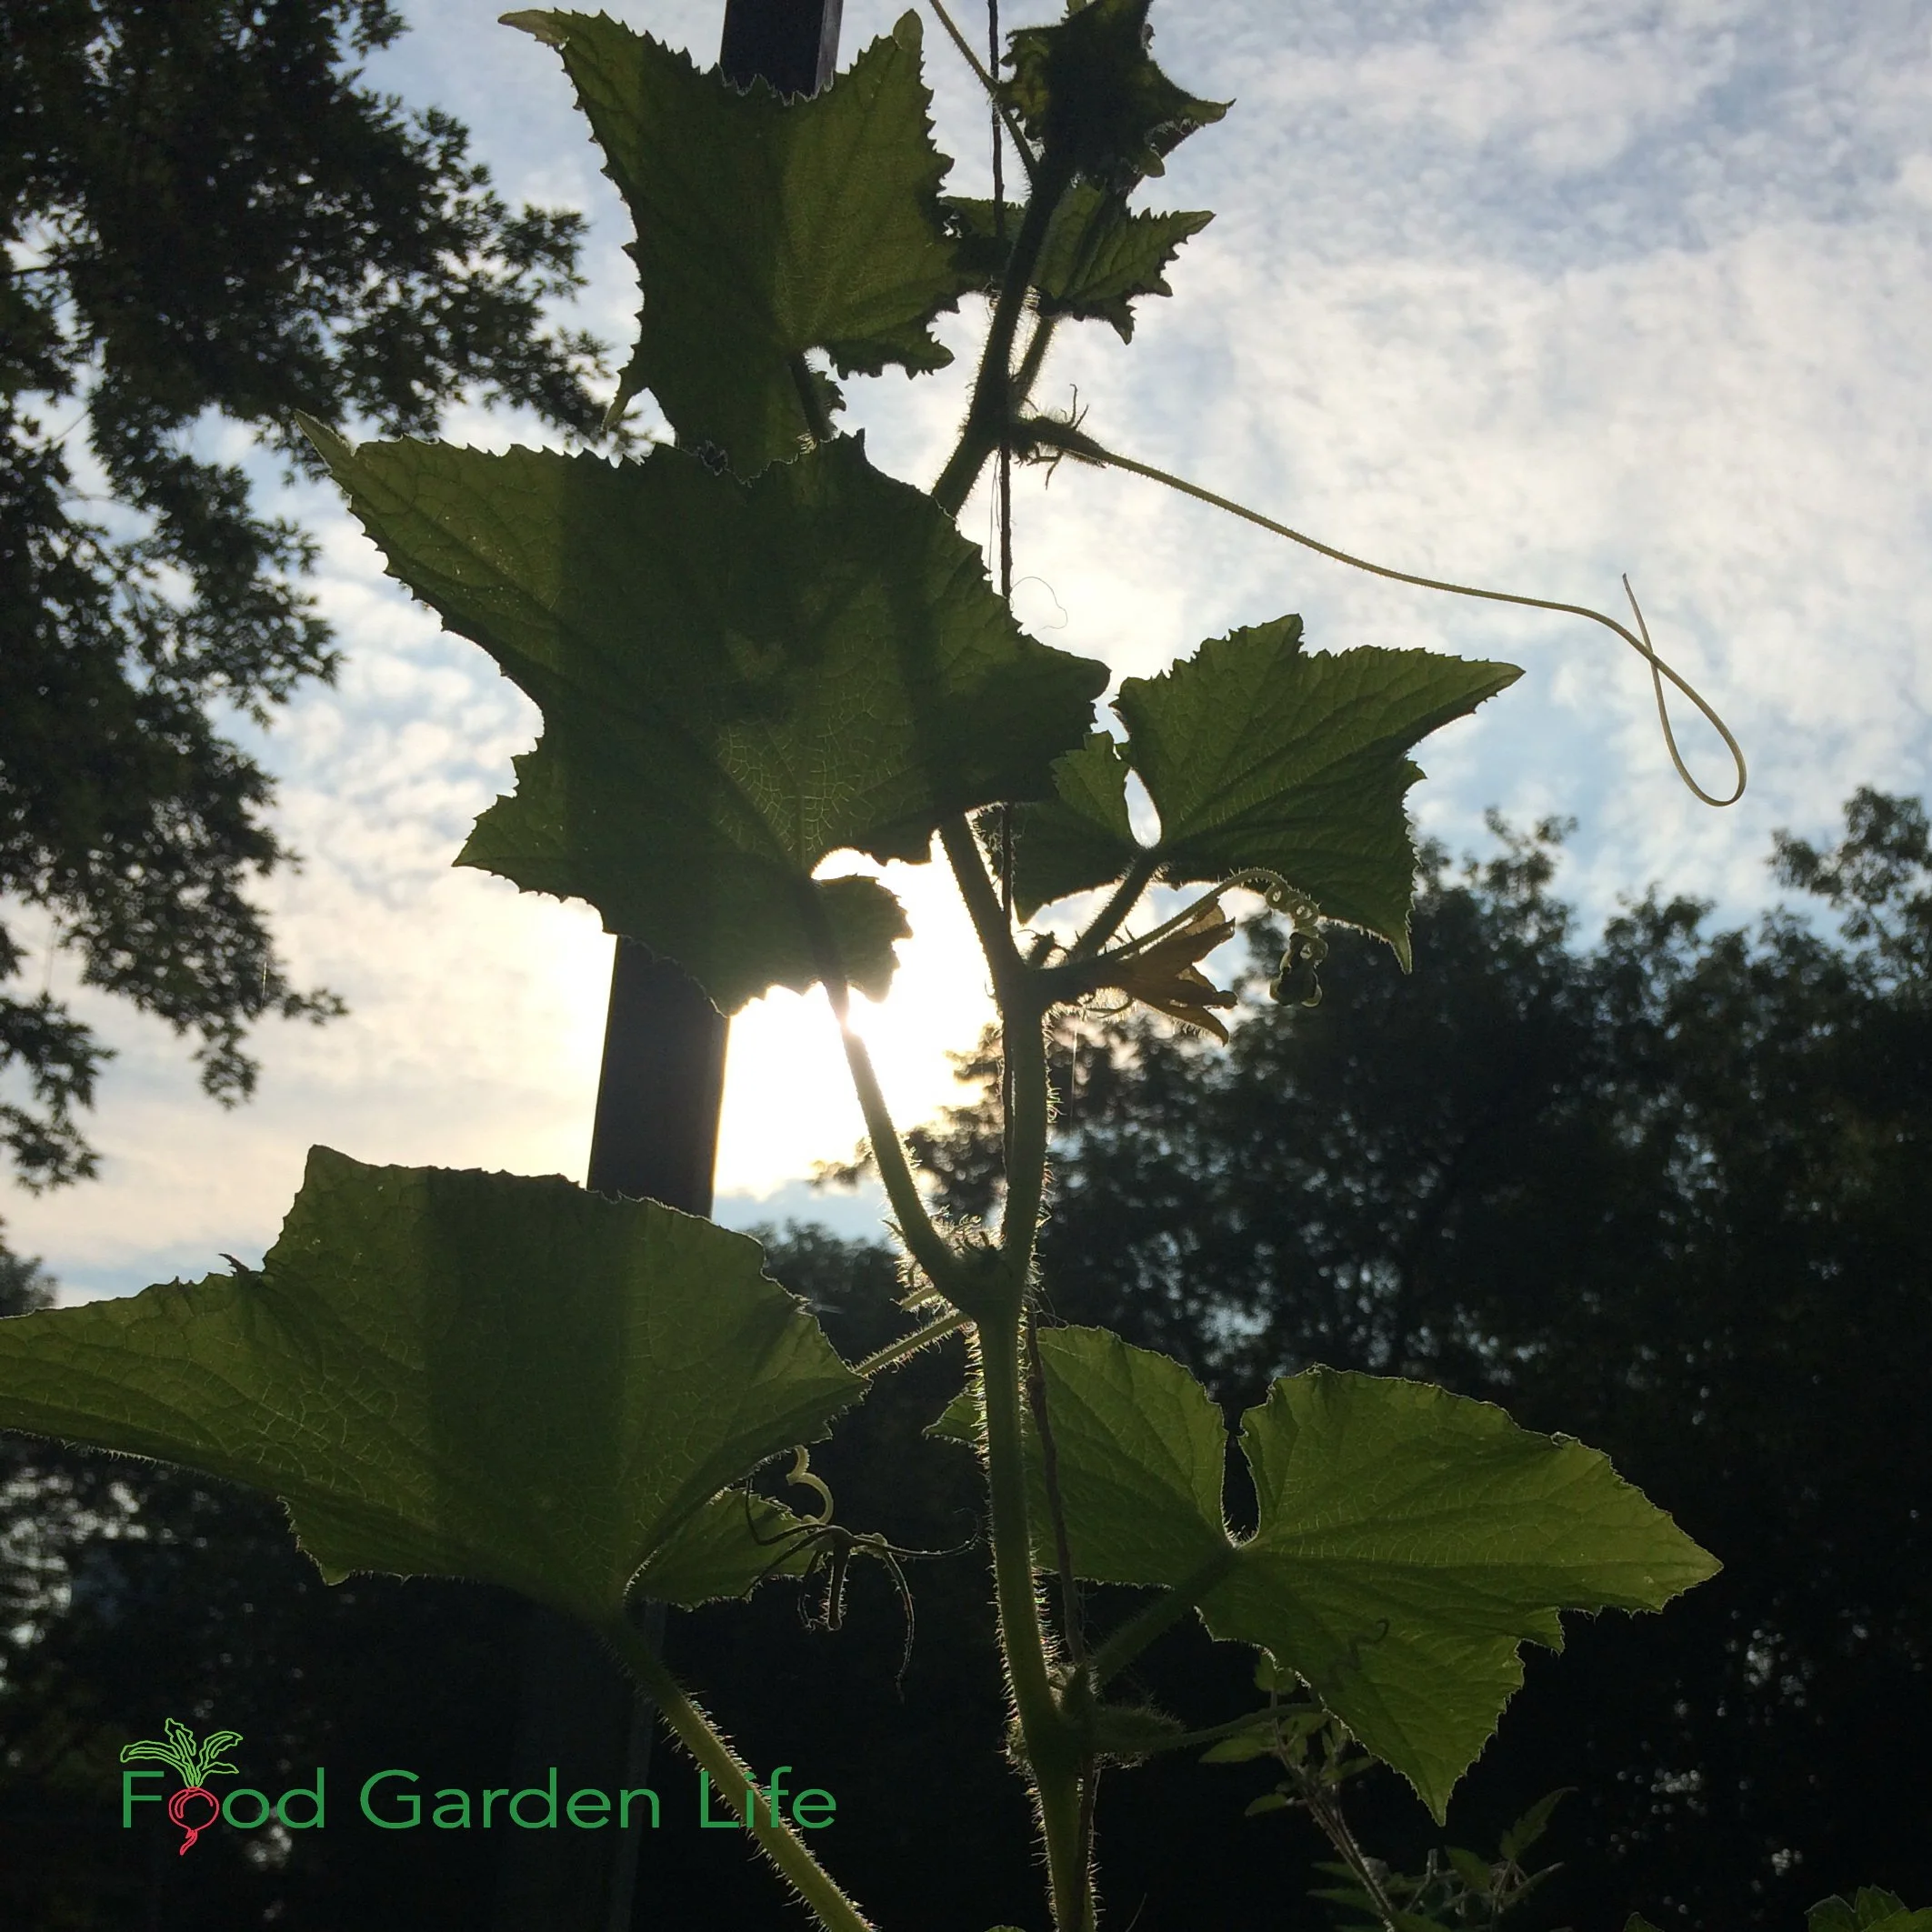
Cucumbers. They grow respectably well in partial shade. I've grown them in afternoon sun, up a trellis on the west side of a garage with very respectable results.
Squash. Like cucumber, they do fine in partial shade. I've grown them along a semi-shaded cedar hedge, and was delighted to find the hedge studded with squash at the end of the season.
Pole and runner beans. The year I grew runner beans up a tee-pee underneath my apple tree they grew right up into the tree above...and those scarlet flowers looked great amongst the green apples!
Vining Peas. Some pea varieties are bush-like, but if you want a vining crop to grow up into a sunnier space, look for vining peas. And with peas, you can also harvest and eat young shoot tips and tendrils.
All of these vine crops work well for vertical gardening. Find out how to make a vertical vegetable garden.
Grow a Container Vegetable Garden
And get an early harvest of crops that usually take too long!
Beyond Leafy Vegetables
I already told you about my 5-hour-a-day driveway tomatoes.
If you're experimenting with other sun-loving vegetables in partial shade, just expect them to have lanky growth and lower yield. And at a certain level of sunlight, you won't get enough to make it worth your while. Growing vegetables in shade might take some experimenting.
But if you don't try, you won't know.
Herbs that Grow in Shade
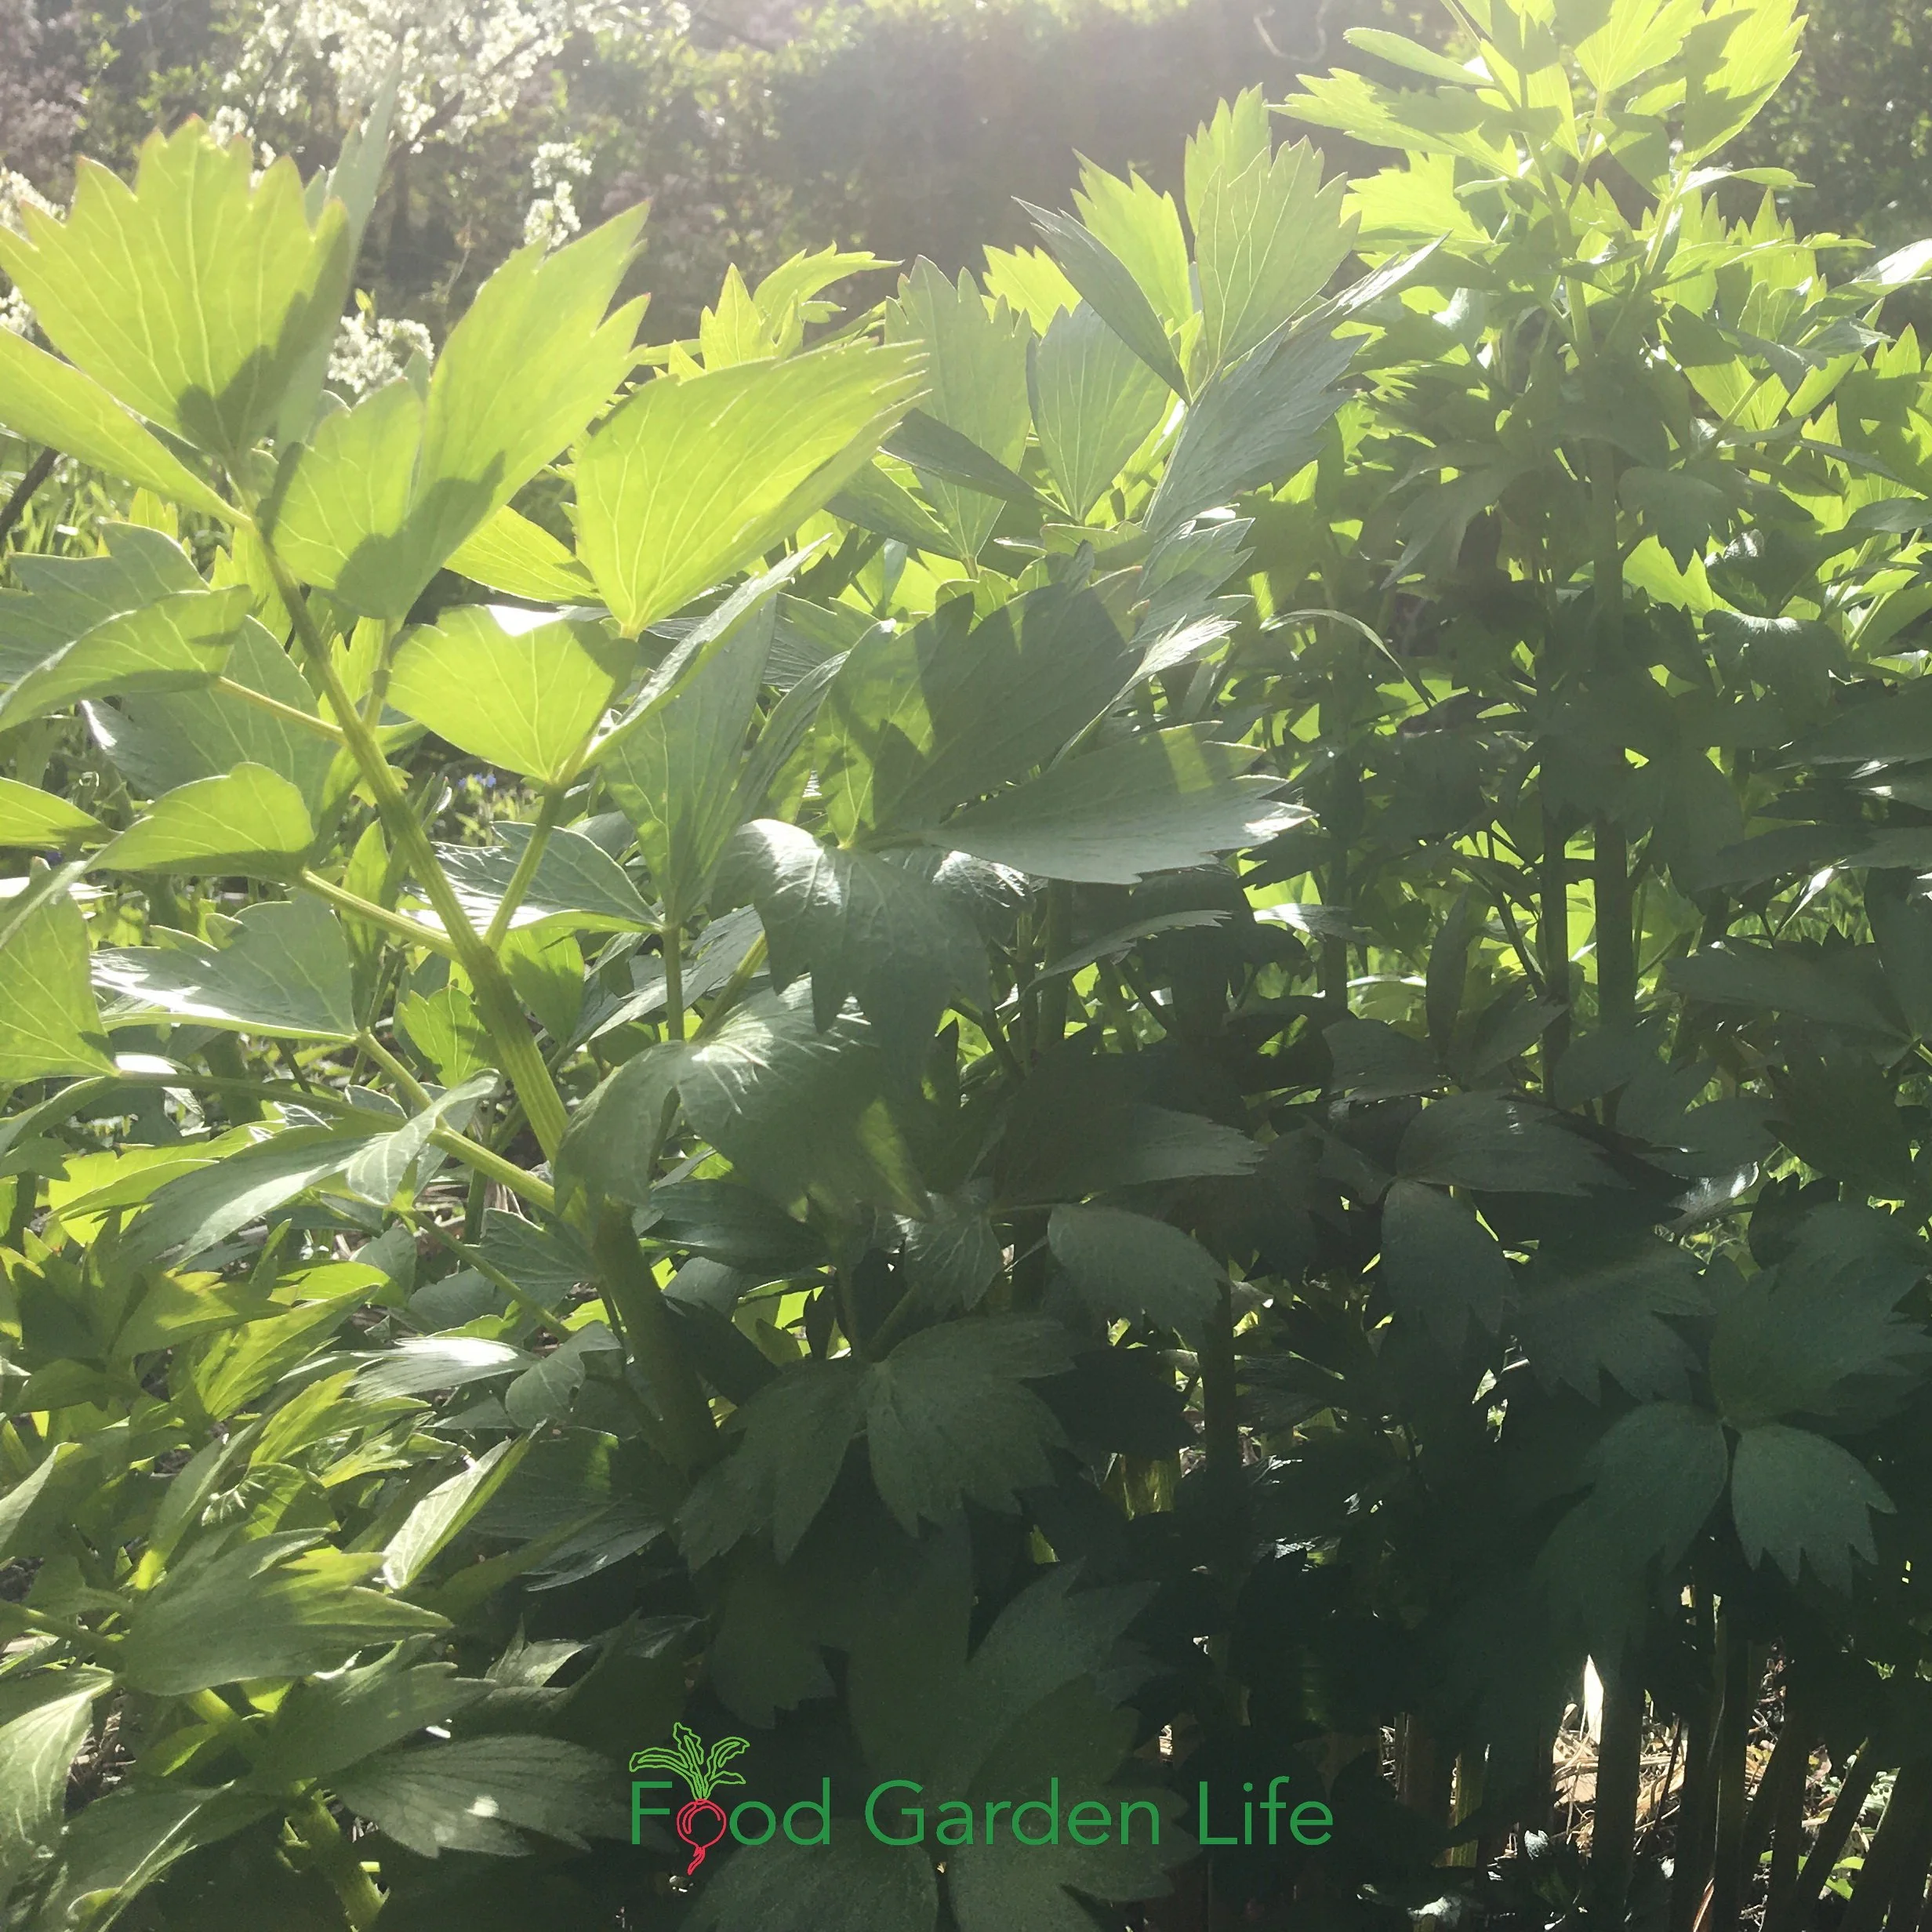
Lovage is a perennial herb that tolerates some shade.
There are many herbs that tolerate partial shade. Here are my favourites:
Chives
Cilantro
Dill
Lemon Balm
Lovage (this perennial herb lives in my semi-shaded perennial border)
Mint (see Full Shade, below)
Parsley
Fruit Crops for Partial Shade
When growing fruit in partial shade, take the same approach we do with veggies. Just adjust expectations accordingly.
Here are fruit crops that grow well in partial shade:
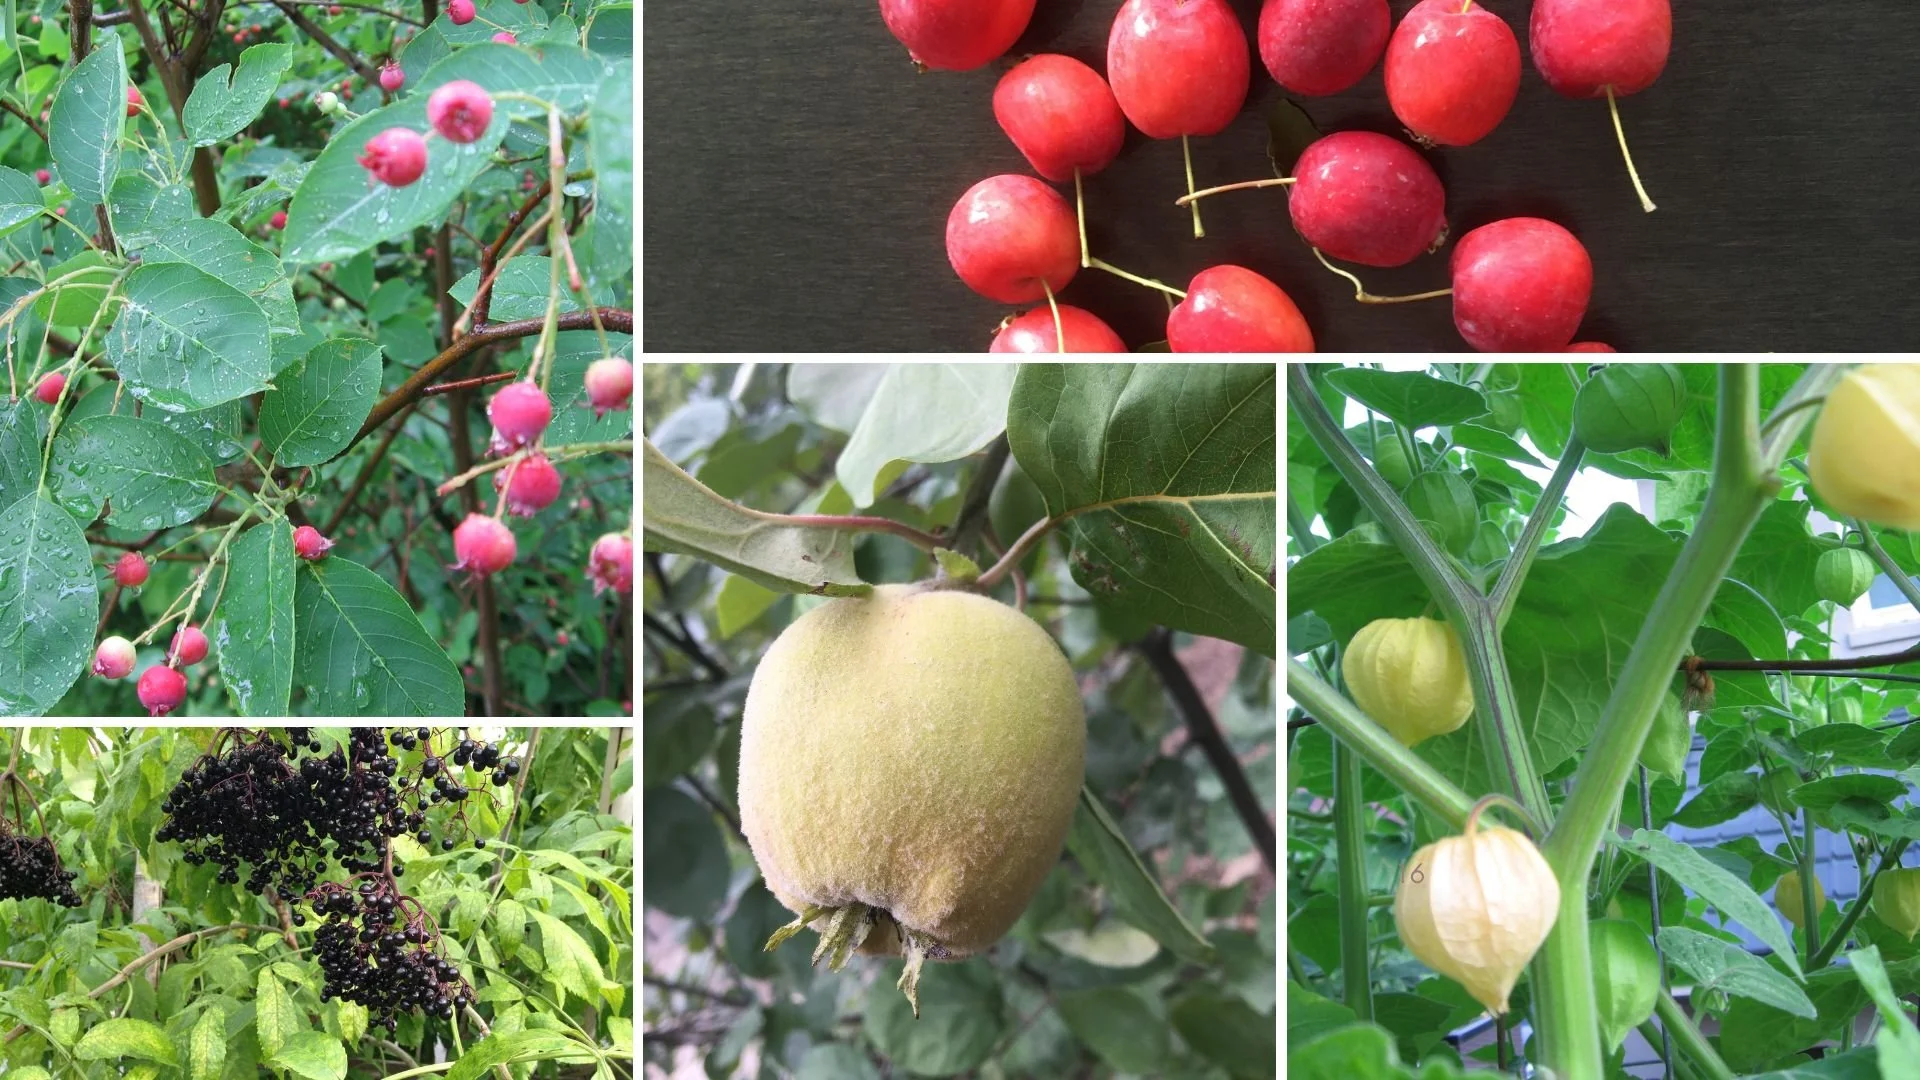
Choke cherry. Often found on the forest edge, where there's some shade. (Find out about 5 Types of Cherry Bushes for Edible Landscapes.)
Currants. My favourite. Here’s an article about how to grow currants.
Elderberry. Often found on the forest edge, where there's some shade.
Gooseberry. They take the same low-light conditions as currants.
Hardy Kiwi Vine.
Pawpaw. While young pawpaw trees benefit from shade, best fruit production is in full sun. But they fruit well in partial shade. No surprise as that's where you often find them in the wild.
Serviceberry. An understorey tree often found on the forest edge, where there's some shade. My favourite member of the serviceberry clan is the Saskatoon bush. Find out more about the Saskatoon bush.
Landscape with Fruit
That’s easy to grow in a home garden!
What About Heavy Shade?
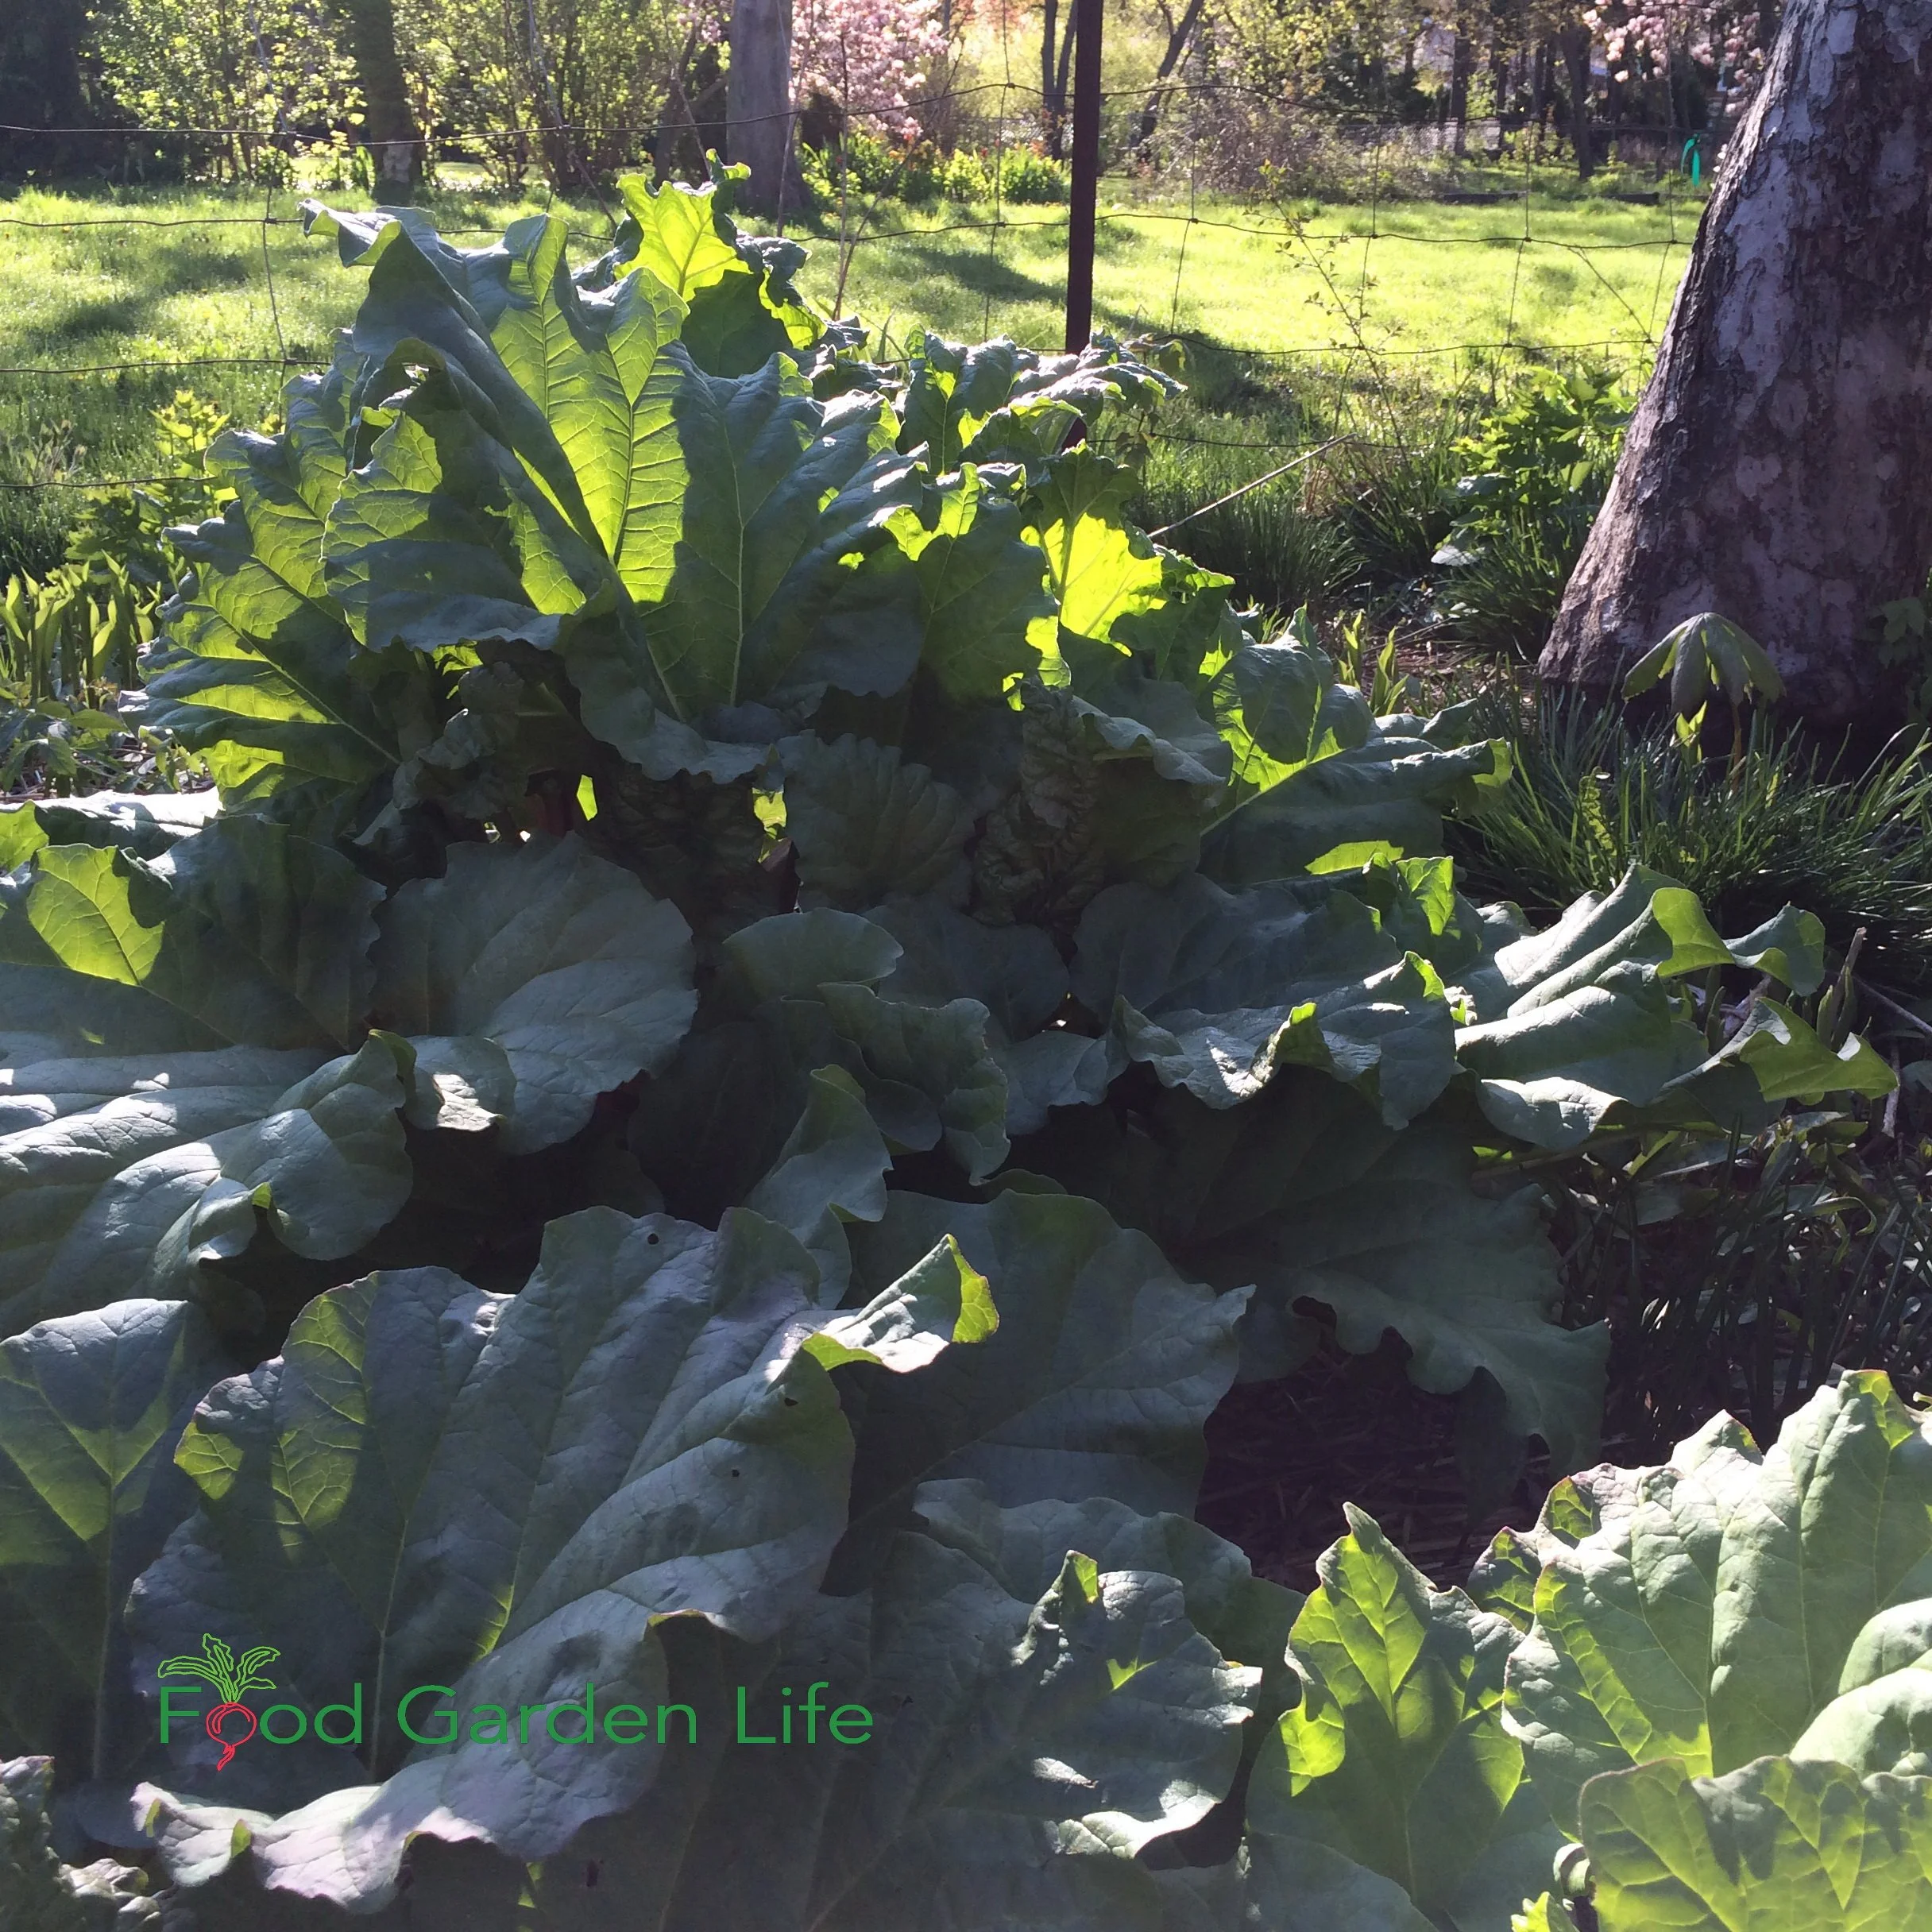
This rhubarb plant is in partial shade, but I’ve seed decent rhubarb patches even in heavy shade.
If you have a space without any direct sunlight, reflected sunlight, or dappled sunlight, your crop options are more limited. This is what people call “full” shade or “deep” shade.
Here are ideas for you:
Mint and shade: Mint is an invasive plant that I normally only grow in containers. But in full shade, mint can be your friend. This is the one situation where I plant mint in the ground.
Rhubarb can do very nicely in heavy shade. My friend Chris had a lovely rhubarb plant that graced the edge of his shady pond...it looked quite tropical with the big leaves! Find out how to force rhubarb indoors over the winter.
Currants and gooseberries are a good fit underneath bigger trees. My neighbour Mr. Browne had a currant bush growing in the full shade of an apple tree...and that bush faithfully fruited year after year, albeit not as much as it would have in a sunnier spot.
FAQ Shade Tolerant Crops
Pin this post!
What is the best shade tolerant vegetable?
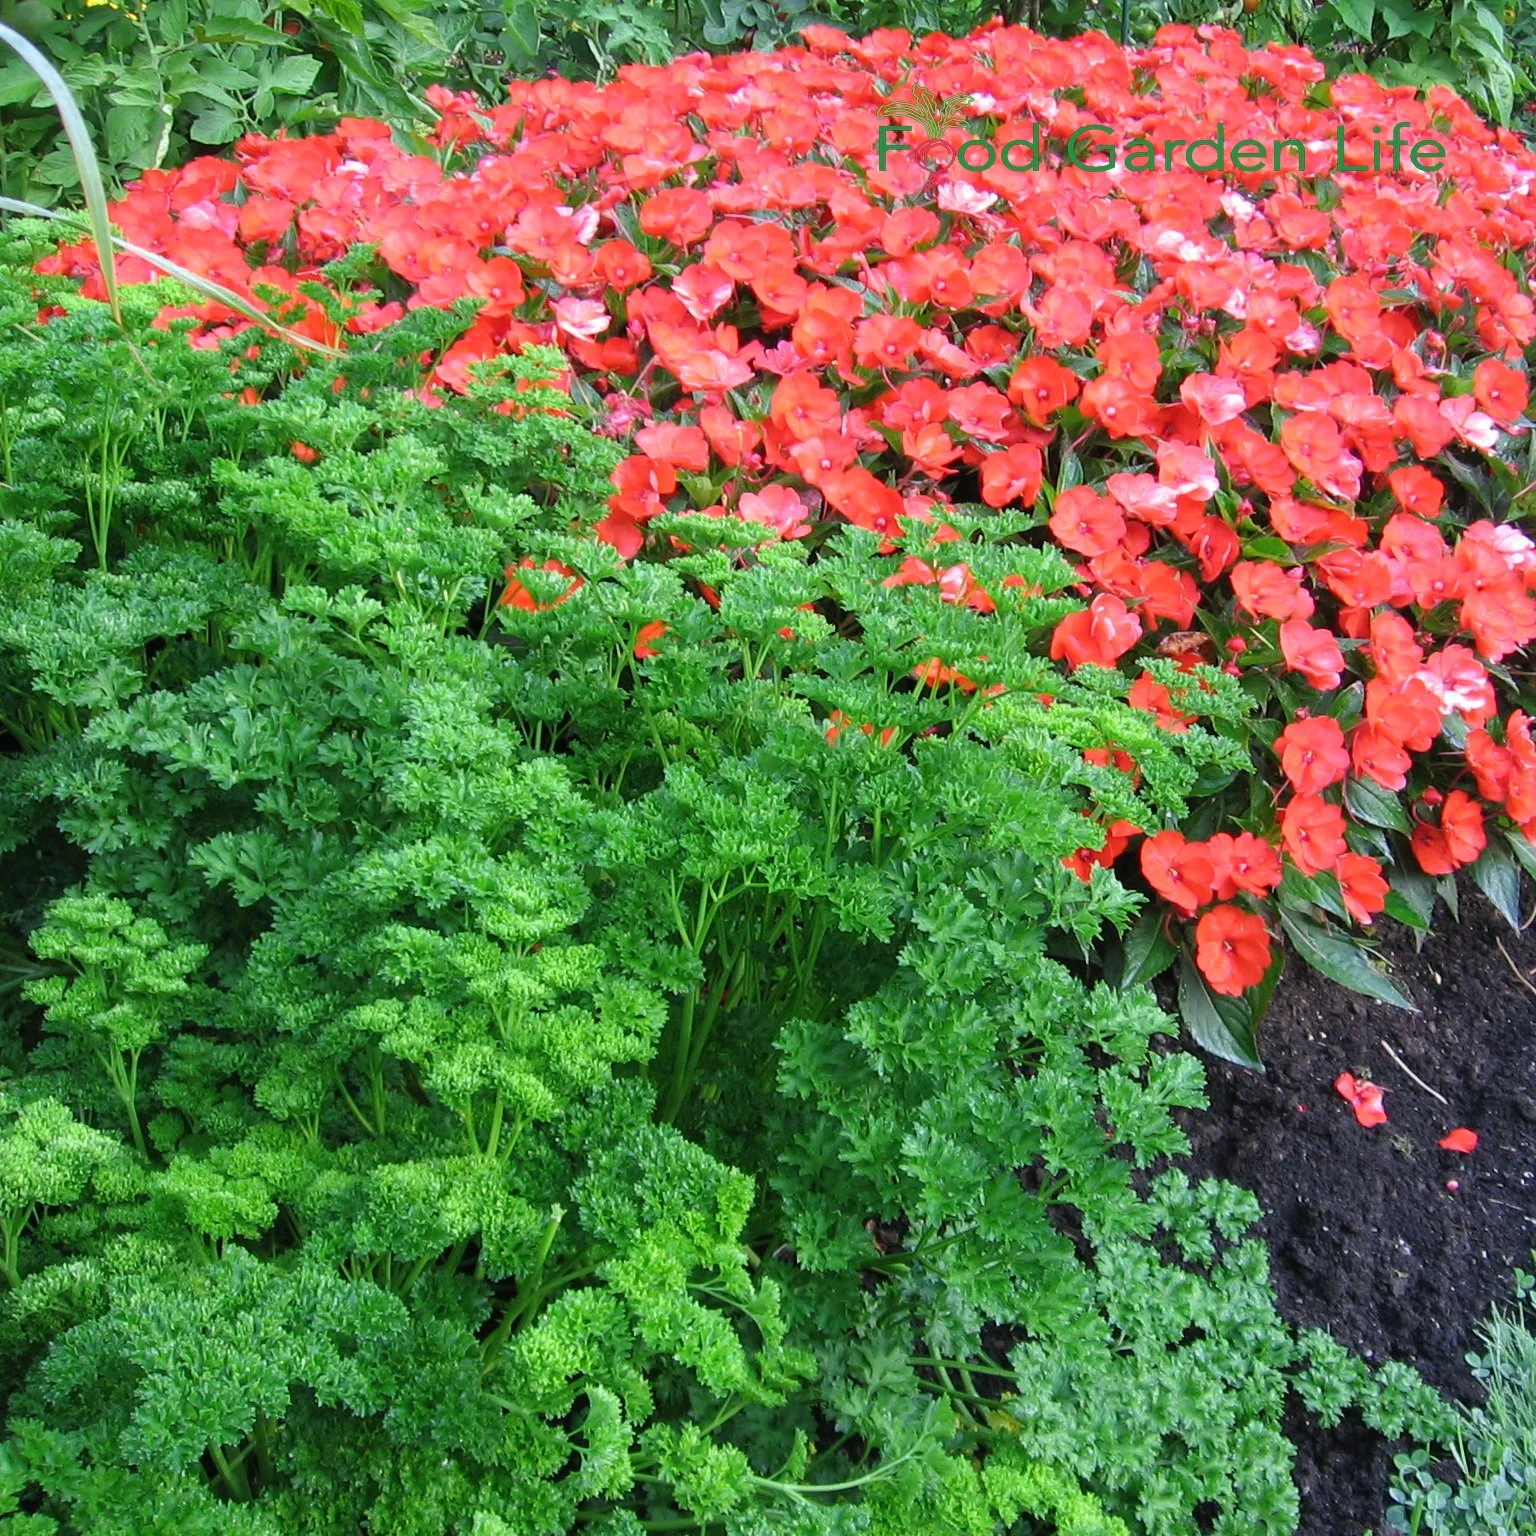
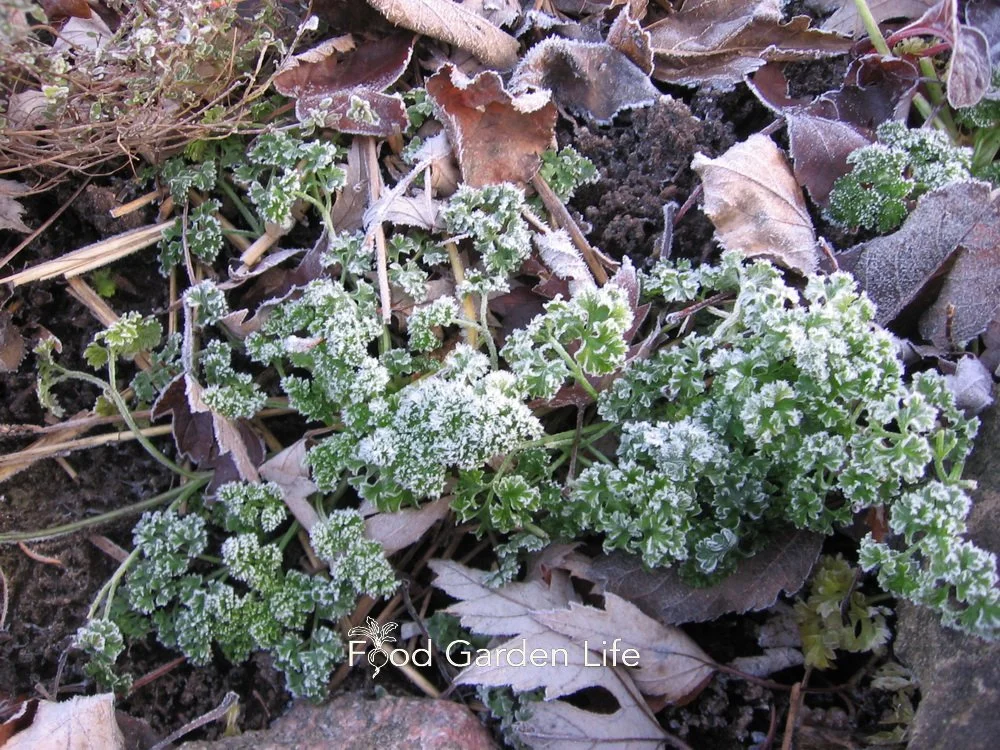
Parsley. Hands down. Because it's delicious, tolerates a wide range of conditions—and it’s very ornamental. I use it as a flower-border edging plant on the north side of the house. The curly-leaf types add great texture, and last well into the fall in cooler temperatures—until there's a hard freeze.
You might be saying, "But it's a herb." I've heard people argue it's a herb, others say it's a vegetable. In the quantities I use in my salads, I'm using it as a veg.
Can vegetables get too much sun?
Yes. Too much sun and too much heat cause many of the leafy greens to bolt quickly. They do better in shady areas in the heat of summer.
What is the difference between partial sun and partial shade?
If you read different sources, you'll come up with various definition.
To me, it's semantics. It just means less than full sun. I guess it depends whether you're the type of person who sees the glass as half full or half empty!
Parsley does very well in shady locations. And it’s a great plant for adding texture to a garden!
Find This Helpful?
Enjoy not being bombarded by annoying ads?
Appreciate the absence of junky affiliate links for products you don’t need?
It’s because we’re reader supported.
If we’ve helped in your food-gardening journey, we’re glad of support. You can high-five us below. Any amount welcome!
More Articles on Growing Crops
Articles about Growing Vegetables
Find out how to stake and support tomato plants.
Courses
Think You Can't Grow an Olive Tree in a Cold Climate? These Canadians Grow Olive Trees
Want to grow olives but live in a cold climate? This article tells you how you can grow and harvest your own olives.
By Steven Biggs
Be Creative and You Can Grow this Mediterranean Staple
An olive tree won't survive winter temperatures in most parts of Canada…but there are creative ways to grow one.
As Bob Duncan points to the olive trees on the south and west walls of his house he tells me, “Don't waste the walls on rose bushes!”
Duncan is near Victoria, British Columbia. And amongst the olive branches against his south and west walls I see a heavy crop of olive fruit.
While olive trees (Olea europaea) don't survive winter temperatures in most parts of Canada, in the balmier parts of British Columbia they do.
“The trees are absolutely fine at -10°C,” says Duncan, owner of Fruit Trees and More nursery.“
Last year, that one was thick with olives. Thousands of them,” he says, pointing to a 10-year-old olive tree.
It's not surprising that olive trees do well here, says Duncan. He explains that they are planted extensively in Mediterranean countries, where winters are similarly cooler than summers.
Growing Olive Trees in Southern B.C.
Planting an Olive Tree Where There's Protection
Bob Duncan, serving me home-grown table olives. This olive variety is from Italy.
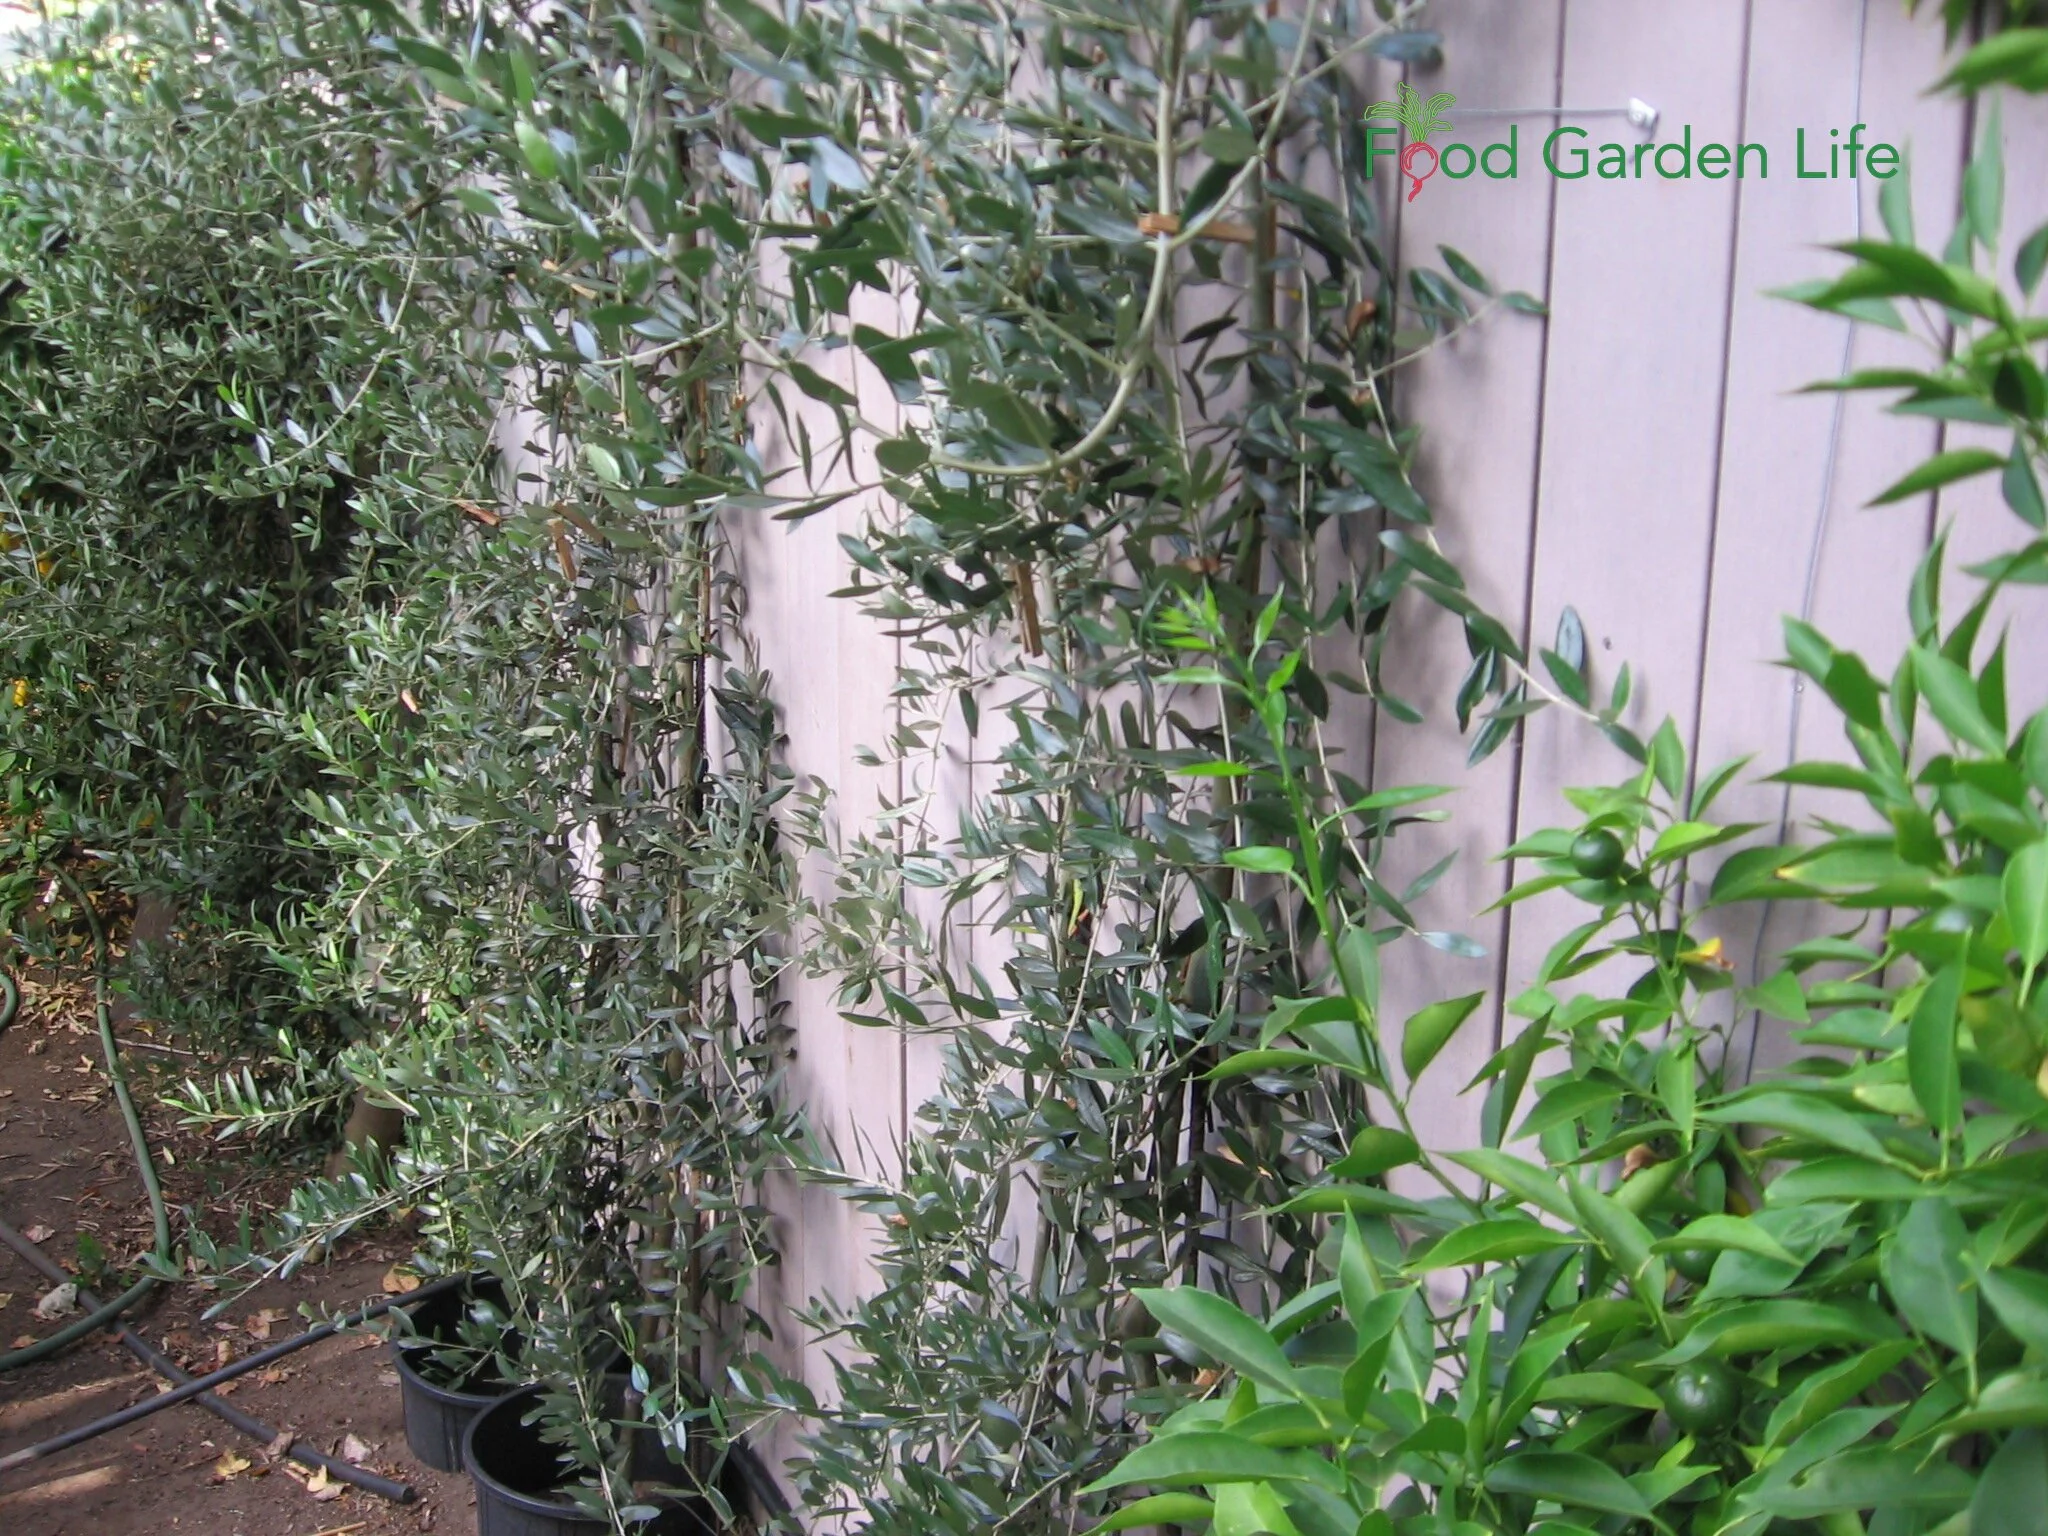
Duncan grows olive trees flat against his house on a series of horizontal wires. If temperatures drop below -10°C (14°F), he drapes the outward-facing side of the olive trees with a floating row cover (a breathable, lightweight, cloth-like material).
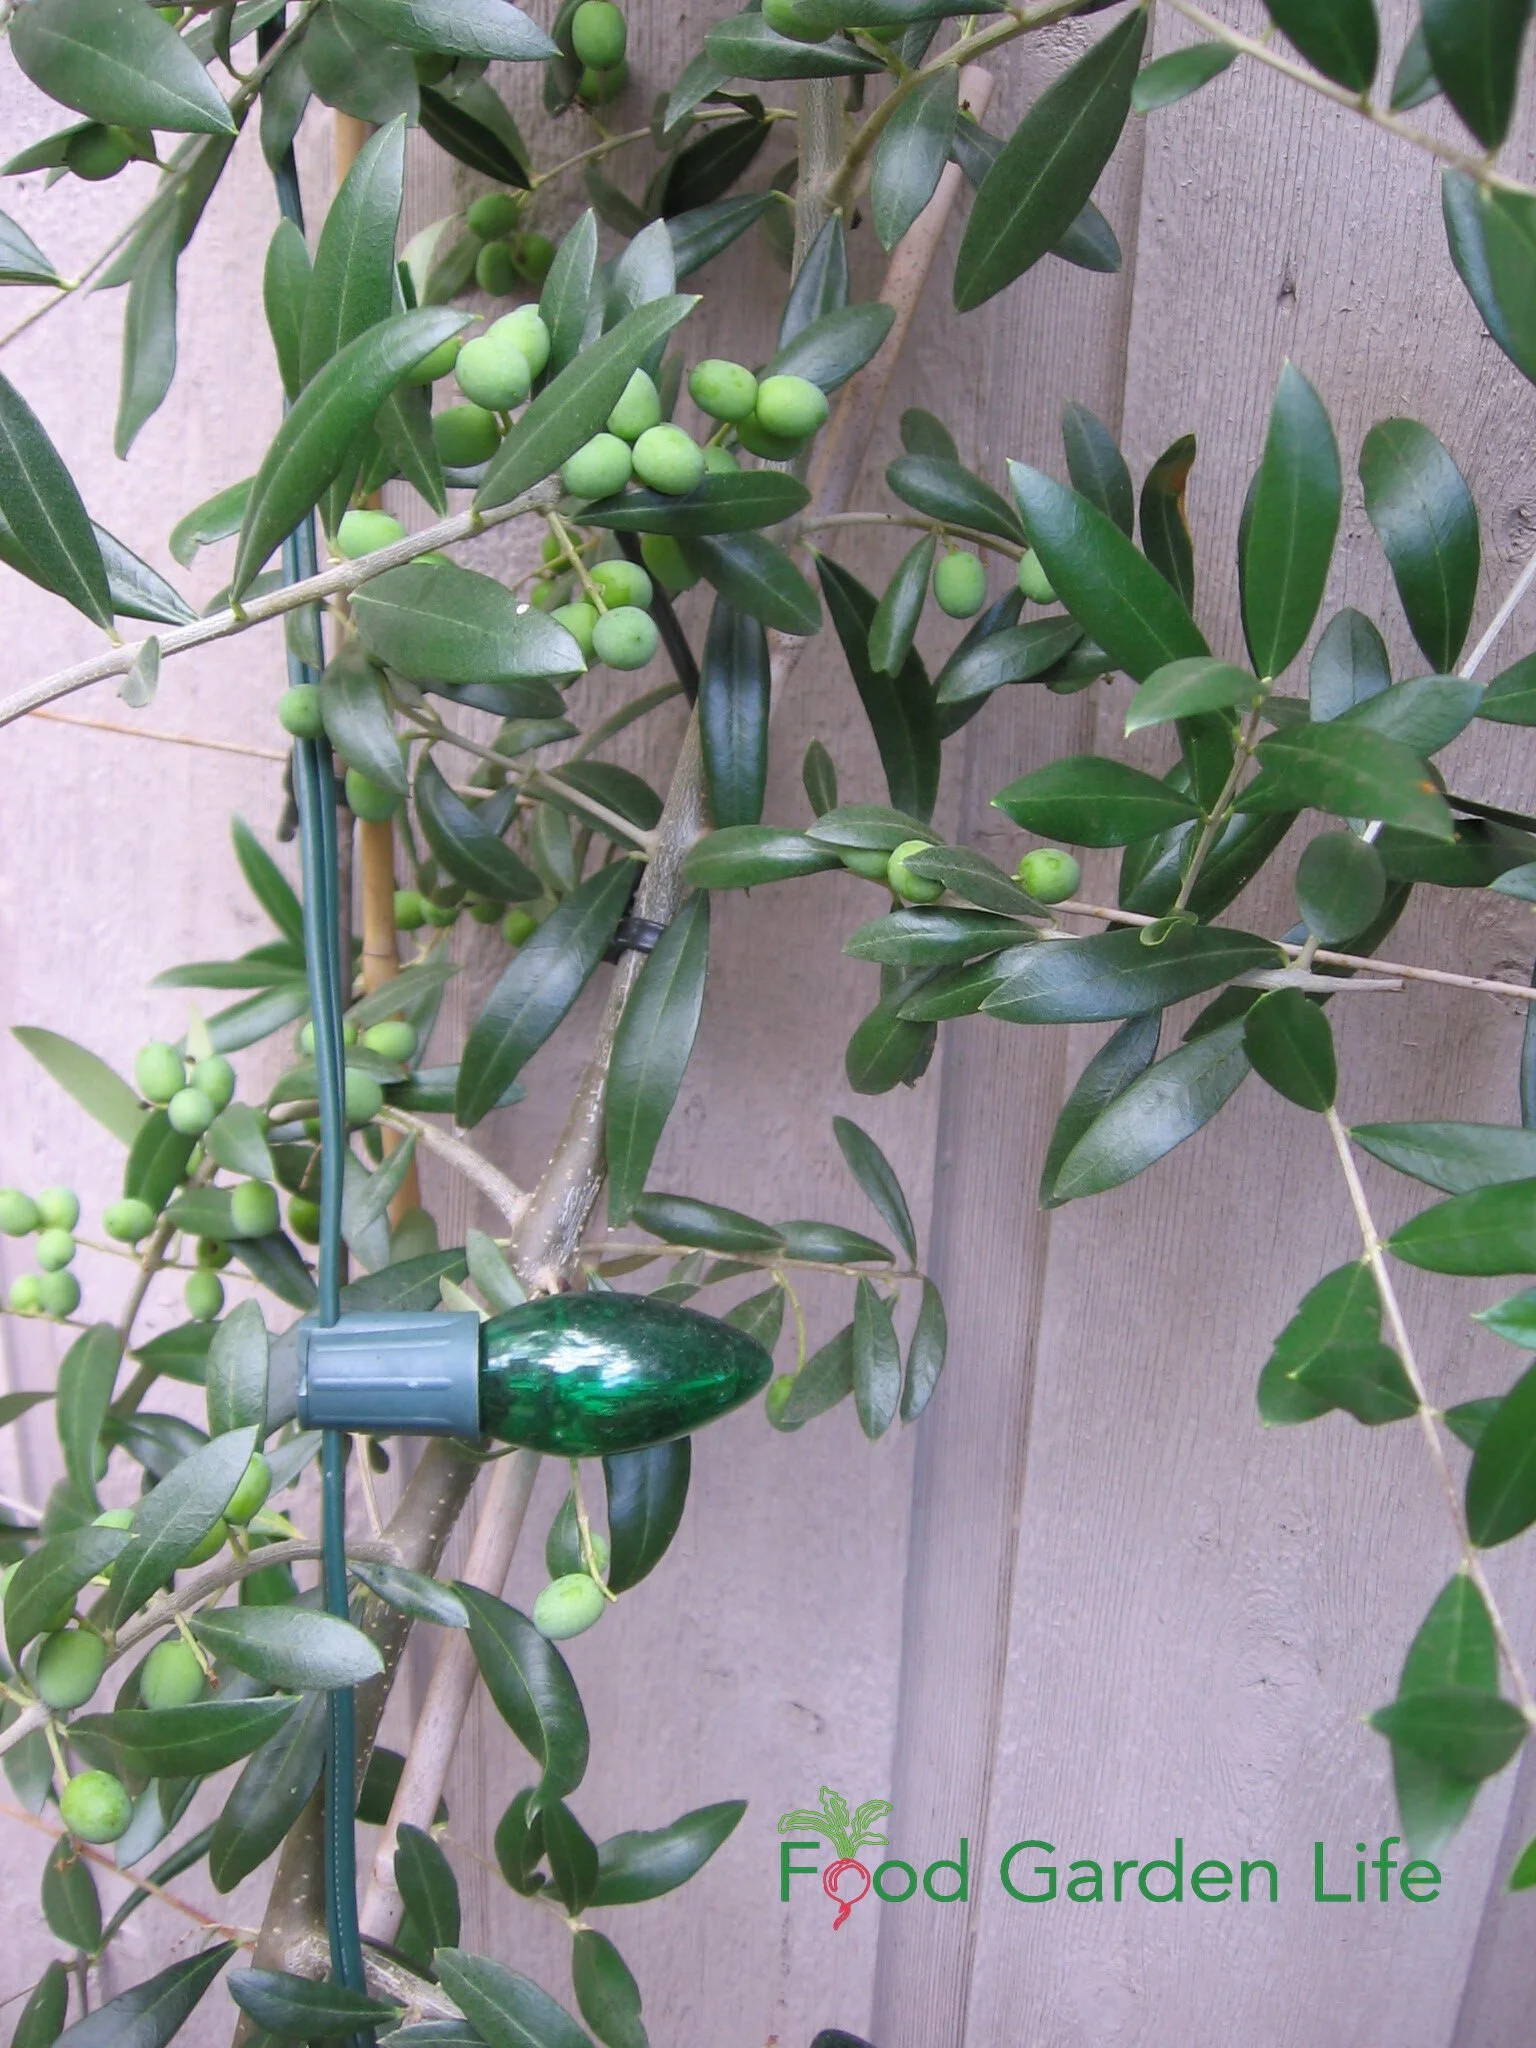
He also has another trick to protect the olive trees during cold spells: Old-fashioned incandescent Christmas lights. When temperatures get low enough, he turns on the lights, which emit just enough heat to keep the temperature in a safe zone.
Olive Trees Elsewhere in B.C.
Conditions Similar to the Mediterranean
Michael Pierce grows olive trees in the ground, out in the open, at his home on Saturna Island, B.C. His nursery, Saturna Olive Consortium, specializes in olive trees.
He says that while the climate on some of the southern Gulf Islands and around Victoria makes it possible to grow an in-ground olive tree, it's borderline.
“They grow more slowly because the growing season is shorter and the conditions are cooler,” he explains.
Duncan tells local gardeners not to waste the south- and west-facing walls on their property on roses…save them for an olive tree!
Growing an Olive Tree in Colder Canadian Climates
Grow Your Olive Tree in a Container
If temperatures drop low enough, Bob Duncan turns on the incandescent Christmas lights on his olive plants as a source of heat.
My own potted olive trees in Toronto survive winter in a cool sunroom or an insulated garage. They’ve even spent the season in our dining room, though that’s not ideal.
A friend overwinters her olive tree by the south window in the house.
Find out more about how to grow an olive tree in a pot.
While an olive tree can make an attractive indoor plant, Duncan and Pierce both point out that without a cool spell, the flowering cycle of the olive tree can be disrupted. So if you overwinter it at room temperature, you might not get flowers. No flowers means no olive fruit.
Don Moffat, who works as an ornamental gardener in Toronto, has helped clients overwinter olive trees. A smaller olive tree, he says, can be buried in the ground to protect it from the cold.
Duncan notes that while an in-ground olive tree easily withstands -10°C (14°F), a potted olive tree should be exposed to no more than a light freeze. “The roots are not as tough as the upstairs,” he says.
Getting an Olive Tree to Flower and Fruit in Canada
An Olive Tree in a Container Needs a Cold Spell!
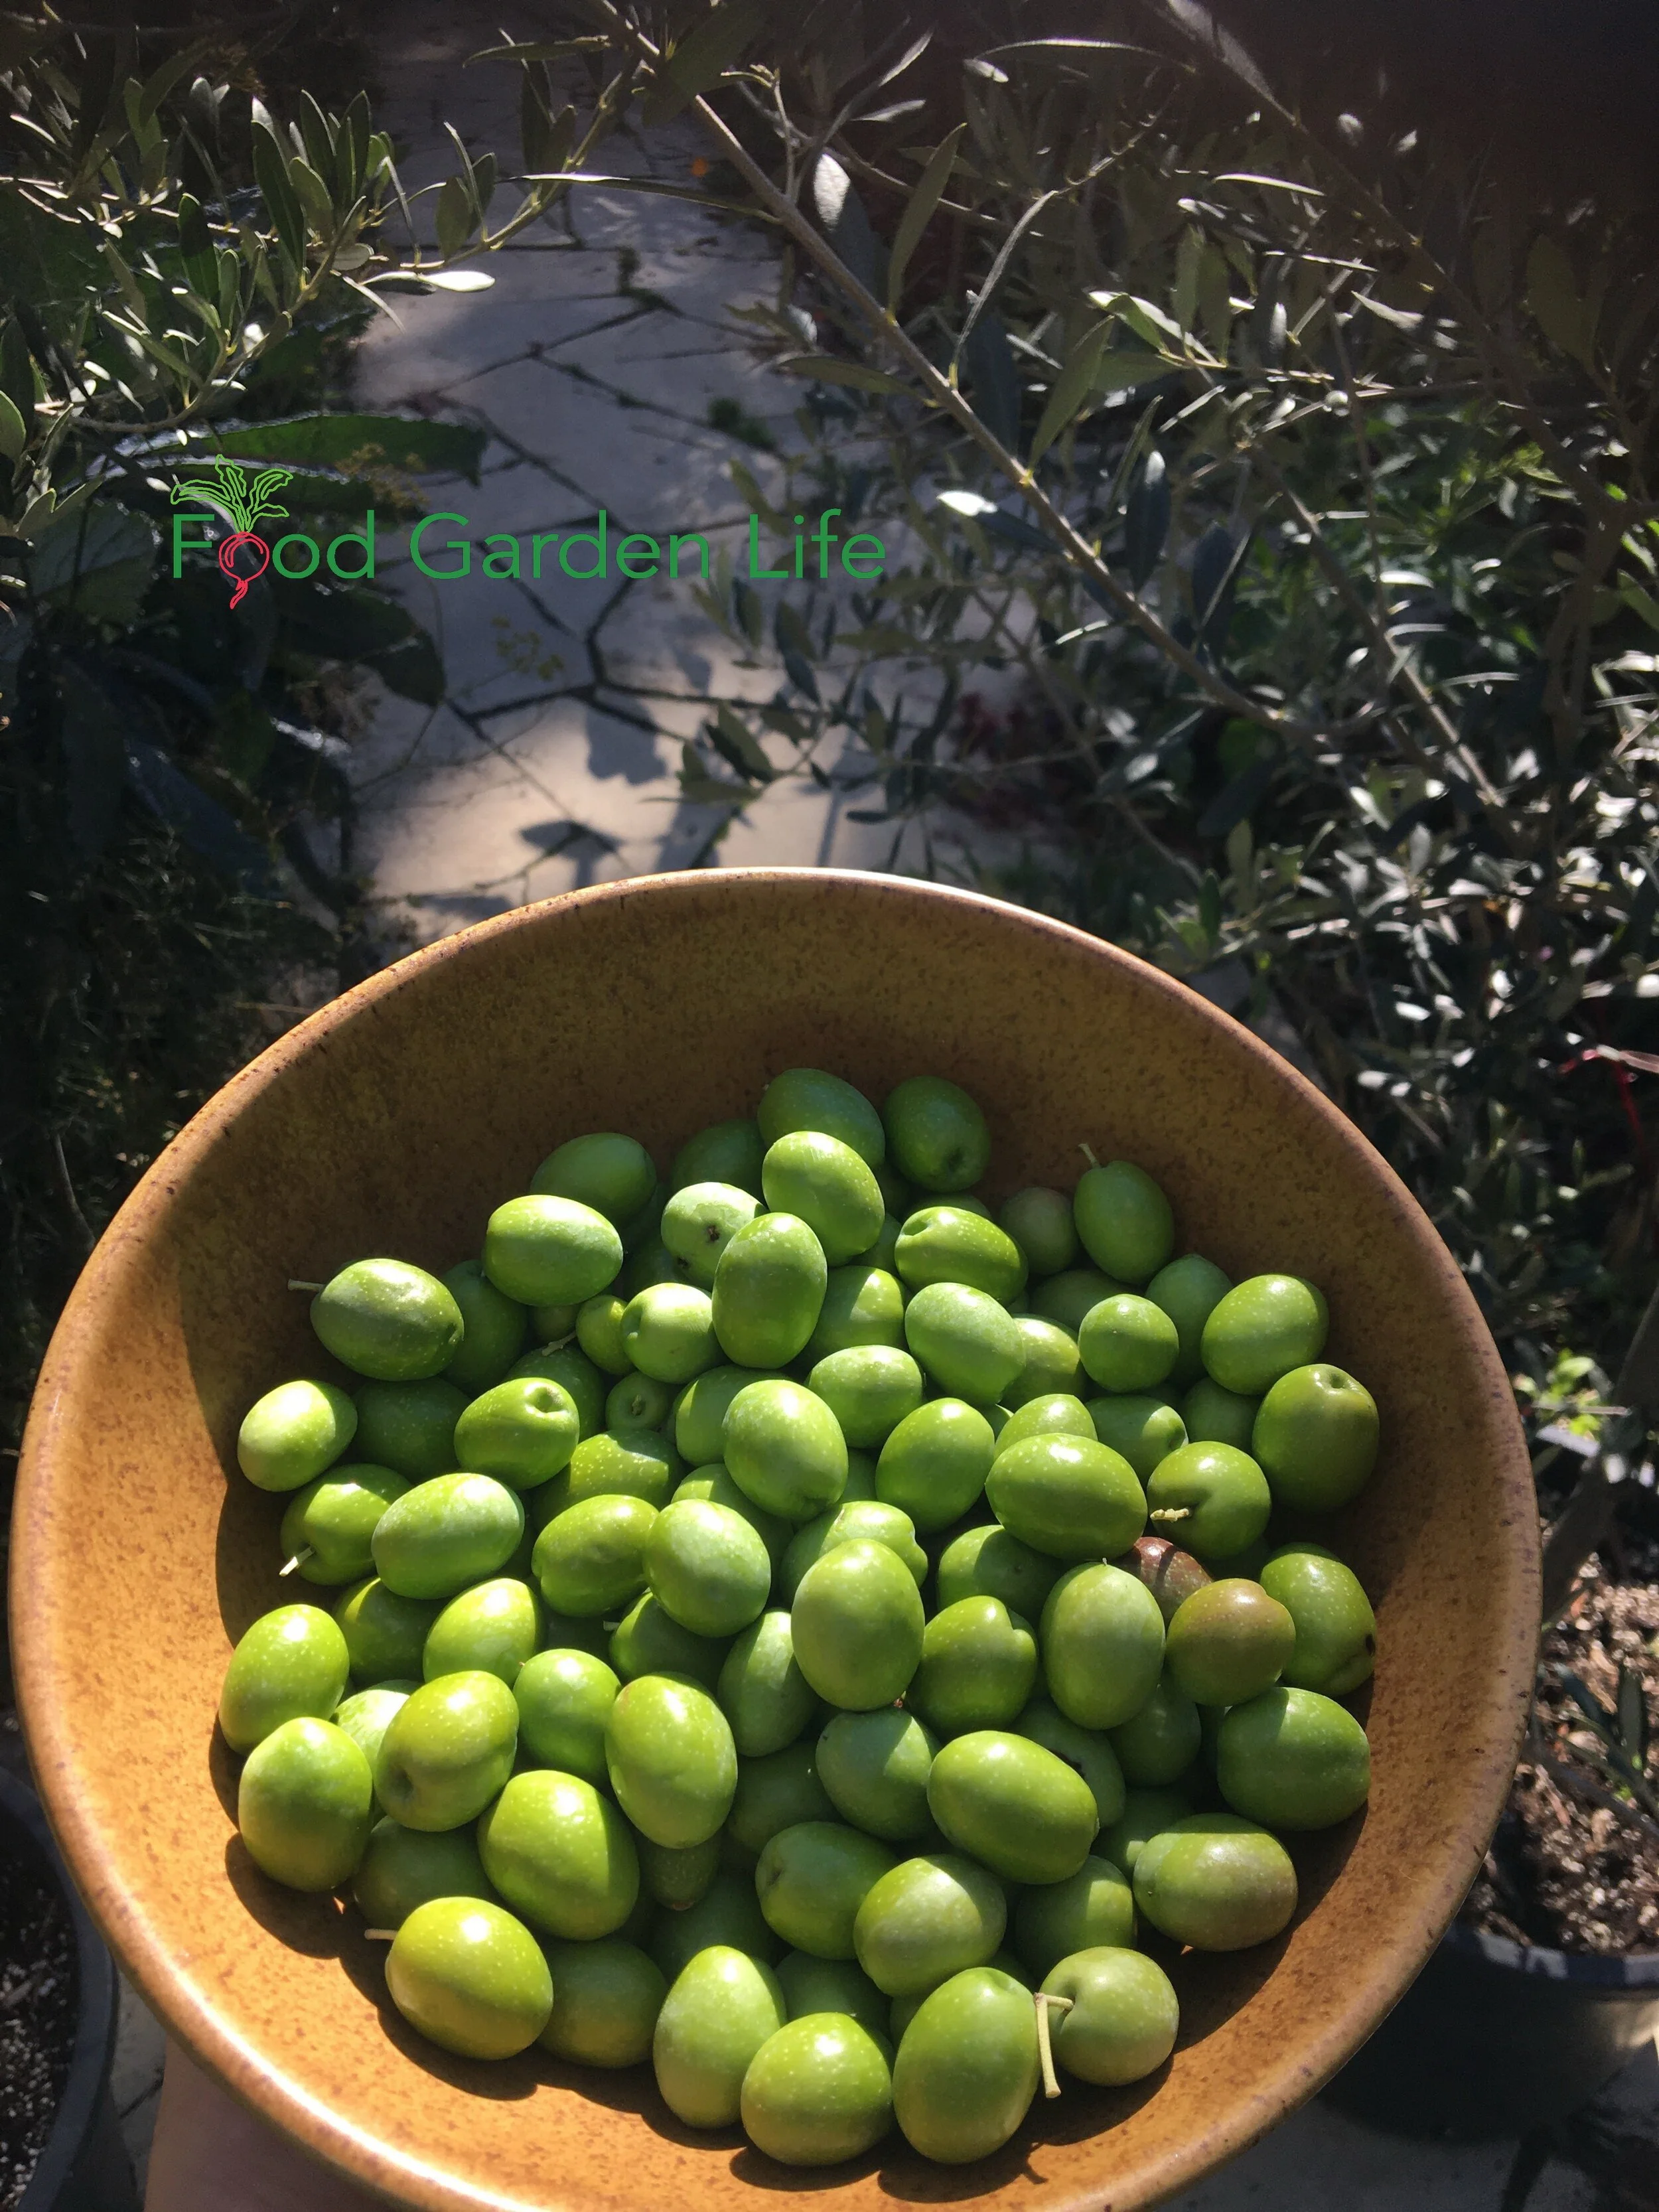
My Toronto olive harvest! I harvest them as green olives.
My original two olive trees—clones from the same plant—looked great but didn't give me olives for years. Duncan told me that they likely needed a cold spell. So I tweaked my overwintering technique to give them cold, bright conditions over the winter in a minimally heated greenhouse. They only get partial sun over the winter; that's fine.
Duncan also explained that because my plants are both the same variety, and because an olive tree is not always self-fertile, I should get another variety so they can cross-pollinate.
While Duncan has seen plants in isolation produce some olives, “It's better to have two varieties,” he says.
So I got a third olive tree—another variety. And between having two varieties, and providing a cold, bright spell over winter, my olives began to flower and set fruit.
Olive Tree Pollination
Want to Help Your Olive Tree?
“There is pollen everywhere,” says Duncan, as he talks about when the trees bloom.
Olive trees are wind-pollinated. But he helps to pollinate his olive trees, using a feather duster, or a vacuum set on reverse to blow.
I don't use a feather duster or vacuum for my potted olive trees. But I do keep the pots fairly close together when the trees bloom.
Olive Harvest
Even if you live somewhere too cold for olive trees to survive the winter, you can enjoy the exotic touch of an olive tree in your garden. This book gives you what you need to know to grow an olive tree in a pot. (And get olives!) Buy at Amazon.ca and Amazon.com.
Pierce usually harvests olives in November. Harvest time depends on the growing season, the variety, and stage of ripeness.
Olives can be picked before the fruit is ripe, while still green. That where green olives come from.
But green olives eventually ripen to another colour, and they can also be picked as they start to change colour, or when fully coloured.
Maintaining an Olive Tree
An olive tree will do best in full sun. When grown in a pot, make sure there are drainage holes. Use a well-draining potting soil and feed with a balanced fertilizer in spring and summer. Keep your potted olive tree well watered, but you don't want the soil to be constantly wet: Duncan advises that they be kept on the “dry side of moist.”
Only have partial sun? Conditions are rarely perfect in a home garden. Worth a try. And if your olive tree is growing in a container, you can move it around to give it as much sunlight as possible.
A young olive tree might need support until its stem thickens. Pruning is usually done in the spring. Prune to obtain the desired size and shape, removing crossing branches. Olives grow into small trees. Duncan's reach up to the eaves of his house.
But the gardener decides when the olive tree has reached its final size. My own olive trees are in 14” pots; I prune the plants to six feet in height so they are easily carried through a doorway.
An olive tree grown from cuttings (as are most commercially available plants) is “physiologically” mature and will fruit while still small. Pierce says, “I've seen a little, twelve-inch olive tree start to flower and get fruit.”
Pin this post about How to Grow an Olive Tree!
Olive Tree Varieties
Choose an Olive Tree for Hardiness and the Type of Olives
There are many olive varieties, and some are more tolerant of cold than others, says Duncan. Pierce finds the cultivars Frantoio and Leccino have good cold hardiness. These varieties are both from Italy.
But for gardeners growing olives in pots and providing a protected spot for the winter, this cold hardiness is not as important as it is for people growing an olive tree in the ground in southern BC.
My original two olive trees are an unnamed variety with olives that are large, plump, and green when I pick them here in Toronto in October. My third olive tree, which came home in the suitcase from Bob Duncan's nursery, is a Frantoio, and it's smaller fruits are just starting to colour up as I pick from my olive trees before stowing them away for the winter.
There are some varieties grown mainly as table olives. Other are for the olive oil. Some are for both olive oil and fruit.
More on Growing an Olive Tree in Cold Climates
Find out how to grow an olive tree in a pot.
Find This Helpful?
Enjoy not being bombarded by annoying ads?
Appreciate the absence of junky affiliate links for products you don’t need?
It’s because we’re reader supported.
If we’ve helped in your food-gardening journey, we’re glad of support. You can high-five us below. Any amount welcome!
Here’s More Exotic Fruit You Can Grow
If you get a kick out of growing things where they don’t normally survive, find out about how to harvest figs and lemons in cold climates:
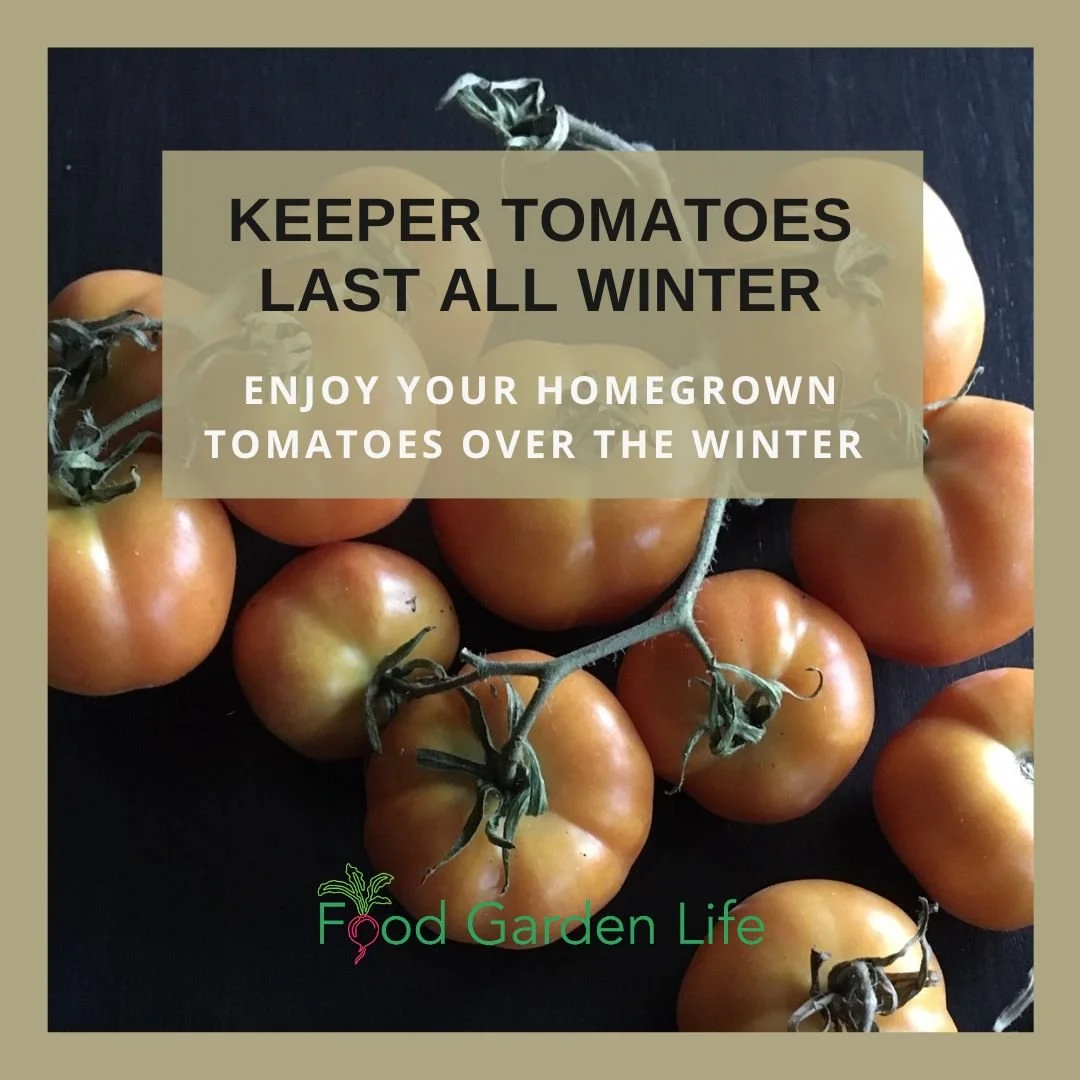
Eat Your Own Fresh Tomatoes in March! Grow Storage Tomatoes
By Steven Biggs
Long Keeper Tomatoes Last all Winter
With the right tomato variety, you’ll still be eating your own fresh tomatoes in early spring. It’s often March by the time I use up my fresh tomatoes.
That’s right. March.
Yet I picked the tomatoes the previous October, just before the first fall frost.
Tomatoes that store well are called long-keeper tomatoes, keeper tomatoes, storage tomatoes, or winter tomatoes.
These storage tomatoes are a simple way to add fresh, homegrown veg to the winter menu. Perfect for home gardeners.
If you’re interested in growing long keeper tomatoes, keep reading to find out how you can enjoy your own homegrown tomatoes over the winter.
What’s a Long Keeper Tomato?
Let’s be clear: Long keeper tomatoes are NOT like a thin-skinned, juicy tomato.
They’re thick-skinned. It’s because of that thick skin that they last a long time without spoiling.
Storage Tomato…Not a Thin-Skinned Slicer
I once gave long keeper tomato plants to my neighbours Joe and Gina. They were avid veg gardeners. Loved tomatoes. I thought they’d love the idea of having their own storage tomatoes all winter long.
But they hated my keeper tomatoes…
That’s because they loved juicy tomatoes for sandwiches and meaty tomatoes for sauces. Keeper tomatoes are for storage—they’re not summer sandwich material.
Expecting a keeper tomato to be like a beefsteak tomato is like expecting a pickup truck to drive like sports car. Ain’t going to happen. The purpose of each is quite different.
When to Sow Long Keeper Tomato Seeds
Because I harvest my keeper tomatoes at the very end of the season, there is no point to starting them too early. (My first fall frost is usually late October—so that means I’m only harvesting the keeper tomatoes in October.)
I start my summer-eating tomato varieties 6-10 weeks before the average last frost date, so that I can enjoy fresh tomatoes as soon as possible.
But I only start the keeper tomato varieties a couple of weeks before the last spring frost. Then I transplant them into the garden when the plants are big enough.
Want to grow your own storage tomatoes from seed? Get tips to grow great tomato seedlings at home.
How to Grow Storage Tomatoes
In the garden, grow storage tomatoes as you would other tomato varieties. The main difference is that there’s less of a rush to get them going early.
Here’s a guide to staking tomato plants.
How to Store Long Keeper Tomatoes
If you have only a few storage tomatoes, put them in a bowl on the counter; they last well and look nice. But for longer-term storage, a slightly cooler temperature is better. That way, they’ll last longer. I store long keeper tomatoes in a cool basement room, spread out on a tray.
Hurray! No processing, no freezing.
Here’s another way to store keeper tomatoes: Leave the tomatoes on the plant, and then harvest the whole plant. Then, hang the plant upside down, somewhere cool. The tomatoes continue to ripen on the plant.
Wondering about how to ripen all the other green tomatoes left in your garden in the fall? Here’s an article that tells you how.
How to Use Keeper Tomatoes
Keeper, or “winter,” tomatoes are perfect for chopping up to use in salads and in cooking.
My favourite way to use them is in bruschetta.
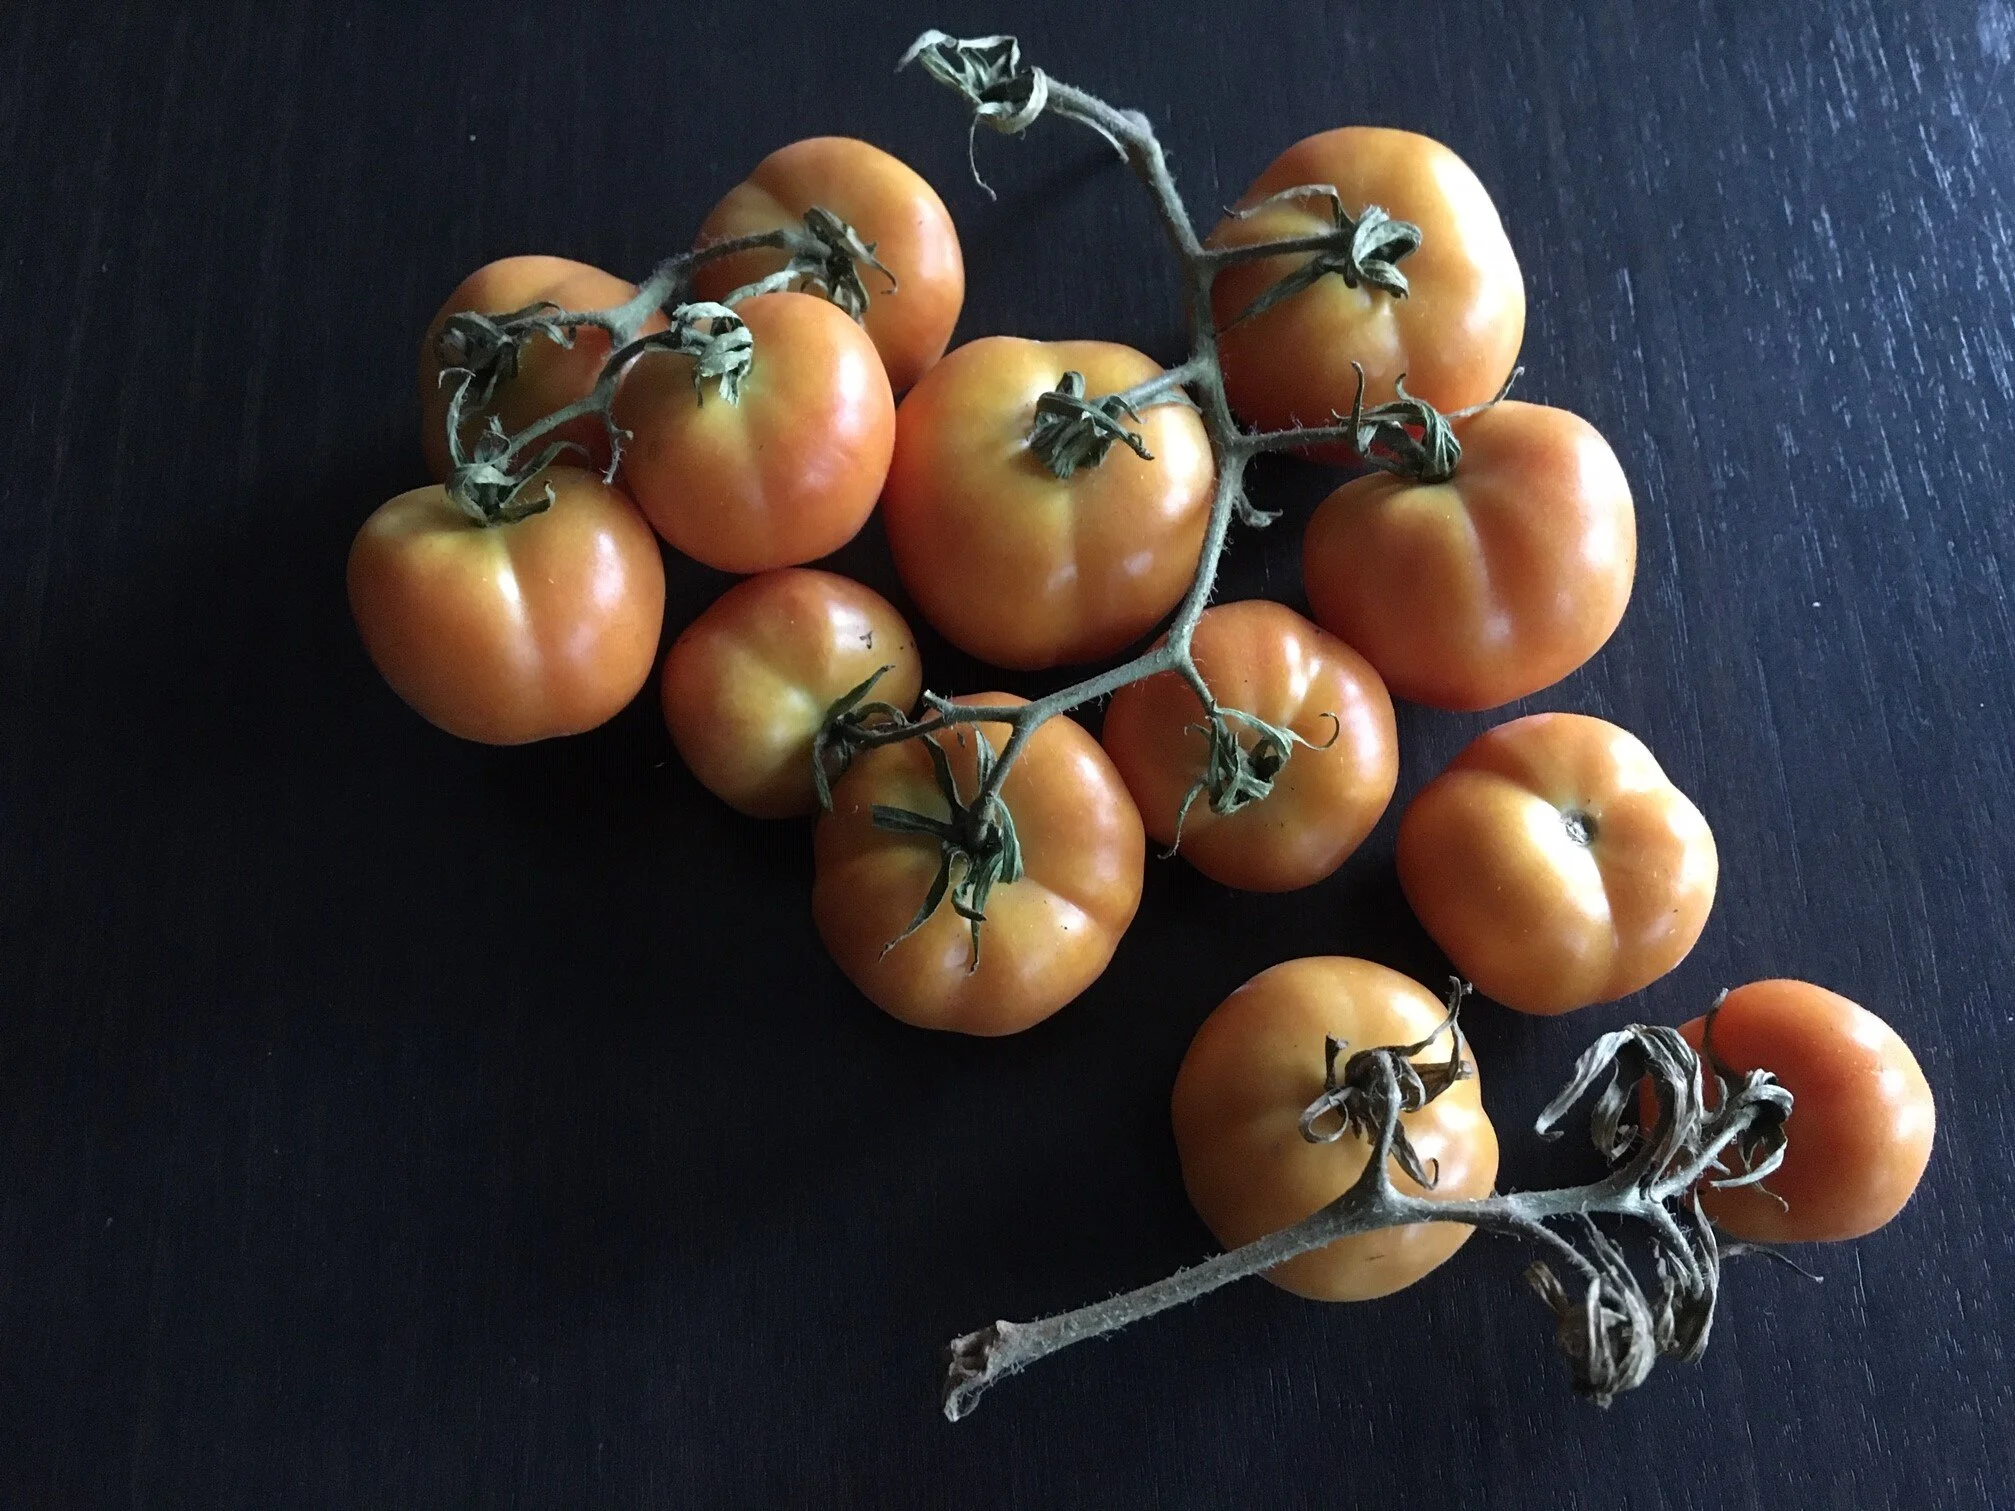
Tomatoes in March. Grow a “keeper” or “winter” tomato.
Long Keeper Tomato Varieties
My first long keeper tomato variety came from my Dad’s friend Dino. Dino simply called it a “winter tomato.” So I just call it Dino’s Winter Tomato.
When it’s ripe, the skin has an orange colour; and when you cut into it, the flesh has a light red colour.
There are many keeper varieties around. Here are some to try:
‘Long Keeper’ is an old variety that’s widely available.
Prairie Garden Seeds sells a keeper tomato called ‘Clare’s Tomato’.
‘Green Bee’ is a firm-when-ripe tomato that grills well—and it’s also an excellent storage tomato.
Looking for a beautiful keeper tomato? Then try ‘Evil Olive’. It’s a great storage tomato. (Don’t be put off by the name, it’s lovely!)
‘Fakel’ is an old processing variety with a thick skin. It’s a medium-sized red tomato that’s good for fresh eating and storage. So if you want something that’s good sliced but also stores well, a good option. (Determinate plant, so good if you’re doing container gardening.)
‘Piennolo del Vesuvio’ is an Italian heirloom from the area around Mount Vesuvius. It forms clusters with cherry-tomato-sized fruit having a pointy tip. The clusters are traditionally picked and hung indoors to slowly ripen through the winter.
More on Tomatoes
Find This Helpful?
Enjoy not being bombarded by annoying ads?
Appreciate the absence of junky affiliate links for products you don’t need?
It’s because we’re reader supported.
If we’ve helped in your food-gardening journey, we’re glad of support. You can high-five us below. Any amount welcome!
Course: Tomato Overload Masterclass
Want to up your game growing tomatoes?
This self-paced course helps you choose great varieties, grow great seedlings, give plants the care they need, and enjoy an abundant harvest.
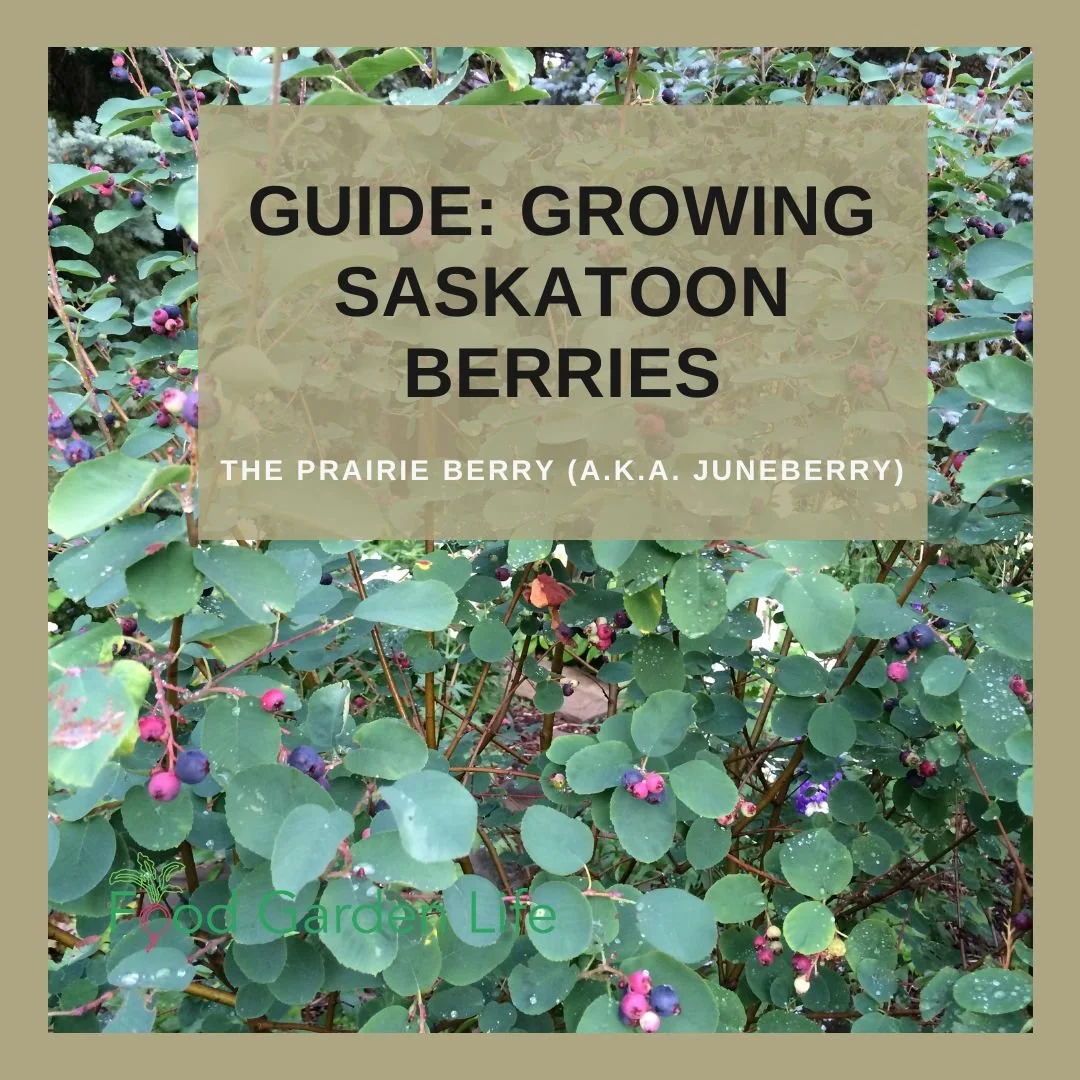
Guide to Growing Saskatoon Berries: The Prairie Berry (a.k.a. Juneberry)
Guide to growing saskatoon berries. A Saskatoon bush is a great addition to a home garden…
By Steven Biggs
How to Grow a Saskatoon Bush
As an Ontarian, there was a fruit that I never ate growing up.
But I heard lots about it from Mom.
She grew up in Western Canada, and talked about the saskatoon berries that her parents grew. And when I finally saw a saskatoon bush, on a trip to her childhood home, I was surprised that the row of bushes was taller than me. I'd been expecting something puny, like the wild blueberry bushes we get in Ontario.
What is a Saskatoon Bush?
The saskatoon bush (Amelanchier alnifolia) is a native North American fruiting bush. It has a wide range: Wild saskatoon bushes are found in Alaska and Yukon, and in the harsh conditions of the prairie landscape.
It has a few aliases: South of the border you might hear it called juneberry (june berry), shadbush, and western serviceberry. And in the east, it's sometimes called serviceberry—like it's many kin in the Amelancheier clan. (There are many serviceberry species, some shrubby, some growing as small trees.)
The saskatoon bush (Amelanchier alnifolia) is a native North American fruiting bush.
(If you’ve ever grabbed a handful of wild serviceberries or saskatoons and them spit them out because they’re pithy and dry, it’s time to try the domesticated version! The flavour and texture of the wild berries varies a lot, can comparing them to Saskatoon berries is like comparing a crabapple to a big, red, juicy apple from an orchard.)
Saskatoon Fruit
Ripe saskatoon berries look a bit like blueberries...but the similarities end there. They have a taste of their own, a bit nutty and slightly almond-like.
(In case you’re interested, they’re actually related to apples and mountain ash, so it’s no surprise they’re very different from blueberries.)
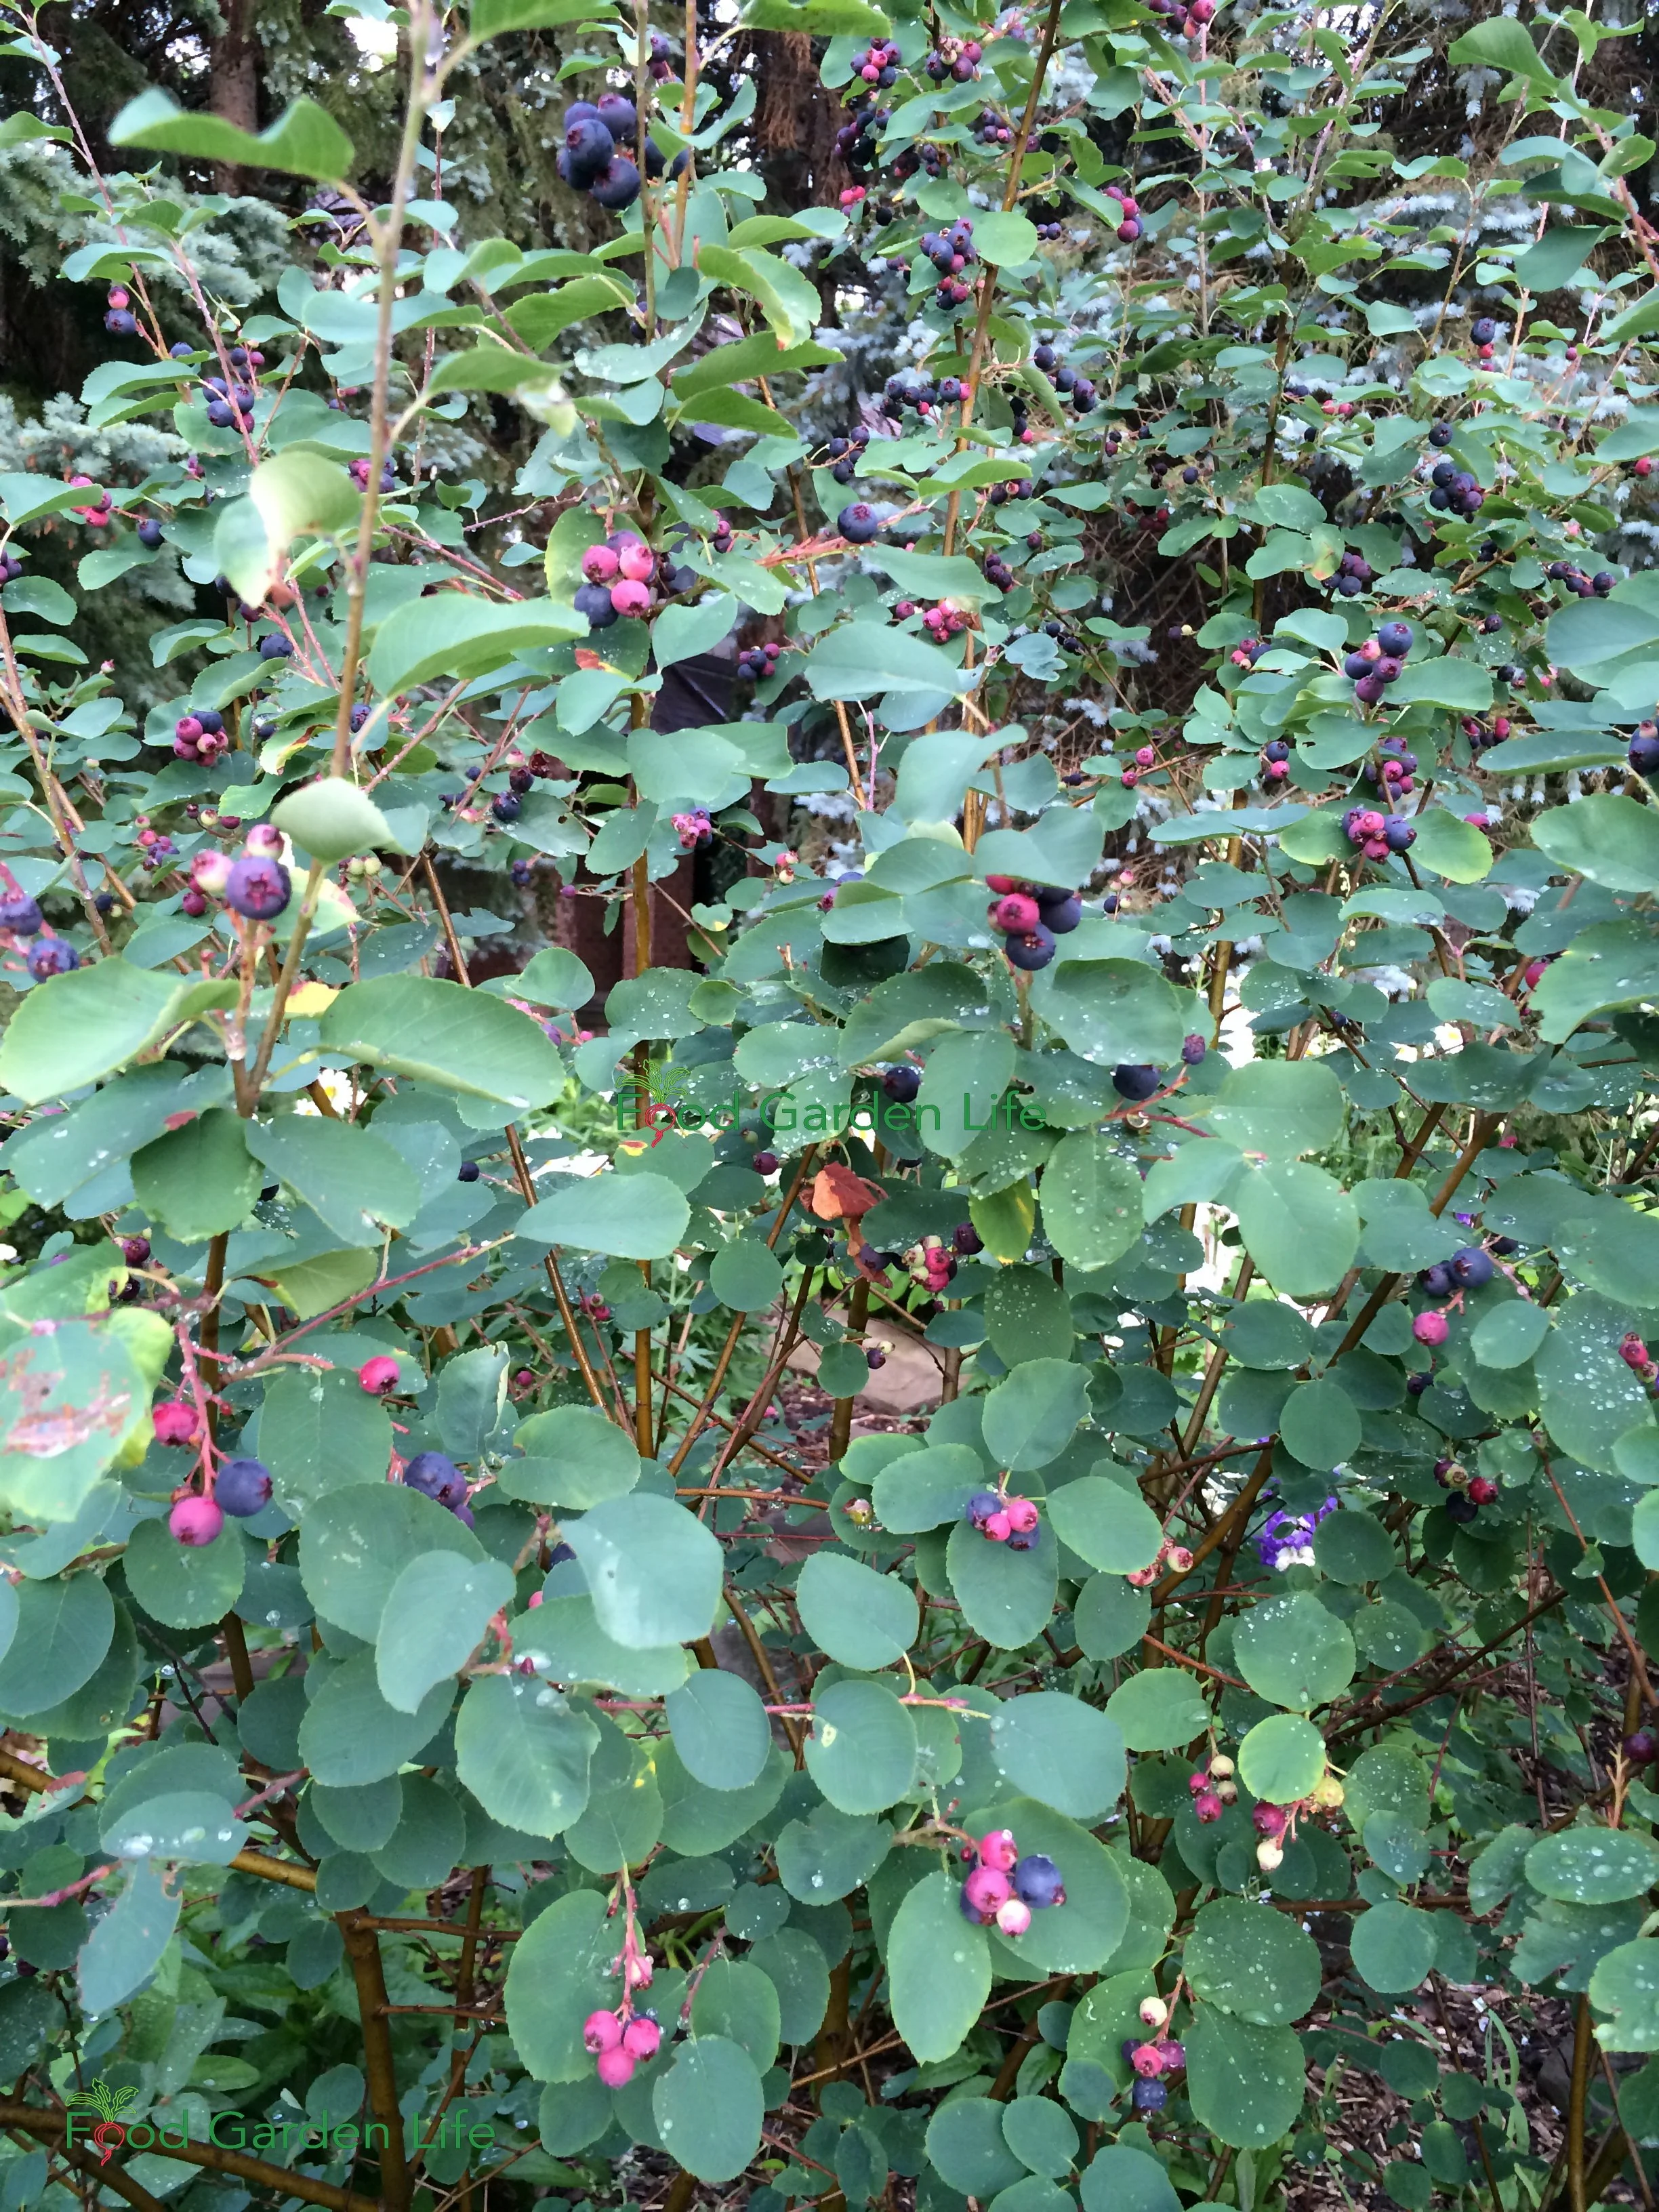
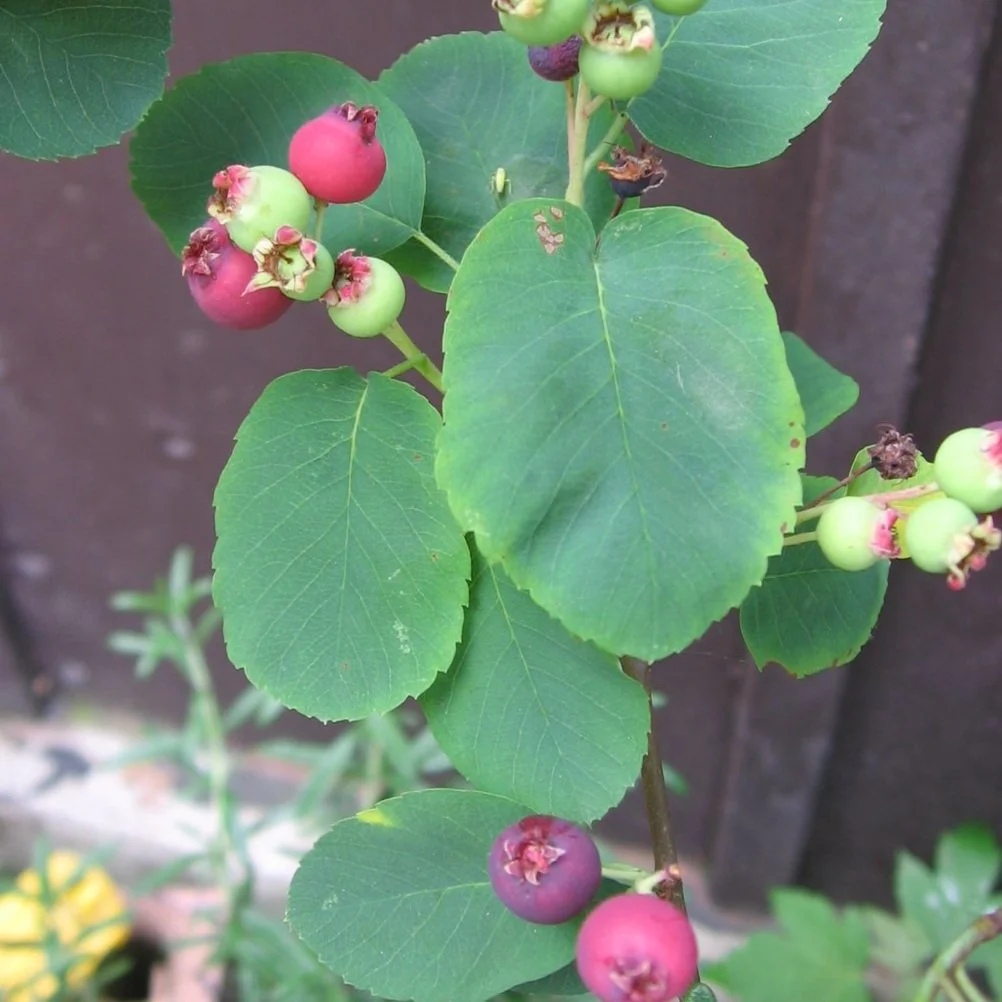
The saskatoon fruit turns from green to red as it ripens, with fully ripe fruit eventually turning deep purple—almost black.
Saskatoon Bush Size
Saskatoon bushes can grow to approximately 5 metres (16’) high when not pruned.
But in commercial production, they're often kept shorter, under 1.5 metres (5’) high.
An Ornamental Edible
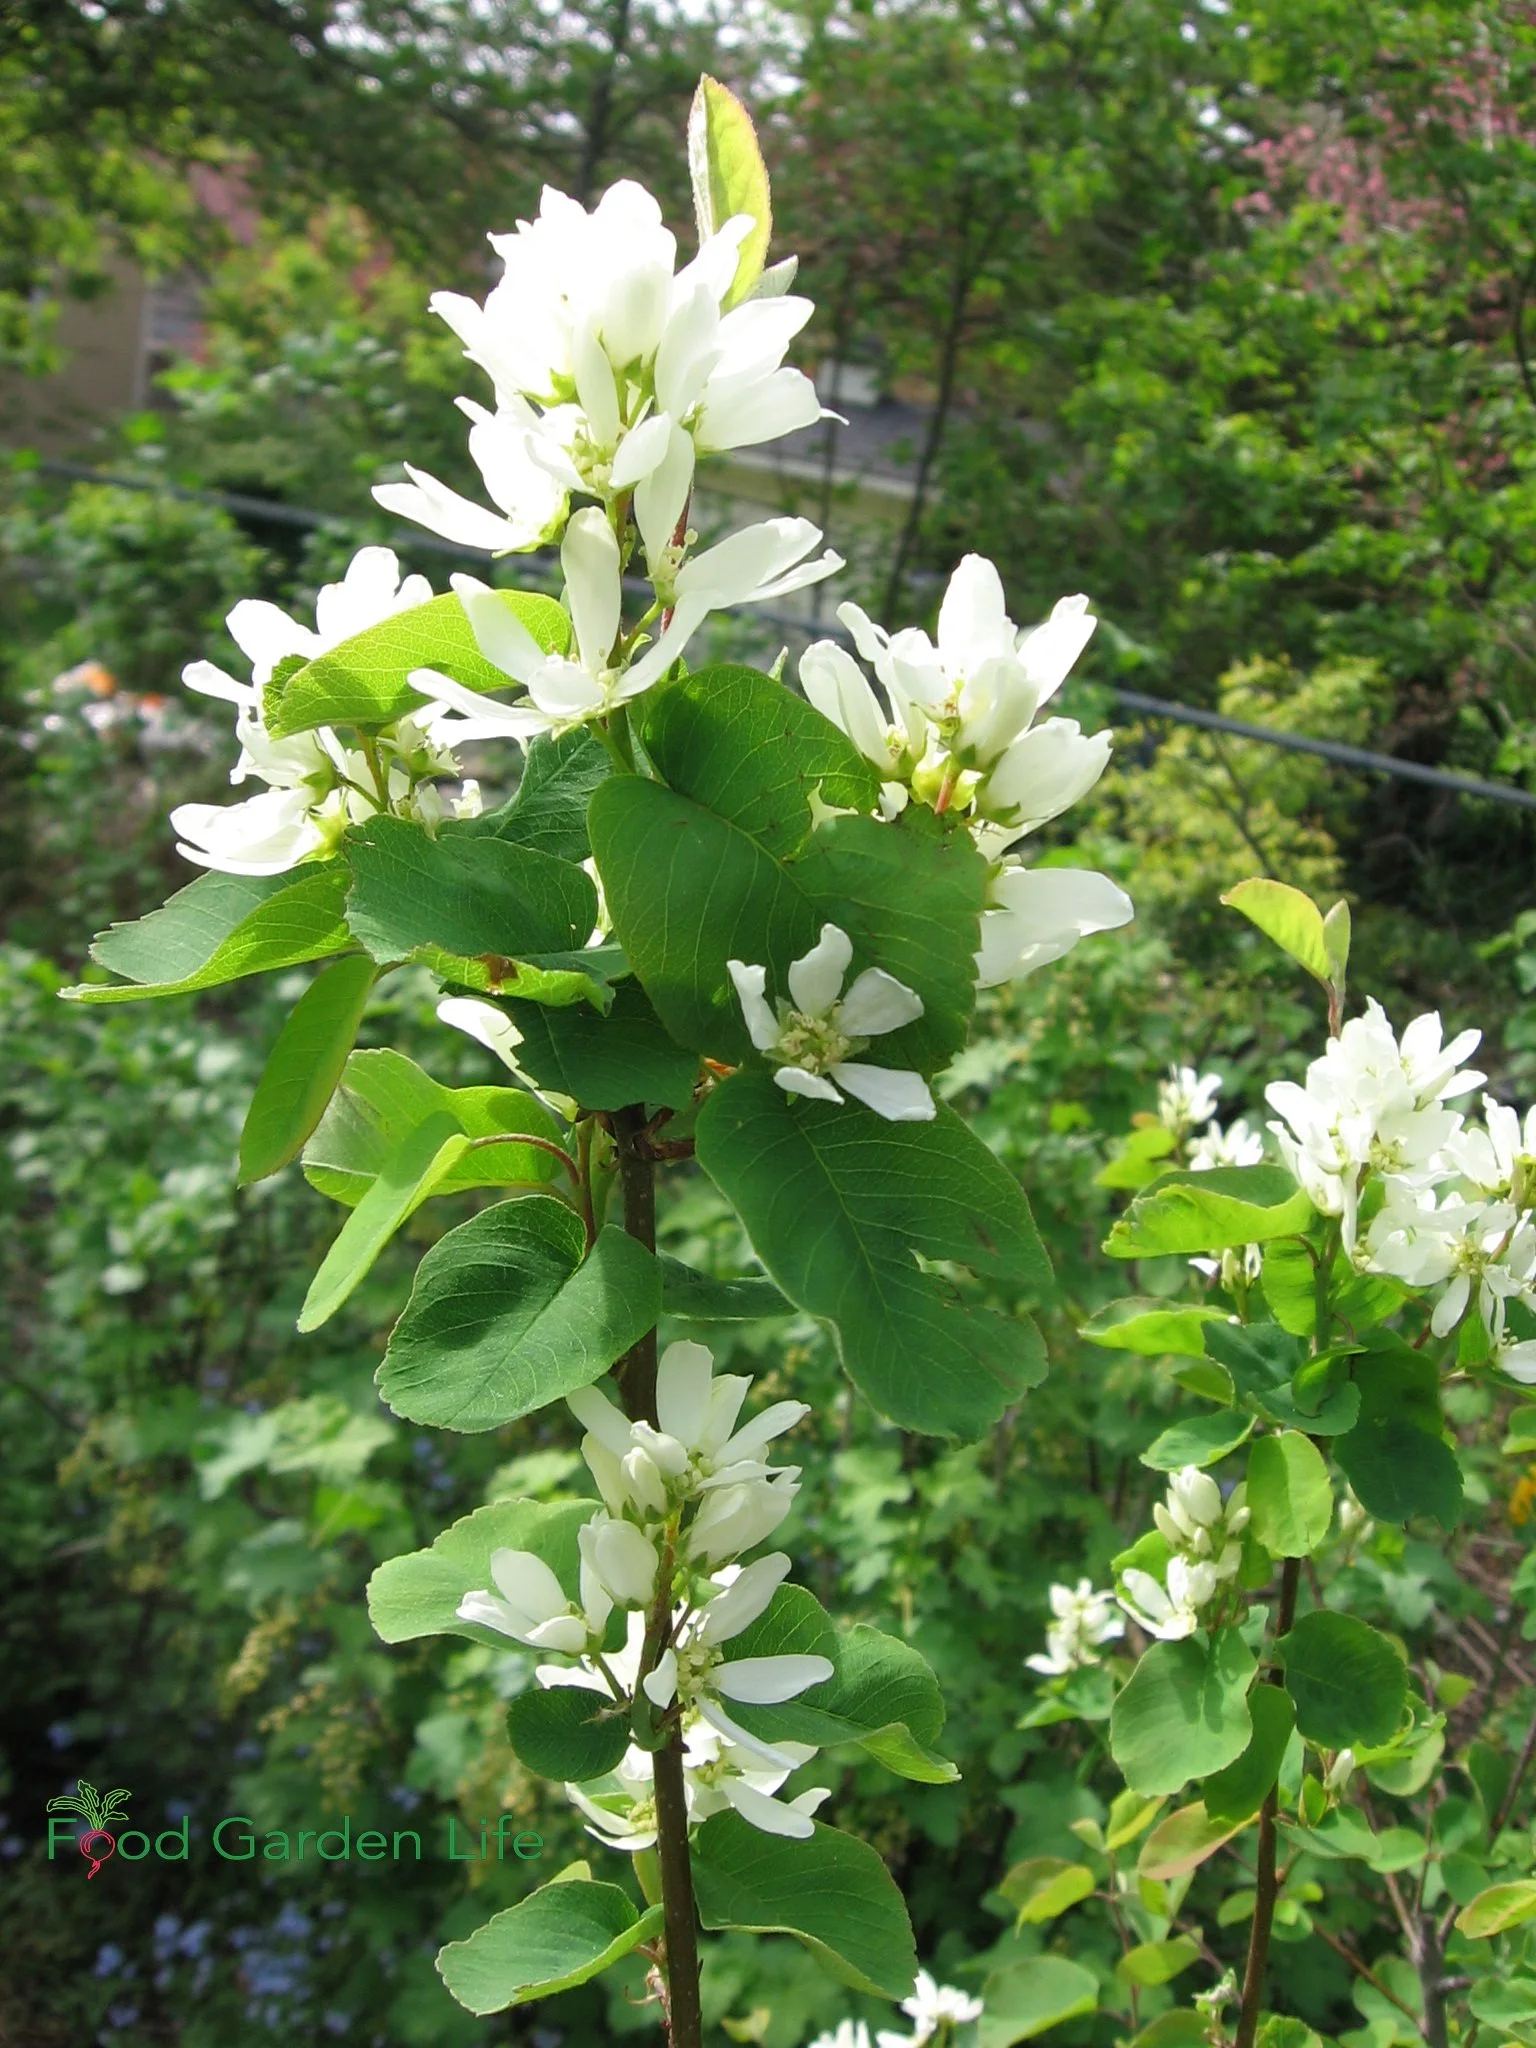
Along with the attractive fruit, saskatoon bushes have showy spring bloom, with clusters of upright flowers.
Saskatoon bushes are a great addition in an ornamental garden too. Along with the attractive fruit, the spring bloom, with its clusters of upright flowers, is very showy.
In the autumn, the leaves paint the garden with a showy orange colour.
Saskatoon Berries Cold Hardiness
It's as tough as nails! No surprise for a plant that’s native to the Great Plains, it takes harsh, dry conditions.
There are a few things that affect hardiness, but it takes temperatures as cold as -50°C (-58°F), and probably colder.
How to Plant a Saskatoon Berry Bush
Choose a Location
Select a location with a well-drained soil. Saskatoon bushes are tolerant of many soil types. So a clay soil with some soil moisture is fine, as long as the soil is not waterlogged.
Full sun is ideal for the best fruit production. It does respectably well in home gardens with partial shade, although the harvest is less than full-sun locations.
If you get late spring frosts, a sloped location where cold air can drain away is best. South-facing locations in cold areas are not ideal, as they warm up more quickly in early spring. That causes flowering while there's still more risk of frost.
Planting a Saskatoon Shrub
When planting most trees and shrubs it's good practice to keep the depth the same as it was before. Not deeper.
There are exceptions to every rule…and the Saskatoon is an exception.
You can plant your saskatoon bush at the same depth; that's fine. But you can also plant it a bit deeper.
Here’s why:
Saskatoon bushes have a habit of suckering—of sending up new shoots beyond the original bush. The bush gets wider over time, and you can end up with a little Saskatoon thicket!
But when planted a few inches deeper, they're less likely to sucker.
After you've planted, keep it well watered for the first year until it's established. Mulch the soil surface around the bush to control weeds and keep in soil moisture.
Landscape with Fruit
That’s easy to grow in a home garden!
Saskatoon Bushes in the Landscape
Saskatoon berries are very versatile in a home landscape.
Here are a few ideas:
Saskatoon Hedge. If it’s an edible hedge you’re after, look no further than the Saskatoon! It’s really ornamental too!
Saskatoons in a Food Forest. In forest gardens, Saskatoons can be grown as shrubs or small trees, and are tolerant of partial shade.
Saskatoon Berries in Containers. Because of their excellent tolerance of harsh conditions, Saskatoon berries are great candidates for container gardens.
I have an edible hedge in my garden that has a saskatoon bush, haskaps, and Nanking cherry.
Find out how to grow an edible hedge.
Check out these 5 types of cherry bushes to grow in an edible landscape.
Saskatoon Berry Care
Pruning Saskatoon Bushes
Regular pruning helps maintain vigour and encourages annual fruit production. (With saskatoon, like many fruit trees and bushes, plants often fruit more heavily every second year, something called biennial bearing.)
With pruning, we're helping the plant grow in a way that's beneficial to us. Importantly, we want to pick saskatoon berries without a ladder! (More fruit within reach means more for you, less for the birds!)
Here are a few more thoughts on pruning your saskatoon bush:
Prune out older, less fruitful wood
Remove diseased branches
The best fruit production is on wood from the previous season (older wood gives some fruit, though not as much)
Some saskatoon shrubs favour one main leading branch (leader) when unpruned. Prune back leaders for a well-branched bush form
Prune when dormant
Remember, prune your saskatoon shrub to control size and to create a multi-stemmed shrub.
With pruning, there are two main types of cut we make:
"Heading" cuts, where we cut a branch back only part way to the main branch they come from, encourage branching
"Thinning" cuts, where we cut right back to the main branch, are used to remove weak or unwanted growth
Feeding and Watering Saskatoon Bushes in a Home Landscape
If you have a well-fed soil that has been amended with lots of organic matter, you might not need to give any additional feed.
Sandy soils don't hold moisture or nutrients as well, so if you're on a sandy soil, be sure to amend the soil with lots of organic matter.
Mature service berry bushes are very hardy and won't require irrigation. While establishing newly planted bushes, water for the first year until well rooted.
When to Harvest Saskatoon Berries
As saskatoon berries ripen, they first turn red or pink. Not all fruit ripen at the same time.
Saskatoons are self-fertile, meaning you get fruit even if you have only one bush. There's no need for a second bush.
Not all flowers open at the same time; and not all fruit ripen at the same time. Fruit on the outside and sunniest part of a bush often develop faster. So expect to pick more than once.
The fruit ripens six to eight weeks after flowering. If you're growing more than one variety, flowering and ripening times vary by variety.
As berries ripen, they first take on a red colour. Next, as they turn to dark purple, you can begin tasting them to figure out if they're close to optimal ripeness. On rip fruit, the flesh is usually pink or red.
How to Use Saskatoon Berries
Our favourite way to use serviceberries is for fresh eating. We graze some in the garden, mix with other fruits for fruit salad, or use them on cereal.
Fresh berries don’t last too long once picked because during picking the skin tears a bit as the stem detaches.
Saskatoon berries go from pink to blue, often to a purple-black colour. Taste some to determine if they’re fully ripe.
Here are a few other ways to use the fruit:
Jams and jellies
Pie
Muffins
Syrup
I've even heard of wine...though I haven't tried it!
And if you want some for using later, freeze them directly in freezer bags—or make some into dried berries.
A few saskatoon berries go nicely atop a crème brûlée! Find out how to make crème brûlée—gardener style!
Propagating a Saskatoon Bush
In the nursery trade, saskatoon bushes are often propagated by cuttings and tissue culture. Sometimes they are seed-grown, but there can be more variability with seed-grown plants.
For home gardeners, rooting saskatoon cuttings is a bit more tricky, as you need controlled conditions.
But its tendency to sucker makes it easy for home gardeners to propagate. The suckers it sends out are from underground stems (called stolons). They shoot up a little way away from the main plant. These can be removed from the parent plant using a spade.
Landscape with Fruit
That’s easy to grow in a home garden!
Saskatoon Berries Varieties
Because saskatoon berries are grown as a commercial crop, there are a number of cultivated varieties. You will probably find the best selection at a specialist nursery.
Here are things to look at as you compare saskatoon varieties:
Fruit size
Fruit colour (there are even white-fruited varieties...but they're usually grown as ornamentals)
Bush height and spread
Bloom time
Disease resistance
Pests and Diseases of Saskatoon Shrubs
In a home garden setting pests and diseases are infrequent.
Here are three to watch for:
Rabbits. They enjoy snacking on young branches on new bushes over winter (use tree guards or chicken wire if this might be a problem)
Birds. Don't leave your harvest too late -- and consider netting if birds are likely to be a problem (or just grow more bushes so there's lots to share)
Saskatoon-juniper rust. This disease needs both the juniper and Saskatoon plants to finish its life cycle. It causes raised yellow areas on leaves and misshapen fruit. Cut out the woody galls on juniper that host the disease (you'll see yellow growths on them in spring). If it’s a problem, look for rust-resistant varieties (Arcadia, Broadmoor, Buffalo, Calgary Carpet)
Saskatoon Berry FAQ
What's the botanical name?
Amelanchier alnifolia (Although there are also a couple of cultivars that are hybrids with Amelanchier stolonifera)
How long will a saskatoon shrub live?
With pruning and good care, a saskatoon shrub fruits well for decades, by which point you'll have taken off suckers to make yourself even more plants!
Find This Helpful?
Enjoy not being bombarded by annoying ads?
Appreciate the absence of junky affiliate links for products you don’t need?
It’s because we’re reader supported.
If we’ve helped in your food-gardening journey, we’re glad of support. You can high-five us below. Any amount welcome!
Course on Home Fruit Growing
How to a Grow a Mulberry Tree
How to grow mulberry in cold climates.
By Steven Biggs
Fowling in Love with Mulberry
My neighbour Hubert handed me a pheasant and a duck from his freezer. I was working for the summer in a rural part of the UK, and regularly saw pheasant when I went out for a jog. Now I’d get to taste one!
As a 20-something-year-old, I’d never cooked either before…and had never even tasted pheasant.
But I remembered reading that the meat is rich and dark, well-suited to a tangy accompaniment.
And I remembered a mulberry tree in a nearby hedgerow.
I’d been grazing fruit from the mulberry tree every time I walked past it. But I had yet to cook the mulberry fruit.
This was my chance! Not really sure what I was doing, I made up a mulberry-Cointreau sauce for basting the roast. The company I had for supper thought it was pretty good.
Roasted fowl with mulberry-Cointreau sauce cemented my appreciation for the taste of mulberry.
Mulberry for Home Gardens
There are many types of mulberry suited for gardens in cold climate. Photo by Grimo Nut Nursery.
Mulberries gets a bad rap. Mention mulberries and many people picture polka-dot-stained sidewalks and bird-bespattered cars. Or experienced gardeners worry that it’s a weedy plant.
Why is it that gardeners always want what’s difficult to grow? Why not appreciate what grows on its own?
This fruit does not play hard-to-get.
Mulberry is a great fit for home gardens because it’s:
Fast-growing
Hardy
Problem-free
Tolerant of many conditions
Very fruitful
And it’s a fruit that you likely won’t find for sale at grocery stores. Too fragile to ship when ripe.
Too bad mulberries get a bad rap for being vigorous growers.…and for the purple stains from falling fruit. They’re a great fruit for home gardens in cold climates.
What does a Mulberry Tree Look Like?
What does it look like? The question should really be, “What does a mulberry tree look like when pruned to feed people, not birds. (More on that below.)
Don’t grow this as a specimen shade tree. There are nicer shade trees out there.
Grow mulberry as a fruit-producing crop – which means you’ll keep it much smaller than if left unchecked.
Types of Mulberry for Cold Climates
Mulberry names don’t describe the fruit colour. That means a white mulberry tree could be black-fruited, red-fruited, or white-fruited.
If you’re shopping for a mulberry tree, here at the three types you’re likely to find in North America:
• White mulberry (Morus alba)
• Red mulberry (Morus rubra)
• Black mulberry (Morus nigra)
Mulberry names don’t describe the fruit colour. While this ‘Carman’ white mulberry fruit is white, other white mulberry varieties can be purple or black. Photo by Grimo Nut Nursery.
For cold-climate fruit growers, it’s the white mulberry and its hybrids with the red mulberry that are hardiest, some into USDA zone 4.
I’ve read articles in British gardening magazines that disparage the less flavourful white mulberry…but it’s what we have.
White mulberry can grow up to about 15 metres (50’) tall. Because it grows easily from seed—and because birds quickly spread the seeds—feral white mulberry trees are common. (It’s considered a weed tree in some jurisdictions.)
Red mulberry is a native of North America. Pure red mulberry trees are rare because feral white mulberry and red mulberry hybridize readily. Here in Ontario, where red mulberry is native in the south of the province, its threatened by the white mulberry due to their promiscuous hybridizing.
The more diminutive black mulberry, noted for the quality of its fruit, is less hardy, and not suited to northern gardens. It’s suited to conditions in USDA zones 6 and higher.
Other thoughts on selecting a mulberry tree:
There are weeping varieties that get to about 3 metres (10’) tall and can be perfect for small-space gardens (just beware, as there are fruitless varieties of weeping mulberry on the market)
There are dwarf varieties that get to about 6 metres (20’) tall
White-fruited varieties might be the ticket is you’re averse to mulberry stains
‘Illinois Everbearing’ is noted for having a long season of fruiting
Plant a Mulberry Tree
Mulberry trees fend for themselves quite well once established, but here are things you can do to give them a good start.
If you’re planting a container-grown mulberry tree, the first thing to do is look at the roots. Because mulberry is a vigorous grower, it’s common to find roots tightly wound around and knitted together.
Use your fingers to tease apart the roots. We want the roots to grow outwards into the surrounding soil once planted, not continue to grow around in circles.
Water well when first planted and until established.
Pruning Mulberry Trees
Many sources suggest that regular pruning is not necessary with mulberry.
That’s fine if you want to feed the birds.
But if you’re growing the mulberries for yourself, I suggest a different approach: Be aggressive – and do it every year.
Your goal is to create a permanent scaffold of branches that you cut back to every year (see below).
Formative Pruning
Grow mulberry trees in an umbrella shape, so you can reach all of the fruit. Photo by Grimo Nut Nursery.
The best way to get a tree with a well-arranged scaffold is to make it yourself. Get a whip, which is a young, unbranched tree. (You probably won’t find this sort of tree at a garden centre; look for a specialist fruit-tree nursery.)
Then prune that whip so that it grows into a spreading tree. Think short and wide.
Start this pruning process by removing the “leader,” which is the growing tip of the tree. Linda Grimo, at Grimo Nut Nursery, a specialist nursery, suggests, “Stand as tall as you can with your pruners in your hand and clip off the top of the tree.” She explains that this stops it from growing upwards, and encourages the growth of side branches at a height you can reach without a ladder.
Umbrella-shaped mulberry tree in summer. Prune hard to keep berries at picking height. Photo by Grimo Nut Nursery.
Grimo says she likes to grow mulberry trees in an umbrella-shaped scaffold, with side branches (laterals) spaced out around the tree. For ease of getting under the tree to pick, don’t grow the side branches too low on the tree; her preferred height is just over a metre (4’) above the ground.
Annual Pruning
Mulberry trees growing in good soil put on a tremendous amount of growth every year. After formative pruning is complete, prune back almost all of the new growth every year, leaving just 1-2 buds from which the tree can send up replacement shoots.
This harsh pruning doesn’t affect cropping because fruit forms on new growth. “Don’t be afraid, you can’t kill a mulberry tree,” is what Grimo tells concerned first-time mulberry growers.
Prune in late winter, when dormant.
Mulberry Tree Feed and Water
Mulberry trees have extensive root systems, which means that they can do quite well without coddling.
Mulch with compost around the base of the tree to feed the soil and suppress weed growth.
Landscape with Fruit
That’s easy to grow in a home garden!
Mulberry Tree Pollination
Mulberry trees are self-fertile, which means you only need one tree to get fruit.
The small, unremarkable flowers are wind pollinated. (There are even some varieties that set fruit without pollination.)
Mulberry Tree Propagation
Dwarf or weeping mulberry varieties are well-suited to use in small-space foodscapes, even in more traditional gardens.
Mulberry plants grown from seed will be different from the parent plant. Just like apples. There is a juvenile period before a seed-grown mulberry tree will flower and produce fruit, often 5-10 years.
It’s easy to grow from seed. In fact, this is a tree that might just seed itself in your garden.
I don’t recommend growing mulberry from seed, because you don’t know what the fruit quality will be like—and you’ll have to patiently wait through that juvenile stage.
Another unknown if growing from seed: Some mulberry trees are dioecious, meaning male and female flowers are on separate plants…and that could leave you with a tree that doesn’t bear any fruit.
If you want good fruit quickly, start with a known variety. Clonally produced trees—grafts and cuttings—can fruit right away because the clone is from a mature tree, and no longer in the juvenile stage.
Some nurseries propagate mulberry by cutting, some by grafting. For grafting, Grimo says cleft grafts work well. Propagation from cuttings can be more challenging for home gardeners without a misting system, bottom heat, and rooting hormone.
Mulberry Trees in Garden Design
Mulberry trees are quite versatile in garden design. Here are ideas for using mulberry trees in the landscape:
Dwarf or weeping varieties are well-suited to use in small-space foodscapes
Large, minimally pruned mulberry trees can be used for a canopy layer in a food forest
Smaller mulberry varieties can fit a forest-edge niche in a food forest because the tree tolerates partial shade
From a permaculture perspective, mulberry is an interesting option because along with fruit, it can provide poles and animal fodder (see below)
Mulberry for More than the Fruit
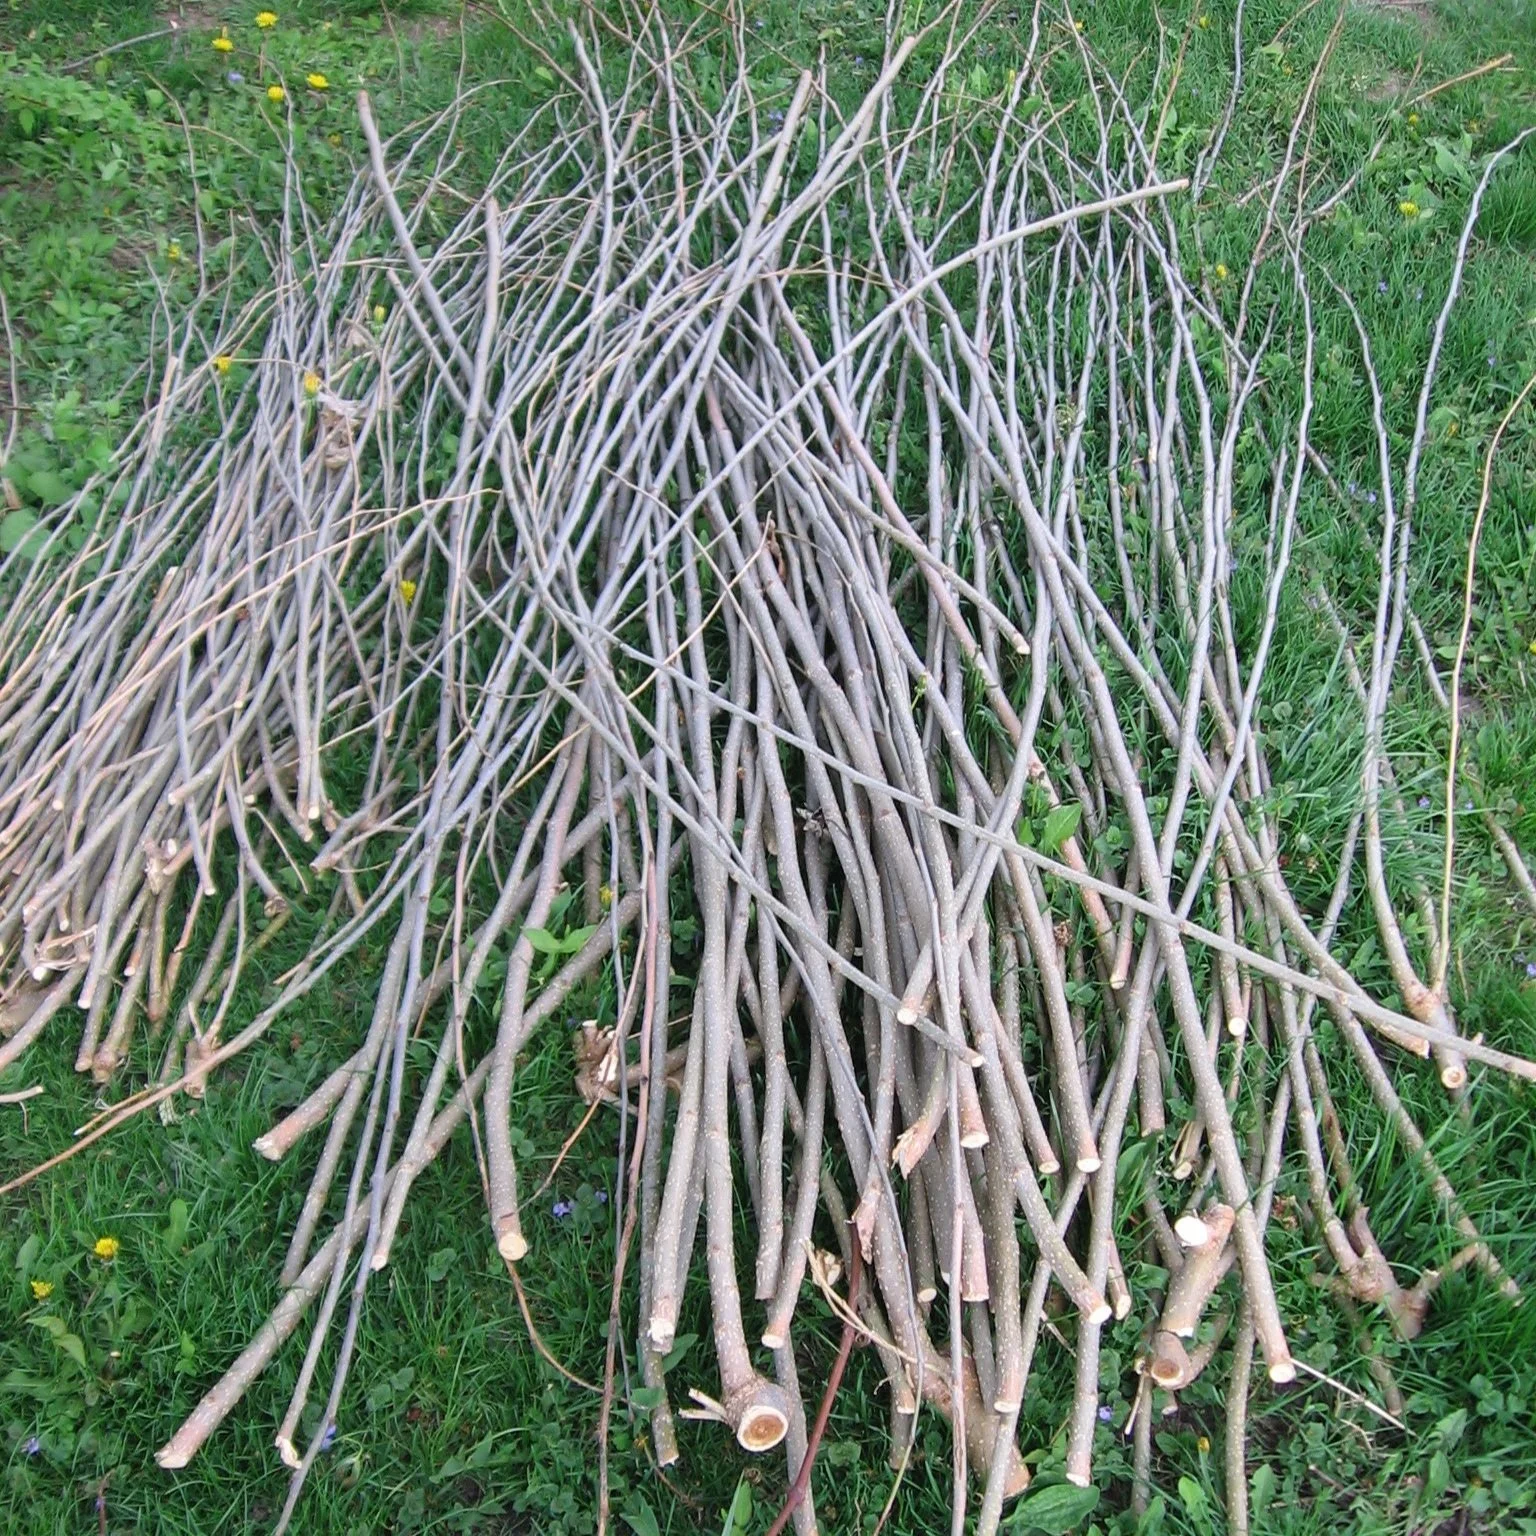
Because it grows very quickly, mulberry is well suited to pollarding and coppicing techniques. Here are branches from my neighbour’s mulberry pollard that I use as poles in the garden.
Mulberry is an excellent tree choice if you’re gardening with a permaculture mindset.
My neighbour Troy used to give his mulberry tree a harsh haircut every year. The long, straight branches made excellent poles that he gave me for staking plants and making trellises.
He grew his tree as a “pollard,” meaning he lopped off all of the growth a few feet above the ground. (Pollarding is often done with catalpa trees, for ornamental purposes.)
The other twist on this idea of using your mulberry tree to produce poles, is to grow it as a “coppice.” Coppicing is when you cut off a tree close to the ground to get it to send out lots of stems. Coppicing has traditionally been used to produce wood for baskets, fences, and fuel.
Mulberry Tree Location
Mulberry trees prefer full sun and rich soil. But they tolerate partial shade and a variety of soils.
And much worse.
To say they’re forgiving of poor conditions is an understatement.
I’ve seen lovely mulberry trees growing between cracks in the pavement. They do amazingly well in inhospitable locations. As I write this I’m looking out the window at the self-seeded mulberry tree in my front garden that I’m training into an espalier. It’s growing right underneath a row of spruce trees, hardly an ideal location. But it persists!
So save the prime real estate in your garden for plants that really need it. Your mulberry isn’t fussy. And, remember, pick a spot where purple spotting is not a nuisance.
The one thing to avoid is standing water. Pick a well-drained location, though occasional wetness is fine.
Challenges
Your mulberry tree will be a bird beacon.
Got a white car? Hanging out clothes to dry?
Then you might want to net the tree to keep away the birds. Netting is easier to do when you’ve grown a compact mulberry tree.
Harvest and Store Mulberries
If you’ve started with a tree grown from a graft or cutting, you might start getting fruit in as little as 2-3 years.
Not all the fruit on a tree ripens at the same time. As they ripen, fruit fall to the ground.
White mulberries can be very sweet, while black mulberries are more balanced, with some tartness. I prefer white mulberries a little bit under ripe—while they’re less sweet. (Remember, a white mulberry tree can have black fruit!)
A couple notes on picking mulberries:
The fruit are fragile, and the juice easily comes out of the fruit when picked…so expect red hands if it’s a dark-coloured variety
Ripe fruit will drop from tree as you pick
A common recommendation when harvesting from large mulberry trees with many unreachable fruit above is to place a sheet on the ground and shake the branches.
The fruit has a short life once picked. There’s a little stem on it – and you can eat it stem and all.
Here are 6 simple ideas to grow lots of fruit in a home garden.
Mulberries in the Kitchen
You can use mulberries raw, use them in preserves, or cook them. Here are ideas:
Mulberry pie
Mulberry wine
Mulberry cobbler
Mulberry liqueur
Dried mulberries (great in a trail mix!)
Mulberry juice
Mulberry FAQ
How fast do mulberry trees grow?
Mulberry trees grow very quickly.
Where do mulberry trees grow?
White mulberry and its hybrids are suited to cold-climate gardens into USDA zone 4. Black mulberry is less cold-tolerant.
Can you grow a mulberry tree from a cutting?
Yes. You can grow mulberry trees from cuttings.
Do mulberries grow on trees or bushes?
Mulberries naturally have a tree form, but you can prune to encourage branching and a bush-like shape.
Can you grow a mulberry tree in a pot?
Cold-climate gardeners who are determined to try black mulberry can grow it in a pot that is stored in a protected area over the winter.
How do you keep a mulberry tree small?
Prune it very aggressively every year.
Do mulberry trees grow near black walnut trees?
Mulberry trees are not affected by the compound “juglone” that is given off by black walnut trees. So if a black walnut tree has limited your growing options, consider mulberry.
Find out more about gardening where there’s walnut toxicity.
Find This Helpful?
Enjoy not being bombarded by annoying ads?
Appreciate the absence of junky affiliate links for products you don’t need?
It’s because we’re reader supported.
If we’ve helped in your food-gardening journey, we’re glad of support. You can high-five us below. Any amount welcome!
More on Growing Fruit
Get our free guide with 6 ways to grow more fruit in your garden.
Articles and Interviews about Growing Fruit
Here are more resources to help you grow fruit.
Courses on Fruit for Edible Landscapes and Home Gardens
Home Garden Consultation
Book a virtual consultation so we can talk about your situation, your challenges, and your opportunities and come up with ideas for your edible landscape or food garden.
We can dig into techniques, suitable plants, and how to pick projects that fit your available time.
Guide to Growing Nanking Cherry: An Easy-to-Grow Bush Cherry
Guide to growing Nanking Cherry, an easy-to-grow cherry bush.
By Steven Biggs
Grow Nanking Cherry
The Nanking cherry bush has a spectacular bloom early in the spring.
“Dad, someone’s taking a picture of your garden,” shouts one of the kids. It’s early May, so I know which plant will be in the photo.
The Nanking cherry, a.k.a. Prunus tomentosa. Even though our front garden is a party of spring flowering bulbs, when the Nanking cherry is blooming, it steals the show.
The Nanking cherry bush is like a stop sign. Pedestrians going past our house change gears from a brisk walk to a full stop and then take photos.
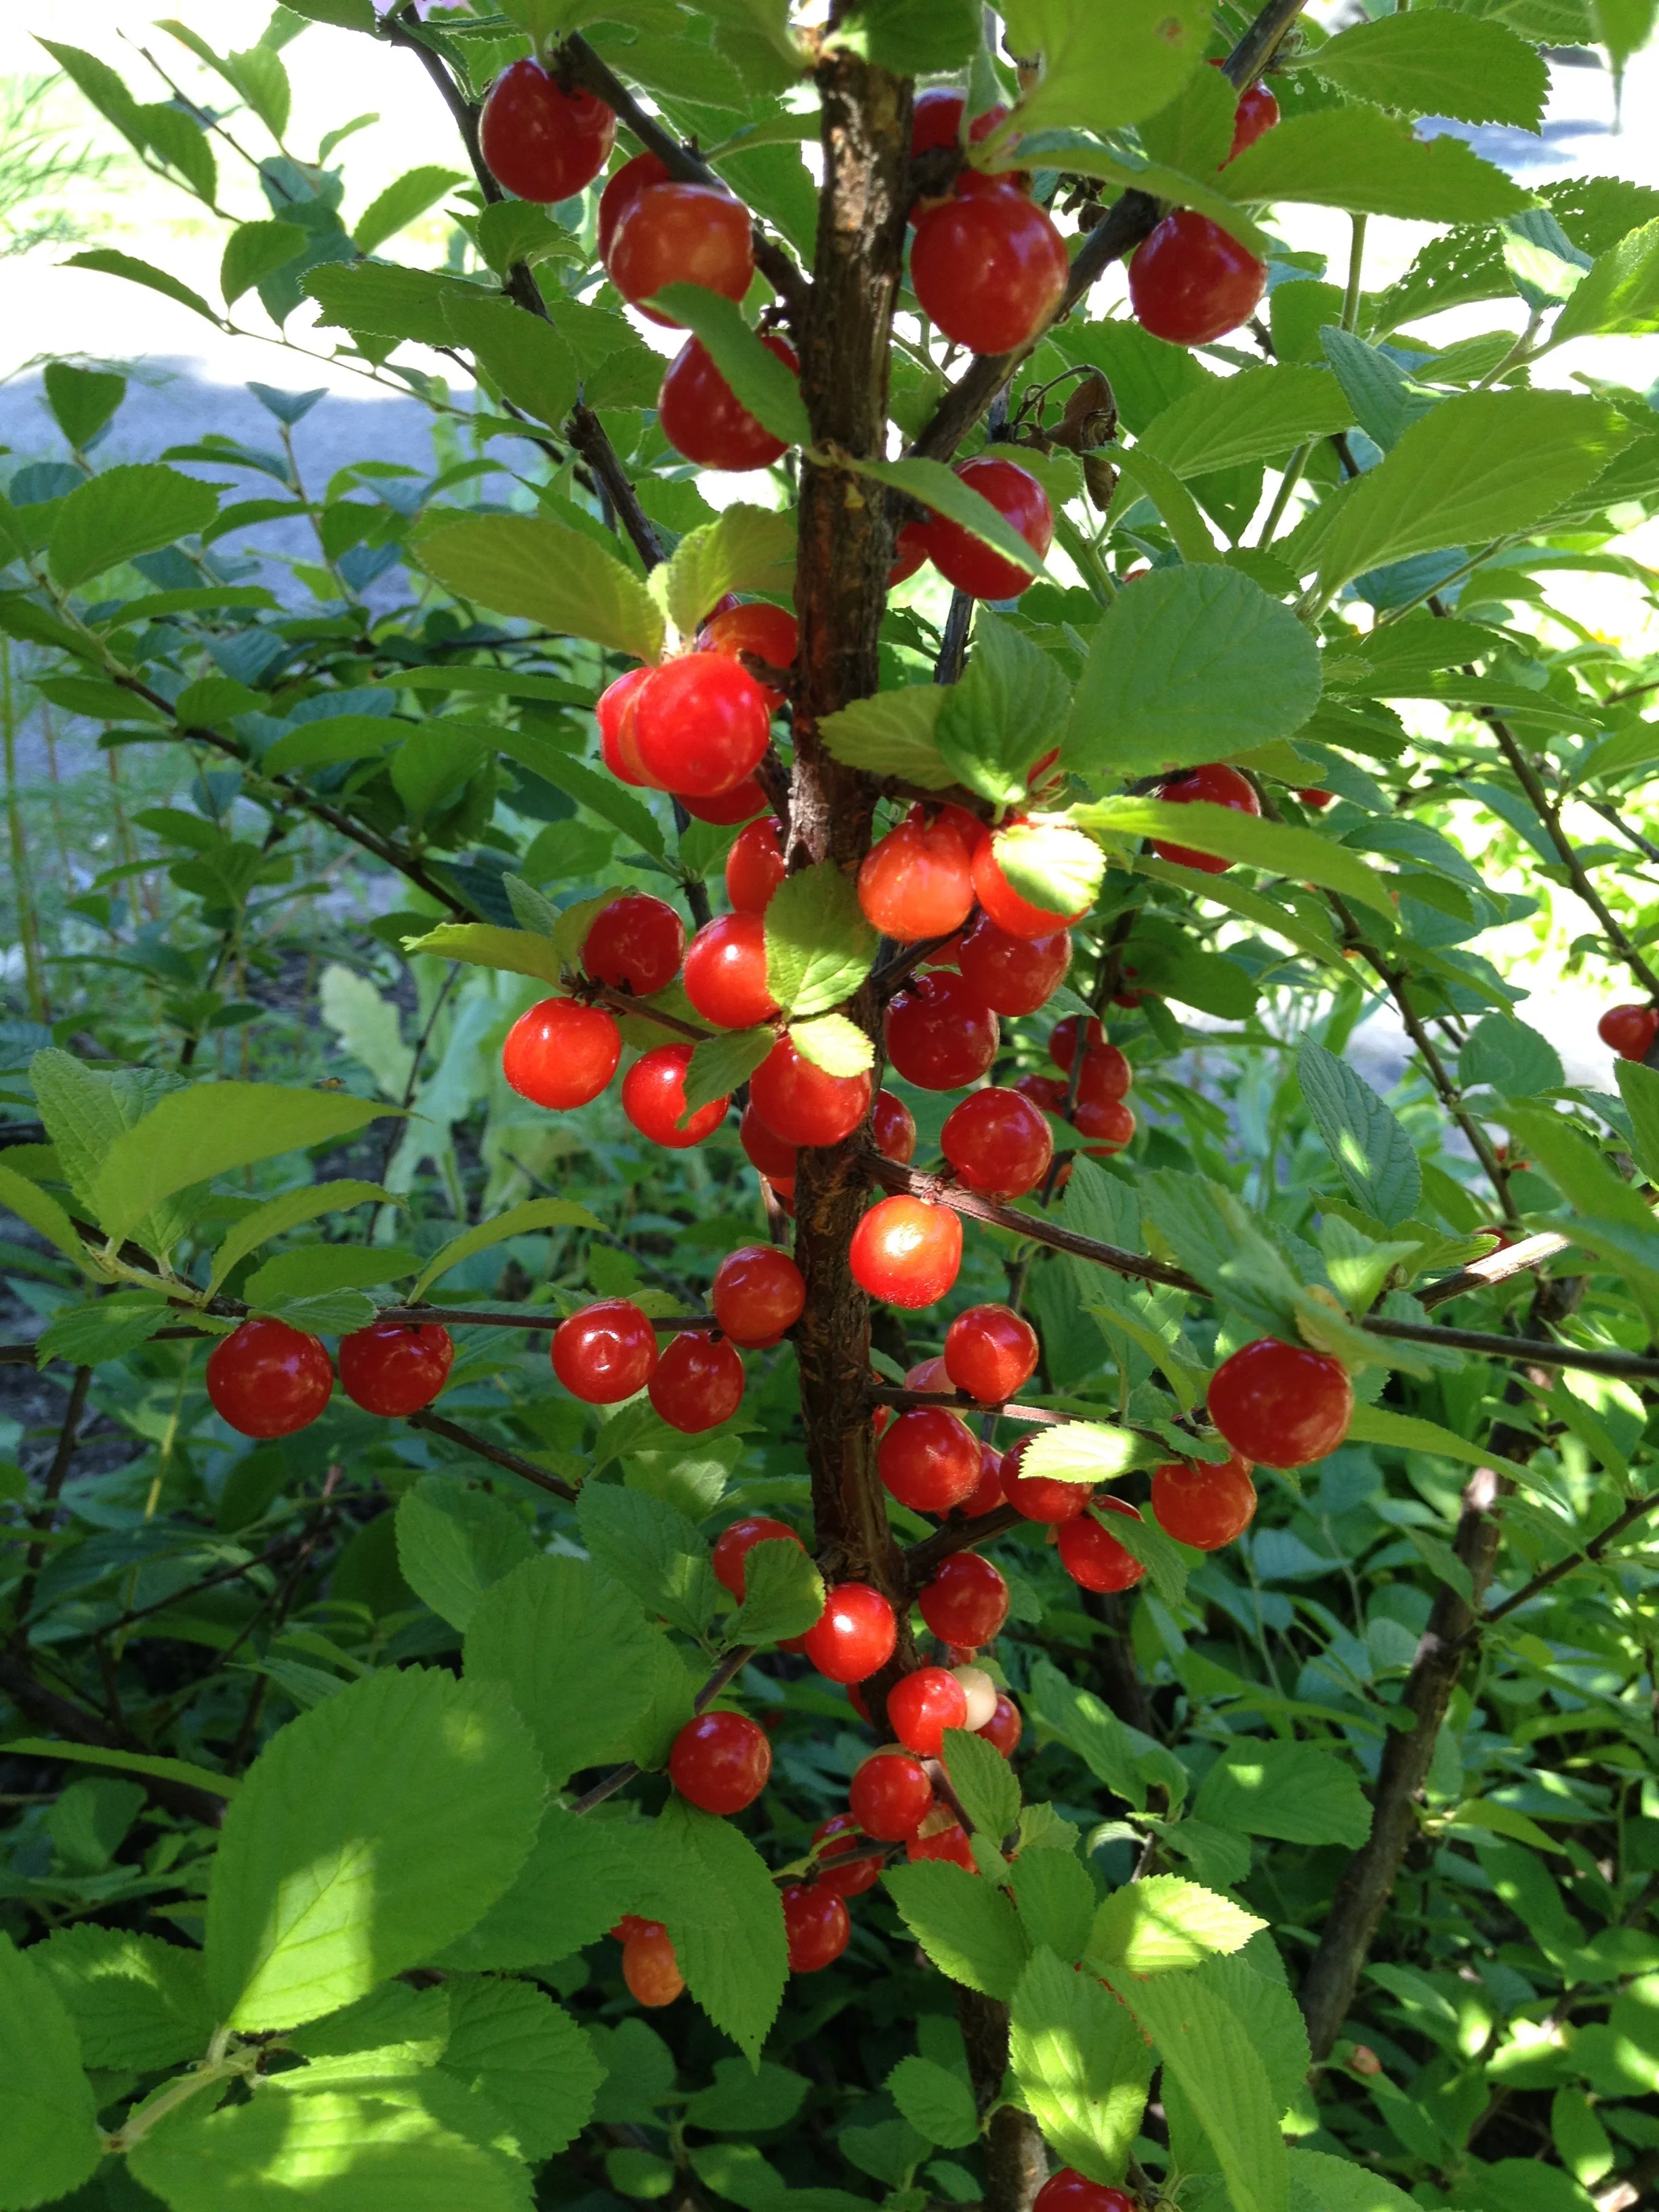
Spring isn’t the only time it looks great: it looks great again as the fruit colours up. And unlike cherry trees, where you have to look upwards, this cherry bush is at eye level.
Perfect Fruit for a Home Garden
Nanking cherry is ideal for a home food garden because it’s compact, ornamental, and easy to care for. By comparison, many fruit trees require a fair bit of pruning and pest and disease management. And they take more space.
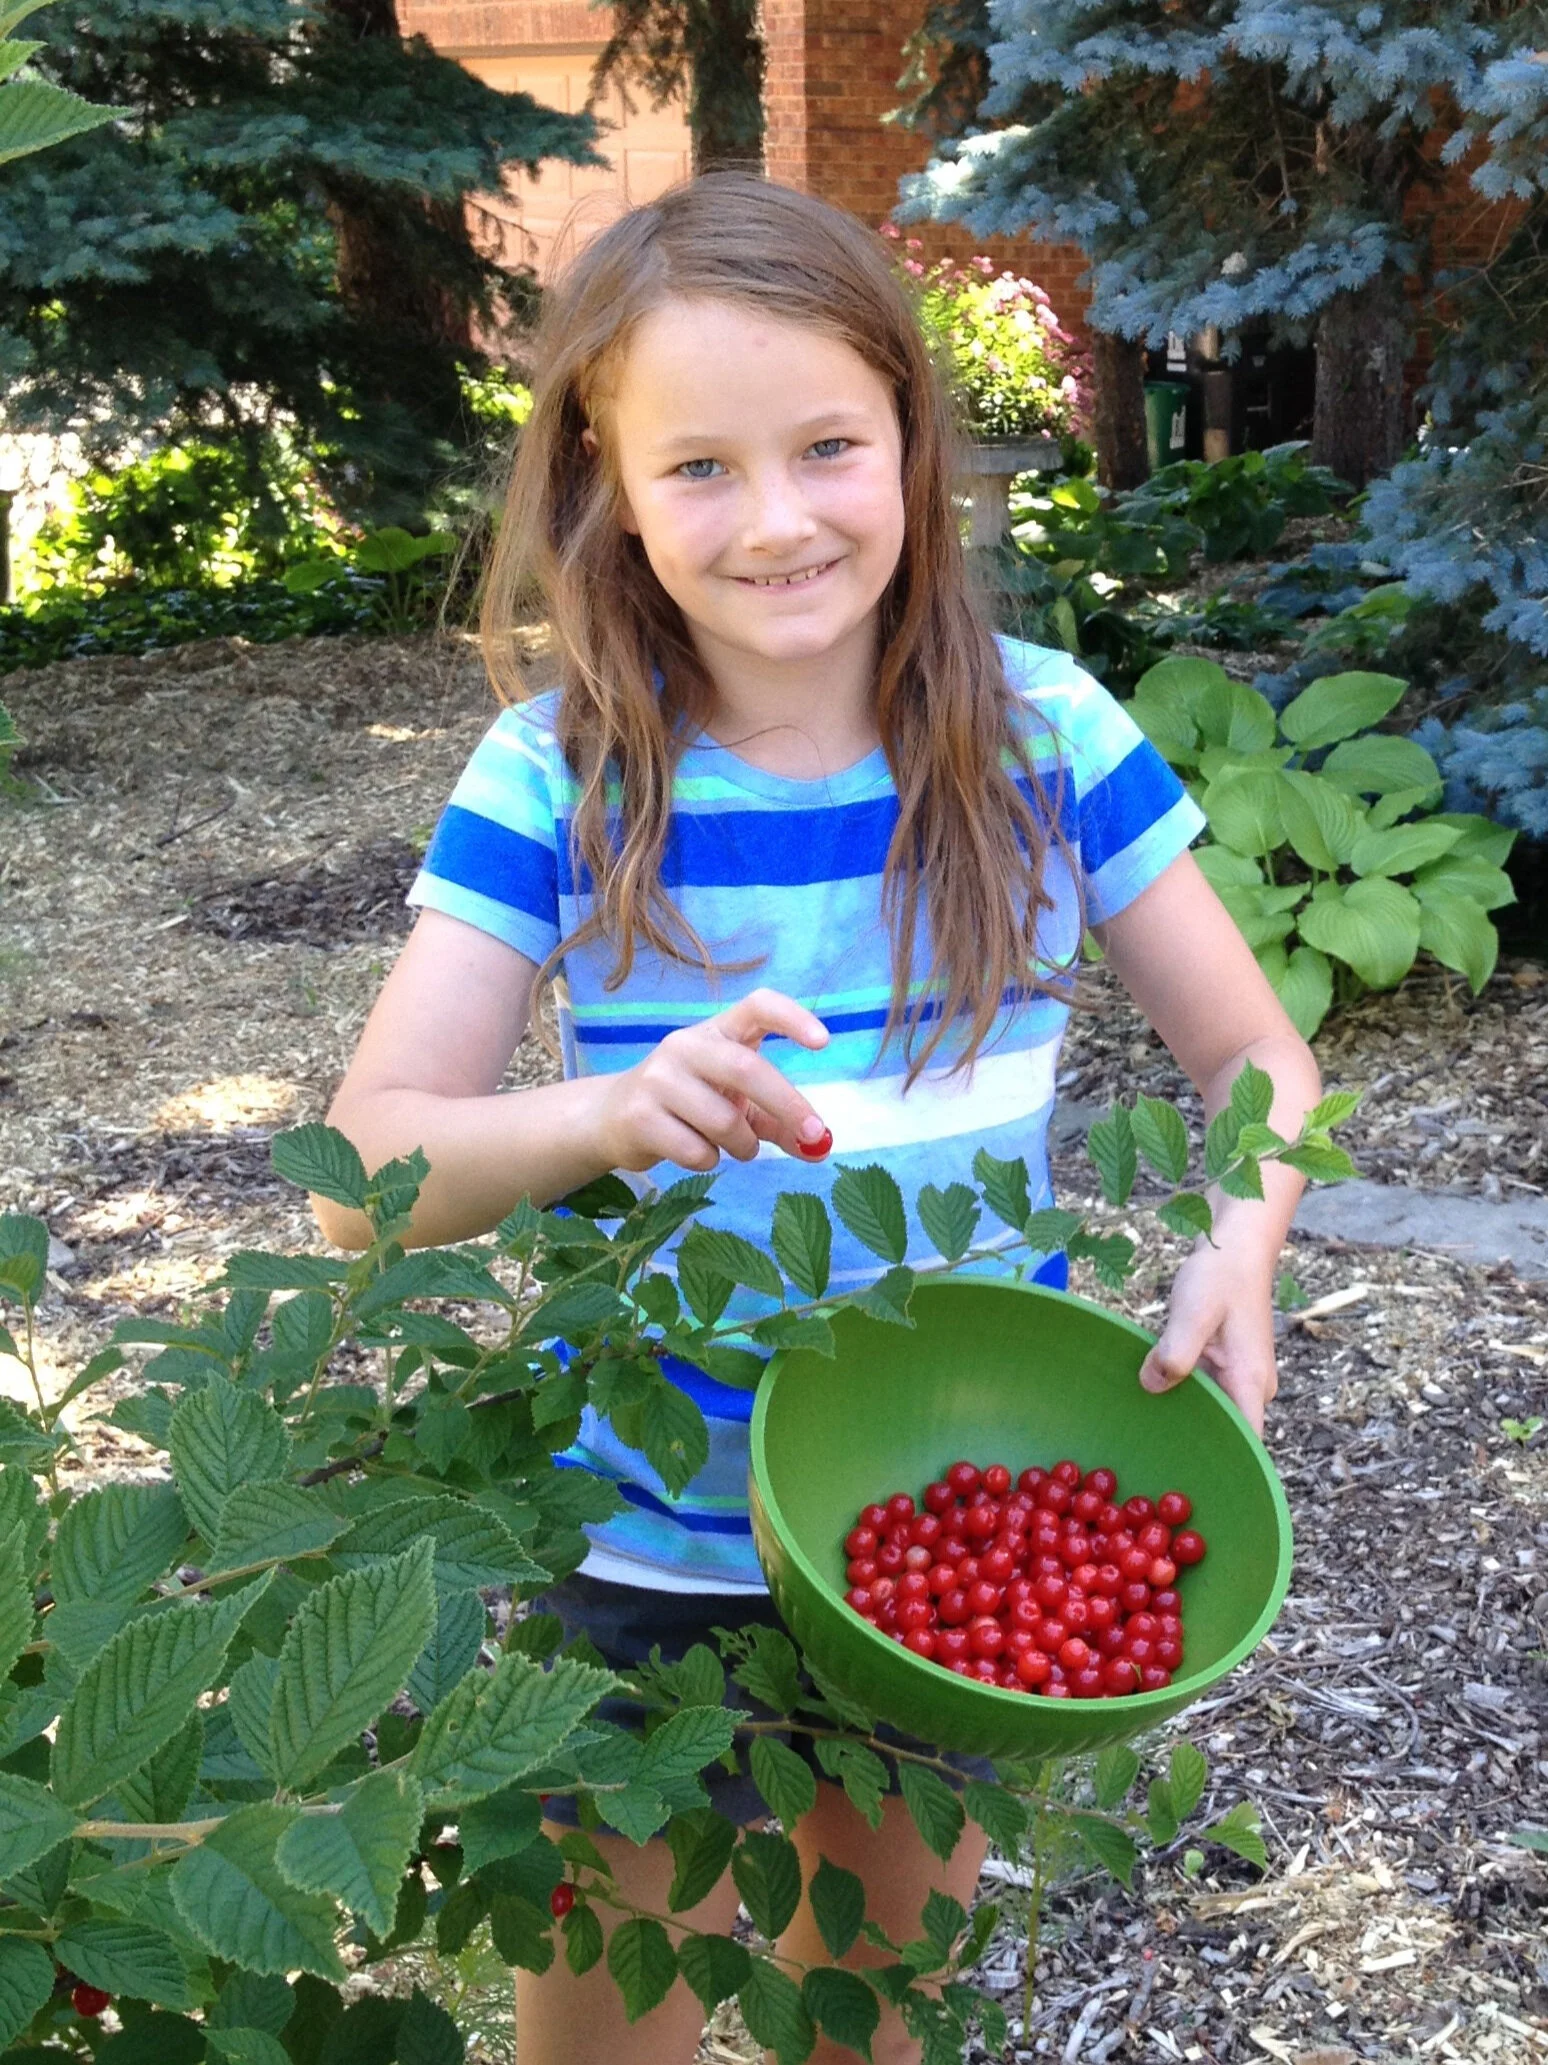
The small, bright-red cherries are juicy. I’d place the taste somewhere between sweet and sour cherries.
Where to get Nanking Cherry
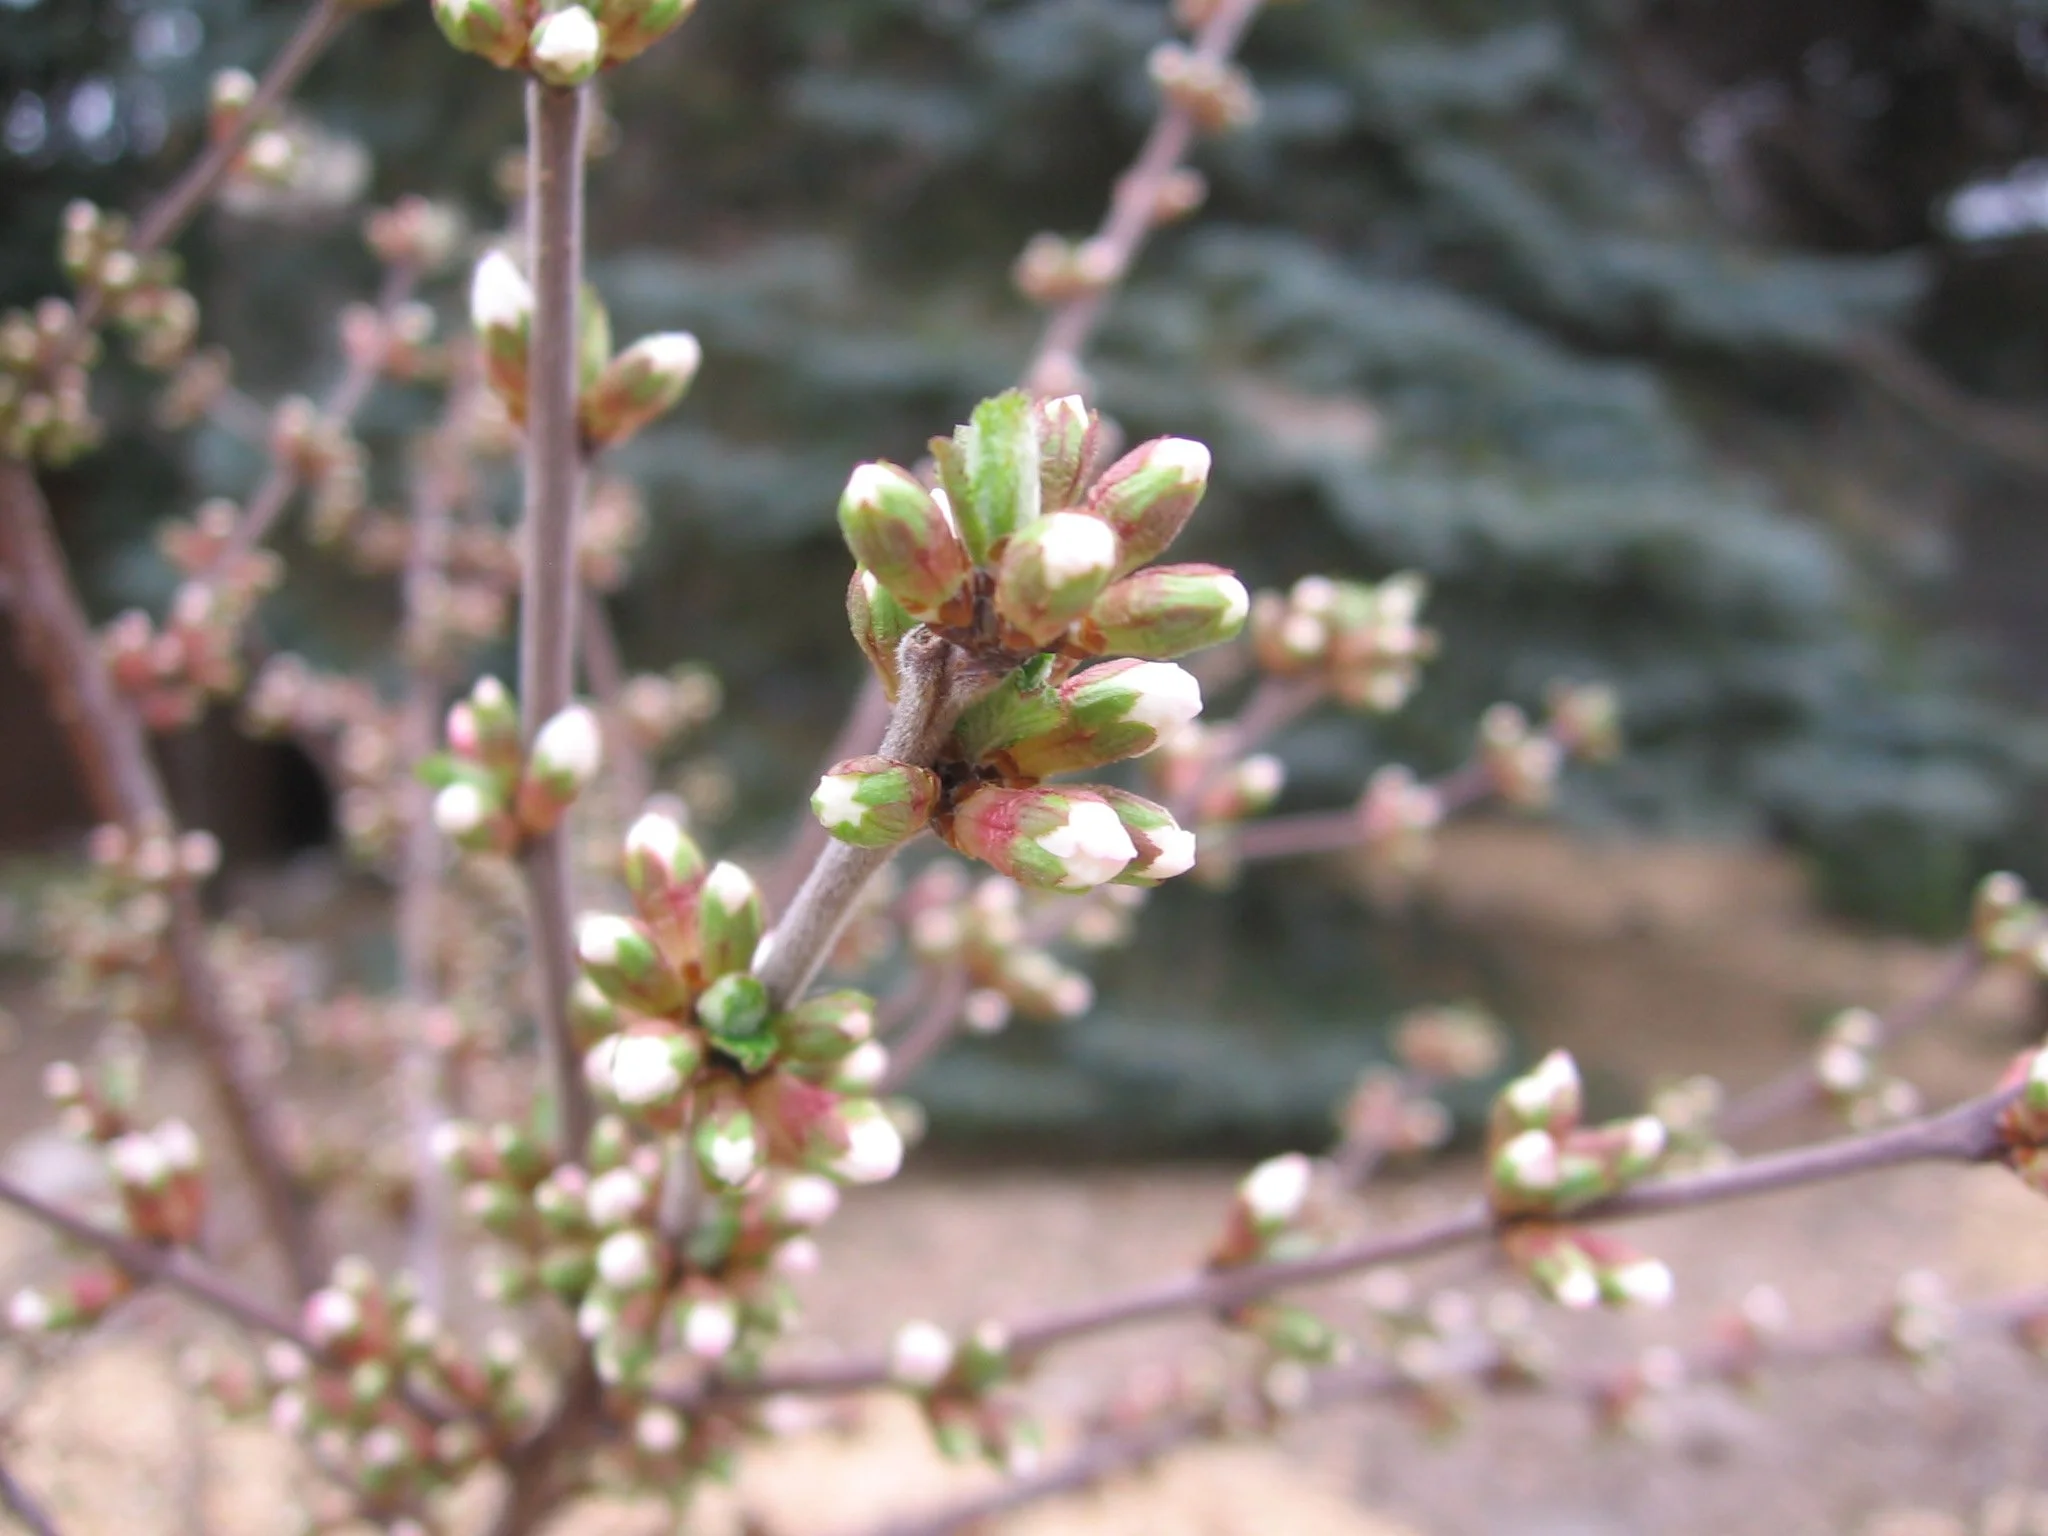
Nanking cherry flower buds
When I teach about edible landscapes, most students haven’t heard of Nanking cherry because it’s not too common in the horticultural trade. It’s a pity because this is such a fantastic home garden fruit bush.
Look for a nursery specializing in fruit and cold-hardy plants. Or, better yet, find somebody who is already growing it, because many of the seeds that drop around the bush will grow.
(I once mentioned this to my class and was asked by students if that meant I had extras to share. I did. And I took in a tray of small cherry bushes the following class.)
By Seed
While many fruit trees and bushes are propagated commercially by cuttings or grafting, Nanking cherry is commonly seed grown. You can grow them from seed at home:
Look for small Nanking cherry plants growing from seed near a mature, fruit-bearing bush.
When saving seeds to grow, don’t let them dry out too much
In the fall, place seeds in damp potting soil
Store potted seeds in a cold location until spring (a fridge or animal-free shed or garage is fine)
In spring, watch them grow!
When you grow from seed, the seedlings will all be genetically distinct, so expect some variability between plants. Seed-grown plants often flower in less than five years.
Cuttings
If you have a Nanking cherry plant that you really like, you can also propagate it from cuttings. Root softwood cuttings in early summer, as fruit ripens, or root cuttings from dormant hardwood in the spring. High humidity and rooting hormone increase the percentage of cuttings that root.
Create Your Own Unique Edible Landscape
That fits for your yard, and your style!
Layering
Another way to propagate Nanking cherry is by layering. This is the practice where a low-lying branch is covered with soil until it grows roots and can be detached from the main plant. I find it’s often enough to simply to pin a low-lying branch to the soil by covering it with a brick.
Nanking Cherry Varieties
Red-fruited, white-flowered varieties of Nanking cherry are the most common in the horticultural trade.
There are not a lot of improved varieties available commercially. At the time of writing this, I’ve just ordered one called ‘Pink Candles.’
Along with the common seed-grown, white-flowered, red-fruited Nanking cherry varieties, look for:
White-fruited varieties
Pink-flowered varieties (like ‘Pink Candles, above)
Cold-Climate Cherry
If you’re gardening in a cold zone, Nanking cherry withstands cold winters and hot summers. My grandfather grew Nanking cherry in Calgary, a mercurial climate if ever there was one. His cherry bushes soldiered on through snow in summer and balmy winter chinook winds.
(Incidentally, he also made wine from Nanking cherry, although I was too young at the time to partake!)
Cold hardiness is never an exact science as there are many variables. But this is a very cold hardy plant, surviving winter temperatures as low as -40°C (-40°F).
Pick a Location for your Nanking Cherry
Sunlight: Full sun is best. As with many crops, if you only have partial sun, it’s worth a try. You’ll still likely get something.
Soil: Well-drained soil, enriched with compost.
Snow load: Winter snow coverage is, if anything, helpful, as it insulates the bush. I have one next to my driveway, and it’s covered every year with heaps of snow.
Landscape with Fruit
That’s easy to grow in a home garden!
Prune Nanking Cherry
One of the things that makes fruit bushes far more suited to home gardens is that the burden of pruning is less. You can prune annually if you want – and you’ll be rewarded with a nicer form and more yield. But if you’re busy and don’t get around to it, that’s fine too.
Timing: Prune in late winter.
Size: Remember, as the gardener, you decide the final height of your Nanking cherry bush. Depending on the growing conditions, it will get to 1.5 – 3 metres high (5 – 10 feet). Bushes can get fairly wide if space permits.
I keep mine pruned to about 1.5 metres (5’) high. That’s because I don’t want it to block the sight line between my garden and the sidewalk. And another important consideration is not to let the bush get any higher than you can pick!
In general, pruning that encourages young branches encourages more fruit. Keeping the canopy open with pruning helps to minimize the chance of any diseases because there is good air circulation. Pruning tips:
Remove some of the older branches
Trim out dead branches
Cut out crossing branches
Prune to shorten the bush
Nanking Cherry Pests and Diseases
Nanking cherry is in the same family as cherries and plums, which are affected by a number of pests and diseases. But I’ve never found the need for pest or disease control.
The one challenge I occasionally encounter is branch dieback where leaves on a branch dry up, and the branch eventually dies. Some sources attribute this to fungal diseases. For dieback, prune affected branches back to the main stem.
Harvesting Nanking Cherries
We eat lots of our Nanking cherries right in the garden! But they are versatile in the kitchen too.
Nanking cherries are an early summer fruit. Around here, that means that I’m picking them around the same time as strawberry season is finishing up.
Unlike sweet and sour cherries, where the stem is left attached to the fruit when picked, the stubby little stems on Nanking cherry stay on the bush. As a result, the fruit don’t last as long as other cherries.
Nanking Cherry in the Kitchen
The kids and I sometimes stand around a bush and guzzle cherries and then see who can spit the seeds the farthest. And that’s an important point I should make: like all cherries, there’s a pit!
Use Nanking cherries for whatever recipes call for sour cherries. I also freeze some for winter use. Because of the size, they are a bit fiddlier to pit than larger cherries.
Here are ways we enjoy using Nanking Cherry:
Nanking cherry juice
Nanking cherry compote
Nanking cherry bump (not for the kids!)
And…one other food related idea: I consider cherry wood the finest wood for smoking meat. So when I prune my Nanking cherry, I keep the branches to use for smoking.
Nanking Cherry FAQ
Do I need more than one Nanking cherry bush?
Many sources report the need for two bushes for cross pollination. I started out with one bush – the only one in the neighbourhood – and had good fruit set. There are reports of some self-fertile varieties.
When should I move my Nanking cherry bush?
The best time to move it is in the spring, while it’s still dormant.
Can I grow my Nanking cherry bush in shade?
It will grow best in full sun, but can grow respectably well in part sun/shade. Just know that you probably won’t get as much fruit as you would if it were growing in a full-sun location. As home gardeners we don’t always have perfect conditions.
Can I grow my Nanking cherry in a wet location?
Well drained soil is best. If the water table is high, consider growing in a raised bed.
What about animal pests eating the Nanking cherries?
The birds will like them just as much as you do. But unlike large tree fruit, such as apples and peaches, there’s much more to share when we grow small-fruited crops such as cherries.
Should I cover my Nanking cherry if there’s a frost?
The flowers are early in the season, when the risk of frost is still high. Most years I still get good fruit set here in Toronto. I’ve had reduced fruit set caused by a freeze once in a dozen years.
Is there a Nanking cherry tree?
Nanking cherry naturally grows as a bush.
Find This Helpful?
Enjoy not being bombarded by annoying ads?
Appreciate the absence of junky affiliate links for products you don’t need?
It’s because we’re reader supported.
If we’ve helped in your food-gardening journey, we’re glad of support. You can high-five us below. Any amount welcome!
More on Growing Cherries
Find out about 5 Types of Cherry Bush to Grow in Edible Landscapes and Food Forests
Hear Dr. Ieuan Evans talk about the Evan’s Cherry
More on Growing Fruit
These Courses Can Help you Grow Your Own Fruit
Edible Native Plants...and My Quest for a Rare Toronto Persimmon Tree
Native North American Fruits and Nuts (including persimmon and pawpaw!)
By Steven Biggs
Ontario Native Edible Fruits and Nuts
Pointing to two trees, Tom Atkinson explains that we have the makings of a golf club.
“There you have the shaft of the club; here you have the head,” he says, pointing from one tree to the other:
The shagbark hickory, with a bit of give in the wood, is ideal for the shaft.
The American persimmon, as part of the ebony family, has extremely hard wood that is suitable for whacking the ball.
Both are native North American species; and both have edible parts.
Hunting Pawpaw and Persimmon in Toronto
Our tree trek today is the result of my interest in another North American native, the pawpaw tree.
Because of my fascination with pawpaw, I tracked down Atkinson, a Toronto resident and native-plant expert, whose backyard is packed with pawpaw trees.
After I visited his yard and soaked up some pawpaw wisdom, he mentioned a fine specimen of American persimmon growing here, in Toronto.
I took the bait.
Under a Toronto Persimmon Tree
Now, in the shadow of that persimmon tree, I’m learning far more from Atkinson than persimmon trivia:
The nut of the shagbark hickory, a large native forest tree, is quite sweet.
He points to a pin oak, explaining that the leaves are often yellowish here in Toronto, where such oaks have trouble satisfying their craving for iron.
Waving toward a couple of conifers, Atkinson explains that fir cones point upwards, while Norway spruce cones point down.
There’s stickiness on the bud of American horse chestnuts, but not on their Asian counterparts.
And while the buckeye nut is normally left for squirrels, he’s heard that native North Americans prepared it for human consumption using hot rocks.
Landscape with Fruit
That’s easy to grow in a home garden!
A Backyard Native Fruit Food Forest
In his own garden, Atkinson’s focus is on native trees and shrubs. Many of them are considered Carolinian and are, here in Toronto, at the northern limits of their range.
My own interest in native trees and shrubs has gustatory motivations, but Atkinson’s came about because of his woodworking hobby. “I thought, if I was using wood, I should be putting it back,” he explains. While no longer woodworking, he still has a garden full of native trees and shrubs.
The edible native North American fruit and nut trees in his backyard food forest include sweet crabapple, black walnut, bitternut hickory, red mulberry and beaked hazelnut. “It is really for the creatures of the area, all this bounty,” he adds. I’m taken aback by his generous attitude towards harvest-purloining wildlife, but it’s consistent with his approach of putting something back.
Find out about elderberry, a native fruit bush.
American Persimmon
In the shadow of an American persimmon in Toronto. Grow persimmon in the warmer parts of Ontario.
Sitting under the American persimmon tree and looking up, I’m dismayed to find that the fruits are still green. Atkinson cautions that the fruit are astringent and bitter when unripe, so I satisfy myself with snapping pictures.
He explains that although this is a native North American species, it doesn’t usually grow wild this far north. But it grows well under cultivation.
(I found ripe, orange American persimmons a week later at Grimo Nut Nursery in Niagara, where the more temperate climate aids in ripening fruit earlier than in Toronto. They are sweet and velvety on the tongue; I’m delighted that the young persimmon tree I’ve been nurturing in my garden will have been worth the effort when it starts to fruit. And the fruit-laden trees are beautiful.)
Pawpaw
Atkinson's Toronto backyard, where he grows pawpaw trees and other native fruit trees.
Pointing to clusters of mango-like fruit, Atkinson says, “The fragrance of the pawpaw when ripe is aromatic.” He finds that the texture is like custard.
Each fruit usually contains four to eight seeds. “Like a watermelon, spit out the seeds,” Atkinson adds.
Don’t wait too long to pick it. “If it’s starting to turn brown, give it to the squirrels or raccoons,” he advises.
Pawpaws can be found growing wild on the north shore of Lake Erie into the Niagara region. Like the American persimmon, you’re not likely to find wild ones here in Toronto, but they do grow well here when planted. The large, lush leaves add a tropical feel to the garden.
Serviceberry
Serviceberry is a native edible plant well suited to growing in the city.
When it comes to native edible plants, Atkinson believes that one of the best to grow in the city is the serviceberry.
“There’s a whole bunch of them,” he explains, listing the related members of the serviceberry (Amelanchier) clan. They all have in common an edible fruit similar in size to a blueberry.
Palatability varies by species and variety. The saskatoon berry, which is also grown commercially, has consistently good fruit quality, according to Atkinson.
Serviceberry is widely planted in Toronto parks and is common in the nursery trade. They can be grown as a small tree or a bush.
In my own garden, I end up sharing my serviceberry harvest with robins if I don’t pick them quickly enough. Atkinson says that cedar waxwings like them, too.
Aside from the fruit, the serviceberry leaves turn a vibrant orange-red in the fall and the bark, smooth and grey, is showy, too.
Here’s a member of the serviceberry family that’s grown as a commercial crop: Guide to Growing Saskatoon Berries: Planting, Pruning, Care
American Hazelnut
Pin this post!
American hazelnut is a native nut bush. It’s related to the European hazelnuts sold in grocery stores, but the nuts are smaller.
Hazelnuts send out attractive catkins in late winter, before any leaves are out.
Crabapple
“They’re a delight to look at,” agrees Atkinson as we change gears and talk about the sweet crab, a wild crabapple. “It puts on a really good show of flowers,” he says as he describes a blush of pink on white flowers in the spring, adding, “It’s as good as a flowering dogwood but in a different sort of way.” The fruit is very waxy, and very attractive, having a greenish yellow colour.
“Squirrels don’t touch it,” he exclaims. He likes the fall leaf colours, which range from yellow to burnt orange.
On the culinary side, he says the sweet crab fruit is sour, but a perfect accompaniment when roasted with a rich meat such as pork, where the tartness of the fruit cuts the richness of the meat.
Black Walnut
Atkinson speaks warmly of towering black walnut trees and of the beautiful dark wood they yield. He notes how common they are in the Niagara peninsula: “They’re almost like weeds.”
I agree with the weedy bit: My neighbour’s black walnut stops me from growing anything in the tomato family at the back of my yard. Despite its hostile actions towards my tomatoes, I have grown fond of sitting under that tree, never really considering why. “The shade under a walnut is really quite lovely,” he says, describing dappled light that results from the long leaf stalks adorned with small leaflets.
He discourages me from promoting the black walnut for edible uses because the nut meat is very difficult to extract: the shells are rock hard, requiring a hammer to crack. And the meat doesn’t come out easily like an English walnut, but has to be picked out. But by this point I’ve already decided to write about edible native plants because of their ornamental appeal.
Read about wicking beds, a way to deal with black walnut toxicity, a.k.a. juglone.
Find out how to garden successfully when there’s a black walnut tree nearby.
Growing Native Fruit in Urban Areas
I thank Atkinson for the tour and email correspondence. A couple of weeks later, Atkinson emails me a photo of a broken pawpaw branch. He writes: “Steve, here is what befalls a pawpaw when in an urban setting, and there are hungry raccoons about. I do not begrudge my masked friends at all for doing what inevitably they will do when after pawpaws.”
FAQ American Persimmon
Can persimmon grow in Ontario? Can you grow persimmons in Canada?
American persimmon is reported to be hardy into Canadian hardiness zone 4, though a long growing season with summer heat is needed for fruit ripening. Best in zones zones 5b-8.
Remember: Zones are only a guideline. Sometimes you can cheat if you have a warm microclimate.
Can I grow a persimmon tree from seed?
If you grow American persimmon from seed, the main thing to remember is that they are “dioecious.” This just means that a plant can be male or female. If you grow a seed and get a male plant, you won’t get fruit from it.
Many commercial varieties produce fruit without a male.
Interested in Forest Gardens?
Here are interviews with forest garden experts.
Find This Helpful?
Enjoy not being bombarded by annoying ads?
Appreciate the absence of junky affiliate links for products you don’t need?
It’s because we’re reader supported.
If we’ve helped in your food-gardening journey, we’re glad of support. You can high-five us below. Any amount welcome!
More Information on Growing Fruit
Articles and Interviews about Growing Fruit
Courses on Fruit for Edible Landscapes and Home Gardens
Home Garden Consultation
Book a virtual consultation so we can talk about your situation, your challenges, and your opportunities and come up with ideas for your edible landscape or food garden.
We can dig into techniques, suitable plants, and how to pick projects that fit your available time.
Guide: How to Grow Sorrel (& How to Use it!)
Find out how to grow sorrel, and get ideas for creative sorrel recipes.
By Steven Biggs
Planting Sorrel: An Easy-to-Grow Perennial Vegetable
Sorrel is one of my favourite crops because it checks off a number of important things for me:
It’s easy to grow (it’s a perennial that comes back year after year)
It’s difficult to find fresh sorrel leaves in stores (and if you find them, they’re expensive)
It is versatile in the kitchen (soups, meat, salads, and more)
(And I've cooked with sorrel on TV!)
Sorrel also has a rich herbal history, with a variety of uses.
I’m no herbalist, so in this post I’ll tell you how to grow sorrel and give you lots of ideas for using it in the kitchen.
Haven’t Seen a Sorrel Plant? You’re Not Alone!
Garden sorrel is a hardy perennial.
Sorrel is a familiar ingredient in European cuisine. That’s how it came to North America—with European settlers.
The “wild” sorrel sought after by foragers is simply sorrel that’s escaped cultivation.
Yet many people in North America don’t know to sorrel.
If you’re new to sorrel, it’s grown for its leaves. It’s sour leaves. I think of it as a lemon substitute for northern gardeners.
When I shop at eastern European shops, I see jarred sorrel…horrid sludge. I don’t recommend it. Grow yourself fresh sorrel!
Grow your own sorrel, and skip the brined sorrel!
But it was an eastern European connection that go me growing sorrel. As a teen, I took Ukrainian lessons (hoping to learn my mom’s first language—which she never taught us.) I never did pick up the language—but the teacher, who knew I was a gardener, couldn’t believe I’d never heard of sorrel. And brought me a clump of this plant that she said was an essential ingredient in the old country.
What is Sorrel?
Sorrel is a hardy perennial plant that grows in a clump. It’s tough as nails, hardy into Canadian zone 4.
The long, narrow leaves are ready to pick early in the season, making it one of the first greens to harvest.
You can use the leaves fresh—or cook with them. (See How to Use Sorrel, below.)
Types of Sorrel
There’s more than one type of sorrel. Here are three common ones:
Garden sorrel leaves can be over 30 cm long when plants are in moist, rich soil.
Garden Sorrel (Rumex acetosa). Garden sorrel was brought to north America by European settlers. It's grown in gardens, but is also an escapee that can be found growing wild. Leaves reach 30-60 cm (12-24 inches) long, depending on the growing conditions.
Sheep Sorrel (R. acetosella). Sheep sorrel is another escapee. Sometimes called sourgrass. You might find it filling in exposed spots like vacant lots and roadsides. Seed stalks take on a reddish colour. Spreads by seed and running roots. This is the less-loved cousin to garden sorrel, with smaller, narrower leaves that have a distinct lobe at the base, a bit like an arrowhead. I wouldn’t plant this fast-spreading plant in the garden, but it’s an excellent edible, and popular with foragers.
French Sorrel (R. scutatus). French sorrel is also called round-leaved sorrel. The leaves are shield shaped. Plants are shorter than garden and sheep sorrel.
Grow a Container Vegetable Garden
And get an early harvest of crops that usually take too long!
How Sorrel Grows
Sorrel grows best in rich, moist soil, in full sun or partial shade. Though that doesn’t mean it won’t grow elsewhere…as evidenced by the behaviour of sheep sorrel in vacant lots!
But in a garden setting, give it water if it’s in a dry location. If it’s in partial shade, you won’t need to water as much.
Flower stalks turn into red-tinged seed spikes. Remove stalks to encourage young leaves—unless you want to collect sorrel seed. If you’ve been diligently removing flower stalks, you’ll be able to continue harvesting for the whole growing season, until the plant shuts down for winter—when the top dies back with fall frosts.
Where to Grow Sorrel Plants
Because sorrel is ready to harvest early, I like to have mine close to the kitchen.
Growing Sorrel in Perennial Borders
As a perennial plant, sorrel is at home in the perennial border. Stick it at the front so it’s easy to reach.
Sorrel in the Vegetable Patch
A row of garden sorrel with seed heads. See the red tinge?
I don’t plant sorrel in my main veggie patch, where I move around crops from year to year. Because it is a perennial plant, I grow sorrel around the periphery, with the rhubarb and asparagus—other perennial vegetables.
I’ve seen an entire row of sorrel plants used as a border in a formal edible garden.
Find out more about perennial vegetables.
Sorrel in the Herb Garden
Garden sorrel and French sorrel are well behaved plants that make a nice addition to a herb garden.
Looking for vegetable garden planning ideas? Here are articles to help you plan and design your vegetable garden.
How to Harvest Sorrel
Young sorrel leaves in the spring are the most tender.
You’ll get the best flavour and texture in spring, from young leaves.
But you can harvest sorrel until fall frosts shut the plant down for winter.
How to Propagate Sorrel
There are two ways to propagate sorrel plants.
Division. When a clump is big enough, divide it in the spring.
Seed. Sow sorrel seeds indoors in early spring. Move to the garden after the risk of frost has passed. Space plants about 30 cm (1 foot) apart in the garden.
FAQ: Sorrel Plants
Will Sorrel Grow in Shade?
Sorrel grows in full sun and partial shade. Because it produces larger, more tender leaves in moist soil, semi-shaded conditions are a good option where conditions are hot.
Are sorrel and hibiscus the same?
An unrelated plant, Hibiscus sabdariffa, also goes by the name sorrel. It’s tangy flowers are used in Caribbean cuisine.
Can I forage for sorrel?
In North America, both garden sorrel and sheep sorrel grow wild.
If you’re interested in foraging, listen to our chat with foraging expert Robert Henderson.
What are oxalates?
Wood sorrel is of no relation to garden sorrel, but it, too, has a sour tasting leaf.
Sorrel contains oxalic acid, a compound also found in spinach and rhubarb. If you go overboard and eat too much, it can cause tummy upset. That means don’t be a pig. You wouldn’t eat a whole bowl of lemons, would you? Consume it with other foods. It’s for flavour—not the main course.
One other thing about oxalic acid is that it can provoke existing joint and kidney problems. So if you have a history of kidney stones, skip the sorrel
What about wood sorrel?
Related in name only, wood sorrels (Oxalis sp.) can be grazed too.
Bloody dock is also known as red-veined sorrel.
Is bloody dock a sorrel?
Bloody dock, R. Sanguineus, is also known as red-veined sorrel. It’s related to sheep, garden, and French sorrel.
But don’t waste a second on it. Unless it’s as an ornamental. (It's quite beautiful.) You’ll find shoe leather that’s more tender than bloody dock leaves.
How to Use Sorrel
Before we get to using sorrel in the kitchen, enjoy sorrel while you’re in the garden. You can graze as you garden. The tangy leaves are refreshing.
Because sorrel is tangy, it pairs well with rich food.
Here are ways to use sorrel:
Use sorrel leaves in salads (I find a sorrel-only salad a bit too tangy, so I mix it with other greens)
Sorrel leaves in sandwiches
Sorrel soup (see recipes below)
In recipes that call for greens such as spinach or lambs quarters, substitute part or all of the greens with sorrel (I add it to my Swiss-chard-and-leek spanakopita)
Add it to sauces for a lemony flavour (I throw in pieces of sorrel leaf when braising meat)
Add sorrel leaf bits to an omelette or frittata
Chop and freeze for use through the winter
I’ve seen a recipe for devilled eggs that includes bacon and sorrel…sounds divine
Gourmet butter: Finely chop sorrel leaves and mix in with soft butter
Making a ranch-style sour-cream or yogurt dip? Add chopped sorrel
Make ordinary pesto shine by adding a bit of sorrel (oh yeah, pairs nicely with blue cheese!)
Sorrel Recipes
Sorrel Soup
Pin this post!
Here’s an easy-to-make sorrel soup recipe.
Ingredients
3 tbsp. butter
1 onion, chopped
3 potatoes, cubed
3 cups sorrel leaves, stem removed
8 cups broth
½ cup sour cream
Salt and pepper to taste
Directions
Fry onion in butter until golden
Add potato, sorrel, broth and simmer (covered) for about 15 minutes, until potatoes are soft
Puree (I use a hand immersion blender)
Whisk in sour cream
Heat to serve (don’t boil)
Sorrel Vichyssoise Soup
If you want to take sorrel soup to the next level—and use some of your homegrown leeks—this take on the creamy potato-leek classic is delicious.
Sorrel vichyssoise soup, topped with a sorrel leaf, a dollop of sour cream, and edible redbud flowers.
Ingredients
2 tbsp. butter
3 cups of sorrel leaves, stem removed
1 large leek, chopped (use both white and pale green parts)
1 onion, chopped
3-4 potatoes, cubed
4 cups water or broth
2 tbsp. salt
4 cups whole milk (use cream if you want something more decadent)
Directions
Fry leek and onion in butter until onion is golden
Add potato, salt, water/broth, sorrel and bring to a boil
Simmer until potatoes are tender
Stir in milk, and then puree
Serve chilled
When serving, I like to float a dollop of sour cream on top, alongside a raft of croutons.
Sorrel Paste and Sorrel Soup
Hear this interview with forager Robert Henderson, who talks about how to make sorrel paste and sorrel soup.
Find This Helpful?
Enjoy not being bombarded by annoying ads?
Appreciate the absence of junky affiliate links for products you don’t need?
It’s because we’re reader supported.
If we’ve helped in your food-gardening journey, we’re glad of support. You can high-five us below. Any amount welcome!
Courses
Edible Garden Makeover. Here’s a course that guides you through creating an edible garden you love. It’s my ode to edible gardening. You’ll find out how to think outside the box and create a special space. Get the information you need about a wide range of edible plants.
Container Vegetable Gardening Masterclass. Here’s a course that gives you everything you need to know for container vegetable gardening success.
Vegetables to Grow: 12 Tips to Choose What’s Best for Your Vegetable Garden
Choose the best vegetables to grow in your garden with these 12 crop-choosing tips.
by Steven Biggs
Choose Which Veggies to Grow in a Garden
12 tips to help you choose vegetables to grow.
“Grow radishes!”
It’s a recommendation I often hear given to new gardeners. That’s because radishes are easy to grow. And they grow quickly.
True.
But in my house, it’s the radishes that are still on the veggie platter when everything else has been devoured.
So while the easy-to-grow crops are part of a good vegetable garden plan, there are other things to think about too.
Keep reading to find out how to pick vegetable crops and varieties for your needs and situation. Instead of being prescriptive and telling you what you should grow, this post gives you 12 tips to help you choose which vegetables to grow.
1. Grow What You Love
So back to the radishes, there’s no point growing what you won’t eat—even if it’s easy to grow
Even if it’s nutritious.
Grow things you’ll enjoy eating.
2. Grow for How You Cook
I love big slabs of eggplant that I can marinate and grill, so I grow large-fruited eggplant varieties
As you choose crops and varieties, think about how you’ll use your harvest.
Here’s an example:
I love big slabs of eggplant that I can marinate and grill—or use to make eggplant parmesan. So I always go for large-fruited eggplant varieties
For tomatoes, I like to make sauce all winter, so I grow good sauce-making varieties
3. Rule Out Some Crops
There might be crops that aren’t a fit for your garden. I’m talking about space hogs—and crops that will probably be a frustration.
Space Hogs
Some crops use up a lot of space—more than makes sense in a small garden.
For example:
I love Brussels sprouts. But they’re big plants that tie up the same patch of garden for an entire season. So I leave them to the market gardeners.
I love edamame too. But for the amount I get considering the amount of space they take in the garden, they’re not my top choice.
Unnecessary Frustrations
Depending on what your situation, there might be crops that disappoint—or frustrate—you.
Here’s are examples:
Corn. I love corn. So do all the raccoons around here. So I don’t grow it. I don’t need the chest pains!
Tomatoes. Some people prefer cherry tomatoes to big beefsteak tomatoes because that way there’s lots more tomatoes to harvest. That way, the gardener gets lots even if wildlife steals some.
4. Try Something New
Have you added something new to your garden? I like to grow something new every year.
Recently it was celtuce, a.k.a. stem lettuce. It’s easy to grow and fun to cook with. Not a new crop at all…just new to me.
20 years ago I grew cucamelons for the first time and have grown them ever since.
20 years ago I tried cucamelons and have loved them and grown them every year since.
Look for neat varieties (e.g. a pepper variety I love is the corkscrew-shaped ‘Corbacci’
Or branch out into a crop from a cuisine you’re not familiar with (okra was new to me…but after I learnt a Cajun fiddle tune I wanted to learn how to make Cajun-style gumbo soup…and now I aways grow okra for making gumbo soup!)
5. Consider Diseases
Variety choice sometimes helps with disease problems. For example:
Downy mildew ravaged my basil for a couple of years. So now when I’m getting basil seeds, I look for mildew-resistant basil varieties
There’s no totally blight-proof tomatoes, but there are blight-resistant varieties, worth adding to the mix in a garden so that in years when blight decimates the tomato patch, there are still a few plants producing late in the season
6. Pick Crops for Small Spaces
If space is a challenge, crop choice can often help you harvest much, much more.
Crops for Vertical Gardening
If you’re gardening in a small space, choose vegetable crops that you can grow upwards on trellises, tee-pees, or fences.
If you’re gardening in a small space, choose veg that you can grow vertically. When you grow upwards, that frees up space on the ground—so you can fit more into a small space.
Here are a couple of my favourites:
Runner beans. I love runner runner beans! The flowers are edible, great for bouquets, attract hummingbirds. Oh, did I mention there’s beans too! (If you’re in a maritime climate, you might find runner beans produce more than pole beans.)
Zucchini: Many zucchini varieties have a bush-like growth habit, and the plant can take up a fair bit of space. But if you grow a climbing zucchini variety, it won’t take up as much space…so there’s room to plant more in your garden.
Grow a Container Vegetable Garden
And get an early harvest of crops that usually take too long!
Plants with Multiple Edible Parts
You might also think about plants with more than one edible part, so in a limited space you’re getting multiple harvests from one crop
Radishes have edible seed pods.
Snap peas (you can eat the peas and the pod…and don’t forget young tendrils)
Squash (eat the flowers, the squash…and shoot tips!)
Beets (both leaves and roots are edible)
Radish (along with the roots, the seed pods are edible)
Find out more crops with more than one edible part.
Hear a chef talk about using squash shoot tips and other uncommon ingredients.
7. Choose for an Early Harvest
Look for crops and varieties that can move up your first harvest.
For example:
I like broad beans, which can be planted far ahead of all the other types of beans
Look for fast-maturing varieties (I grow fast-maturing arugula and spinach varieties in my cold frames in late winter because I want that first harvest as soon as possible)
Do the same with your beets, carrots, tomatoes and other crops
To choose faster-maturing varieties, compare the days-to-maturity information with other varieties (often called “DTM”)
8. Remember Fall Harvesting
Parsley holds up well when fall frosts arrive.
Remember to add in cool-season crops that keep producing as fall frosts arrive.
Cabbage family
Kale
Celery
Parsley
9. Choose for a Short Growing Season
If you’re dealing with a short growing season, there might be some crops you don’t want to bother with. I have friends who won’t grow eggplant and pepper.
More ideas:
Bush beans give a quicker, more concentrated harvest than pole and runner beans
Look for varieties that mature more quickly (e.g. we love Cream of Saskatchewan watermelon, which ripens melons much more quickly than watermelon varieties grown in warmer zones.)
10. Grow for Year-Round Enjoyment
Many gardeners like to enjoy the harvest year-round. If that’s you, here are some ideas:
Grow dry beans that you can easily store for later use
Look for root crops that store well (these tend to be varieties that grow larger roots)
Thought of kohlrabi…there’s a storage variety too
You can harvest leeks right through the winter when there’s a thaw
Get more crop ideas for year-round enjoyment.
11. Plan an Edible Landscape
Looking for attractive veg to add an ornamental touch to a landscape?
Here are ideas:
Asparagus looks great at the back of a perennial border, with its tall, ferny foliage
Runner beans have beautiful flowers
Lovage is a perennial with a celery-like taste, great for the perennial border
Eggplant has beautiful flowers
Kale is a great way to add colour and texture into a garden
Here are more perennial edibles.
Sometimes shade is a challenge in an edible landscape. Here are fruits and vegetables that you can grow in the shade.
If you’re serious about edible landscaping and want to create an awesome out-of-the box edible landscape, check out this course.
12. Crop Substitution for Less Work
Pin this post!
Keep your workload to a minimum through crop choice!
Here are examples of the type of thinking you can use to make less work for yourself.
Leaf celery instead of stalk celery. Stalk celery takes lots of water and feeding to get tender, crispy stalks. Leaf celery doesn’t make big stalks—you just get lots of leaves on short stems, and it’s far less bother if you don’t mind consuming celery this way. (I chop it into soups, stews, and salads for that same celery taste.)
Ground cherry instead of cape gooseberry. I actually prefer the taste of cape gooseberries…but they need a longer growing season, meaning I have to start the seeds earlier, and then give them prime, hot, garden real estate to get a decent harvest. Ground cherries are far easier to grow. (Find out more about these two different husk cherries.)
Broccoli instead of cauliflower. Not only is cauliflower more finicky, to get snow-white heads it must be blanched, which is often done by tying leaves over the head with an elastic. It’s a lot of bother compared to broccoli, which requires no blanching.
Squash instead of potato and sweet potato. Squash is far less work. Instead of transplanting sweet potato plants, you just poke squash seeds into the soil. And instead of digging out sweet potato roots, you just snip squash from the vine. You still get the sweet, orange ingredient for baking.
Find This Helpful?
Enjoy not being bombarded by annoying ads?
Appreciate the absence of junky affiliate links for products you don’t need?
It’s because we’re reader supported.
If we’ve helped in your food-gardening journey, we’re glad of support. You can high-five us below. Any amount welcome!
More on Vegetable Garden Planning
More on Growing Vegetables
Vegetable Gardening Articles and Interviews
For more posts about how to grow vegetables and kitchen garden design, head over to the vegetable gardening home page.
Vegetable Gardening Courses
Damson Plums: This Forgotten Fruit Combines Dry, Sweet, Spicy, and Bitter (and it’s a perfect home-garden crop)
Find out how to grow this forgotten fruit that has a rich, complex flavour. It’s a gem in the kitchen, and easy to grow in a home garden.
By Steven Biggs
Disappearing Damsons
I remember when Nana started to ration the jam. The damson jam.
She was running low on her homemade damson jam. And what was left was reserved for damson tarts—one of her specialties.
She couldn’t get damsons any more.
Why the fuss? Because damsons have a special flavour and make marvellous jam. They’re the ultimate plum for cooking, with a rich, complex flavour that combines sweet, spicy, slightly sour, and a touch of bitter.
I was just a kid at the time. Since then, I’ve rarely seen damson fruit or damson trees for sale. Too bad, because it’s a unique fruit that’s well worth a place in a home garden.
But they’re not completely forgotten.
When I drove through the Kamouraska region of Quebec, I took a detour especially to visit Maison de la Prune, a small damson orchard and museum in what was once a major damson production area. I came home with damson syrup, and sweet and savoury jellies.
Keep reading to find out more about this special plum, and how to successfully grow it.
Hear a Damson Expert Explain What’s Special About Damsons
What is a Damson Plum?
Damsons (Prunus insititia) are smaller and not as sweet as their cousin the European plum (Prunus domestica). (Quick plum primer…it’s a big family, including Japanese plums, P. salicina, North American plums, P. americana, and the cherry plum, P. cerasifera.)
A damson is a small, oval-shaped plum. The skin is often a deep blue-purple colour, with yellow flesh, although there are also yellow-skinned varieties. They’re a “clingstone” fruit, meaning that the flesh, which is quite firm, is attached to the stone. Like many fruit in the plum family, the fruit has a waxy “bloom” on it, giving fresh damsons a silvery hue.
Damsons are self-fertile—meaning only one tree is needed to get fruit. They bloom in early spring, with fruit starting to ripen in late summer.
How are Damsons Different From Other Plums?
The damson is smaller than the European plum. These damsons will ripen to a purple colour.
When it comes to the plant itself, the trees have a more compact growth than other domestic plums, developing a gnarled shapes as they get older.
The fruit is smaller too, with more stone and less fruit than other domestic plums—up to one third stone. The fruit is also drier than European plums and Japanese plums.
While damsons are sweet, they’re also slightly astringent, giving them a complex flavour and making them superb for cooking. (Perhaps less attractive for fresh eating, though I love them.)
Along with the astringency comes a spiciness and sweetness that sets them apart from domestic plums.
What is a Bullace?
It’s worth noting a couple of other relatives that are sometimes included when talking about damsons. Along with damsons, Prunus insititia includes bullaces, and St. Julian plums.
St. Julian plum is mostly grown as a rootstock for grafting damsons
The round bullace fruit is smaller than damsons, ripening later, and has a less complex flavour
The bullace is different from the sloe (Prunus spinosa) which is bushier. If the sloe is new to you, look up sloe gin. (I know of sloes because my dad had a bottle of sloe gin when I was growing up.)
Landscape with Fruit
That’s easy to grow in a home garden!
How to Grow Damsons
Planting Damsons
The first thing to know is that damsons are self-fertile. This means that you can plant one damson tree and get fruit.
Like other fruit that flower early—while there’s still a risk of frost—choose a location where there’s less chance of flowers getting hit by frost. This means:
Avoid low-lying pockets that get heavy frost when other parts of your garden don’t
If you’re in an area with late spring frosts, a north-west-facing slope can be safer than a south-facing slope (it might seem counter-intuitive…but they’ll bloom earlier on a south-facing slope, meaning more chance of frost damage)
Hear a fruit expert talk about site selection in cold climates.
Where to Plant a Damson Tree
Full sun is best for damsons. They tolerate semi-shade if that’s all you have.
Damsons grow in a wide range of soil types. Avoid acidic soils and soils that dry quickly—meaning sandy soils.
Stake newly planted trees for a year to prevent shifting.
Spacing When Planting Damsons
Damsons are a relatively small tree.
Here are a couple of considerations when deciding on spacing between damson trees:
With grafted trees, the tree size and optimal spacing depends on the rootstock
Space between trees allows air flow, which helps reduce disease pressure
In a home garden setting, there are often competing needs for a small space. In that case, you might want to be creative with spacing. For example:
Plant more than one damson tree in a hole – a clump of damsons
How to Care for Damson Plums
Below is more information about how to care for damsons. But to sum it up quickly in case you’re already a fruit grower: Treat damsons as you would other plums.
How to Prune Damson Plum Trees
Damson fruit in mid summer. They have a golden-yellow flesh when ripe.
If you’re growing damsons in a hedge, you might take a hands-off approach to pruning.
When you’re growing damsons as separate trees, use pruning to shape the tree into a framework of branches that gives good strength, and allows air circulation and ease of picking.
A tree from a nursery might already have a framework developed. If it’s a young tree, you can develop the framework of branches yourself. Damsons can be formed into central-leader style trees, vase-shaped trees, or into a bush. For a bush, picture a short trunk, with branches coming out above that.
Pruning fruit trees is an entire article unto itself, but here are top tips:
Avoid narrow, v-shaped angles
Don’t make sloppy cuts that leave a nub of branch beyond a bud
Remove crossing branches
Aim to keep the canopy of the tree open, to allow air movement
Like other stone fruit, damsons don’t respond well to attempts to train them into cordons.
Prune in late winter.
Protecting Damson Blossoms from Frost
With a well-chosen site you’re less likely to have frost damage in the spring…but if there is a late frost, and if your damson tree is small enough, a simple cover might protect the blossoms.
Drape the plant with burlap or horticultural fleece. (I’ve even covered tender plants with an old shower curtain!)
Damson Hardiness
Damsons are very cold hardy. There’s no question of hardiness here in my Toronto garden.
I’ve seen Canadian nurseries listing damson varieties hardy into Canadian Plant Hardiness Zone 3, and American nurseries suggesting USDA Zone 5. Here’s a list of nurseries that sell fruit trees.
Consider zones a general guide. Conditions within a zone can vary—and microclimates allow gardeners to push zone boundaries. There can be “frost pockets” in low-lying areas, and moderate areas near large bodies of water.
With grafted plants, hardiness depends on how hardy the top (scion) is—and how hardy the bottom (rootstock) is.
How to Propagate Damson Plums
Damson Seeds and Suckers
In times past, damsons were commercially propagated using seeds and suckers.
Seeds. When grown from seed, many damson varieties “come true,” meaning the new plant is like the parent. If you want to seed-grow damsons, first stratify the seed, and then sow in a pot or directly in the garden.
Suckers. Suckers are the shoots that come from the base of a mature plant, and already have roots. This is an easy way to get started if you know that the tree is not grafted. (If it’s a grafted tree, a sucker might actually be coming from the rootstock.)
Grafting Damsons
Most commercially produced damsons are propagated by grafting.
Under some conditions, damson trees can grow up to 6 metres (20’) tall. But if conditions are not as good—or if trees are grafted onto a rootstock that restricts growth—they’ll be smaller.
This means that it’s good to know how rootstock can affect damson tree size.
Here are common damson rootstock:
Large. Myrobalan B, Brompton
Medium. St Julian A
Small. Pixy, VVA-1
Damson Harvest
Pick damsons as they develop colour and as the fruit becomes softer to the touch.
Damsons ripen in late summer and early fall.
When are Damson Plums Ripe?
Pick as the damsons become soft to the touch. (You can pick them earlier if making gin.)
Why Damsons Sometimes Fruit Every Second Year
It’s common to have what’s called “alternate bearing,” meaning a large crop one year, and then very little—or nothing—the next. This happens because when a fruit tree carries a heavy crop, energy goes to the ripening of that crop—and flower buds are not formed for the next year.
You can prevent alternate bearing by thinning fruit.
Damson Pests and Diseases
Black knot disease.
Mice and rabbits often gnaw on fruit tree bark over the winter. While damson trees are young, use a spiral tree guard around the trunk for the first few winters to protect the bark from rodents.
Black knot is a fungal disease that affects many plants in the plum family, including damsons. Some damson varieties have more black-knot resistance than others. You can recognize black knot by the black, woody growth encircling a branch. (My kids called it poo on a stick when they were little.)
If you see black knot, prune the affected branch back at least 20 cm (8”) below the knot. Don’t leave the pruned-off branch near your damson trees because the knot provides inoculum for more infection.
Damson Recipes
I started off by telling you about my Nana’s damson plum jam. It was so delicious because of the balance that the damsons give, with the combination of fruitiness, sweetness, spiciness, tartness, and a little bit of astringency. Damsons are excellent for jams, fruit butters, and for making fruit cheese because they contain a lot of pectin.
Because they’re “clingstone,” the fruit is usually separated from the stone after cooking.
There are many more ways to use damsons. You’re more likely to come across these in the UK, where there’s a longer tradition of cooking with them.
Damson chutney
Pickled whole damsons
Damson vinegar
Damson gin
Use them where you would use other tart fruits. And think of using them with savoury dishes—not just sweet. That’s because the combined tartness and astringency work well with rich dishes.
(And if you don’t have the time or inclination to spend a lot of time in the kitchen, stewed damsons are a true delight. When I lived in the UK there were damsons in a nearby hedgerow. I’d stew them, cooking with a bit of water and sugar until soft enough to the damson stones. Then I’d eat them with clotted cream.)
For more recipe ideas, I recommend the book Damsons: An Ancient Fruit in the Modern Kitchen.
Where to Buy a Damson Plum Tree
While you might not see damsons at garden centres, specialist fruit tree nurseries often carry them. If ordering online, look for bare-root trees so shipping costs are lower.
Here’s a list of fruit tree nurseries.
The choice of damson varieties in North America tends to be limited. I’ve most often seen damsons sold as Blue Damson.
(You sometimes see them sold as “Damas Bleu,” as there’s also a long history of damson production in Quebec. If you want to delve into that, here’s a fun book: Les Fruits du Québec: Histoire et traditions des douceurs de la table, by Paul-Louis Martin, who is the proprietor of Maison de la Prune that I mentioned earlier.)
In the UK there is a wider selection of damson varieties. I have a 1926 text that lists Blue Prolific, Bradley’s King, Farleigh Prolific, Quetsche, Rivers’ Early, Shropshire Prune, Merryweather. If you search UK nurseries, you’ll see many of these are still available.
Using Damson Trees in Garden Design
Damsons are good choice for a home garden because they are self-fertile. That means that in a small space, you only need one tree to get fruit.
Here are ideas for using damson trees in garden design.
Edible Landscapes and Food Forests
Damsons work well in edible landscapes with a mixed planting of edibles, and in a food-forest setting. Like many fruit trees, they do best in full sun, but tolerate the sort of partial shade that you can get in an urban edible landscape or on the periphery of a food forest.
Home Orchard or Stand-Alone Specimens
A more traditional planting gives each tree enough space to fully develop. The amount of space needed for well developed, well-spaced damson trees depends on the rootstock.
Hedges and Hedgerows
In my own garden, my damsons are part of a fruiting hedge. There are damson and other plum trees in a long row, underplanted with currants and gooseberries. At ground level are strawberries. It’s still rather neat and tidy, but damsons could work well in a less formal hedgerow or windbreak too, mixed with other small fruit.
Here’s a chat with a small fruit specialist to get ideas for less common fruit for a hedge.
FAQ: Damson Plums
How long should I stake a damson tree?
Pin this post!
Remove stakes after the damson tree is established and has rooted into the surrounding soil, usually after one season.
Why are so many fruit dropping off in early summer?
There’s a natural fruit drop in early summer. As long as there are lots of fruit remaining on the tree, everything is probably OK.
Do damson trees fruit every year?
Not always. If there’s a heavy crop one year, there might not be a crop the following year. This is called alternate bearing. You can thin fruit to reduce alternate bearing.
What is the botanical name for damsons? Why am I seeing two different botanical names for damsons?
Good question. You might find damsons as Prunus insititia or as Prunus domestica subsp. insititia. That’s because plant taxonomists sometimes rename things.
Find This Helpful?
Enjoy not being bombarded by annoying ads?
Appreciate the absence of junky affiliate links for products you don’t need?
It’s because we’re reader supported.
If we’ve helped in your food-gardening journey, we’re glad of support. You can high-five us below. Any amount welcome!
More on Fruit Crops
Articles: Grow Fruit
Visit the Grow Fruit home page for more articles about growing fruit.
Here are a few popular articles:
Courses: Grow Fruit
Here are self-paced online courses to help you grow fruit in your home garden.
Home Garden Consultation
Book a virtual consultation so we can talk about your situation, your challenges, and your opportunities and come up with ideas for your edible landscape or food garden.
We can dig into techniques, suitable plants, and how to pick projects that fit your available time.
Grow Microgreens at Home for Easy-to-Grow Salad Greens all Year
How to grow microgreens indoors. The setup is simple. The materials are easy to get. There’s no need for fancy lights or equipment.
By Steven Biggs
Growing Microgreens at Home is Easy
Pea shoots grown at home: All you need is a handful of dried peas, a pie plate, potting soil, and a windowsill.
On a recent trip to the grocery store I noticed small containers of pea microgreens. Gulp…a whopping $4.99.
The same amount of pea microgreens grown at home takes only a handful of dried peas, a pie plate, potting soil, and a windowsill.
Growing microgreens costs pennies—and it’s easy.
The setup is very simple. The materials are easy to get. There’s no need for fancy lights or equipment. And you can grow microgreens indoors any time of year.
Keep reading and I’ll tell you how to grow your own microgreens.
What are Microgreens?
Microgreens are immature plants. They’re often vegetable or herb plants. There are a few other fun ones, like sunflower and corn (deliciously sweet!)
They’re harvested while the plants are small and the stems still tender. Harvesting means cutting off the tops. Seems brutal, but it’s a short-term crop.
Why Grow Microgreens?
They’re easy to grow, quick to mature, and inexpensive: A perfect indoor crop for home gardeners.
I have a big garden, with lots to harvest into the fall and early winter. But microgreens are my go-to green crop for winter. When I want a green salad mid-winter, instead of lettuce or other leafy greens, I chop up microgreens.
If you’re already a microgreen connoisseur, another reason to grow microgreens at home is that you can grow microgreen crops you won’t find at the grocery store.
Grow microgreens with different tastes:
Spicy (e.g. radish)
Sweet (e.g. pea)
Bitter (e.g. lentil)
Nutty (e.g. sunflower)
A colourful tray of fresh microgreens.
And microgreens with different colours:
Light green
Dark green
Red
Purple
Crops for Home Microgreens
There are many different plants suited to a crop of microgreens, including vegetables, herbs, flowers—and others, like some common field crops!
Before you grow something into a microgreen, make sure it it’s edible. I’ve listed many microgreen crops below. If in doubt, see what seed vendors sell for microgreens.
Vegetable Seeds for Microgreens
Here are vegetables that are commonly grown as microgreens:
Grow microgreens from many different types of seed, giving you different tastes, textures, and colours.
amaranth, arugula, beet, broccoli, cabbage, carrot, chard, cress, dandelion, kale, kohlrabi, mizuna, mustard, onion, orach, pac choi, pea, radish, tatsoi, watercress
Herb Seeds for Microgreens
Here are herbs that are commonly grown as microgreens:
basil, cilantro, dill, fennel, lemon balm, parsley, shiso, sorrel
Flower Seeds for Microgreens
Here are flowers that are grown as microgreens:
borage, celosia, marigold, sunflower
Field Crop Seeds for Microgreens
Here are field crops that can be grown as microgreens:
alfalfa, barley, clover, chickpea, corn, lentil, quinoa, wheat
Microgreen Seed Mixes
There are also seed mixes with more than one type of microgreen seed, giving a blend of taste and colour.
My favourite is pea microgreens—a.k.a. pea shoots. They’re sweet, crunchy, and easy to grow. I also love sunflower microgreens for the delicious nutty flavour. (The husk of the sunflower seed is easy to remove as the sunflower microgreens get bigger.)
Buying Microgreen Seeds
Dried green peas from the grocery store.
When shopping for microgreen seeds you might come across the interchangeable terms “sprouting seeds” and “microgreens seeds.” It means the seeds are untreated and uncoated. They’re usually sold in a larger volume than seeds intended for the garden—so it’s better value. And in some cases, it means that the seed company tests the seed to be sure there’s no contamination with pathogens.
I use dried peas and lentils from the grocery store—the same dried whole peas used for cooking.
Stick with food grade seeds from the grocery store or seeds sold for microgreens.
Seed sold for planting in the garden is sometimes “treated,” which usually means with fungicides. Treated seed is not suitable for growing into microgreens.
Wondering where to buy seed? Here’s a list of seed companies.
First Microgreen Crop? Give Peas a Chance
First time growing microgreens? I like the peas-and-pie-plate approach. It’s easy!
I recommend pea microgreens (also known as pea shoots) as a first microgreen crop. Dried peas are easy to find at the grocery store, easy to grow, and have a sweet flavour—much like snow peas and snap peas.
It doesn’t matter whether you use green peas or yellow peas—the key thing is to use whole peas, not split peas…they won’t grow!
How to Grow Microgreens at Home
Choose a Location to Grow Microgreens
When you grow microgreens you’re using the energy saved up in the seed. The goal is a tender young stem and leaves that you cut off and eat as a green. That means you don’t need bright light. It doesn’t matter if the plants are gangly.
Supplies for Growing Microgreens Indoors
Here are supplies to grow microgreens at home:
Seed
Potting soil
Container
Spray botte (optional)
Soil for Microgreens
The potting soil is to hold moisture and let the microgreen plants anchor themselves as they grow. You don’t need to supply nutrients because the plants are using energy stored in the seeds. Start with fresh soil every time—don’t reuse soil.
Moisten the potting soil before planting.
Use a soilless potting soil. Coir or peat moss as a growing medium work well too.
Containers for Microgreens
There are lots of options for microgreens containers. You only need to have about an inch of potting soil, so any shallow container works.
Here are examples:
Lentil microgreens growing in a plastic container.
A standard 10”x20” plant tray
A pie plate
Takeout containers
Smaller containers dry out faster, so you’ll need to water more often.
If you trust your judgement with watering, don’t make drainage holes. But if you think you might overwater, punch a few holes in the bottom of your container.
Spray Bottles
A spray bottle for microgreens is optional. I don’t use one. Some gardeners use a spray bottle to avoid splashing around small seeds. Instead, you can water carefully with a gentle stream of water.
How to Plant Microgreens
Soak larger seeds such as pea, lentil, and sunflower overnight. (Soaking gives a faster, more uniform germination.)
Put an inch or two of potting soil in the container.
Put seeds on top of the soil, spacing them so that they’re close to each other, but not covering each other. Don’t cover seeds with soil.
Water so that the soil is moist but not wet. (You want the soil moist, not wet...don’t float your seeds!)
Place under lights or on a windowsill.
Pea Microgreens Step by Step
Top Tip: When seeds are in contact with the soil you get a faster, more uniform germination. Put something heavy over the microgreens after sowing. The weight pushes down on the seeds so that they are in contact with the soil. (I stack my pie plates full of seeds.)
Don’t do this: Don’t fertilize them. There’s enough stored energy in the seed to grow the microgreens until harvest.
Location for Microgreens
Growing microgreens under lights. Less light is OK too.
You don’t need perfect growing conditions, so make do with what you have. If you have a bright window or set of grow lights, these work well.
Low light is also OK too, because the plants are growing using energy stored in the seed. I’ve grown them on a dim countertop.
The warmer the temperature, the more quickly the microgreens grow.
Seeds sprout more quickly in warmer conditions. Here are ways to give your microgreen seeds more heat:
A heat mat
A sunny windowsill
The top of a hot-water radiator
A heated floor
Growing Your Microgreen Crop
If you put something heavy on top of the seeds, remove it after a couple days. These amaranth microgreens were covered a bit too long…but they’ll bounce back.
Check daily to make sure the soil is moist and to see if your seeds are germinating.
If you put something heavy on top of the seeds, remove it after a couple days.
Harvesting Microgreens
Harvesting Pea Shoots
When I grow windowsill pea microgreens over the winter at room temperature, I expect to harvest them about 2 weeks after sowing.
Harvest microgreens when they get 3-4 inches tall, a size when they are tender and not fibrous.
The first cut is the largest. There might be a couple more smaller harvests with pea shoots. (Not all microgreens regrow from what remains after harvest.)
Spotty germination in this container of pea microgreens because the potting soil got too dry.
When the energy in the seeds is used up and they no longer send up new growth, compost them.
Harvesting Other Microgreens
The height and time to harvest depends on the microgreen crop. Most crops are harvested before a second set of leaves grows.
Harvesting Microgreens: Here's a Hack
In commercial operations growers often use shallow trays so that it’s easy to harvest microgreens with a knife. (With a deeper tray, the edge of the tray gets in the way of cutting close to soil level.)
My daughter grows our microgreens in shallow trays: it’s worthwhile if you’re planning to grow lots.
How to Store Microgreens
If you have more microgreens than you can use at once, store them the same way you do leafy greens.
I wrap them in damp paper towel, and then put them in a plastic bag, in the fridge.
Great for Gardening with Kids
Growing microgreens is an easy and fun gardening project to do with children.
My hunch that pea shoot tendrils would be fun to tickle my kids with was what prompted me to grow microgreens in the first place.
The tendril-tickling got lots of giggles, and the sprouts were a crunchy and sweet—perfect for kids.
Growing microgreens also turned out to be a fun project to do with the kids.
If you grow microgreens with kids, start with pea shoots: They’re fairly big and easy for kids to handle.
Microgreens on the Menu
If you’re not used to eating microgreens, it’s not hard to incorporate them into the menu.
Microgreens as a finishing touch on a cracker with cheese!
Here are ideas:
Salads (our fav is chopped pea microgreens with toasted sunflower seeds and diced halloumi cheese)
Microgreens as a garnish
Served atop stir-fries
In sandwiches, instead of lettuce
FAQ: Growing Microgreens Indoors
What’s the difference between microgreens and sprouts?
Sprouts are grown in warm, humid, dark conditions, without soil. You eat the whole thing—including the roots.
Microgreens are grown in light, on a thin layer of potting soil. You eat the top—but not the roots.
I don’t bother growing sprouts. They require more attention. And there’s more chance of microbial contamination because the humid, warm, still conditions for growing sprouts are ideal for microbes to multiply.
Are microgreens safe?
Pin this post!
Many people associate sprouts with foodborne illness, a result of well-publicized cases of Escherichia coli (E. coli) and salmonella bacterial contamination.
By extension, people wonder about microgreens too. But there’s a difference between sprouts and microgreens.
Microgreens are exposed to light and air movement, making conditions less suitable for bacterial growth on microgreens. (Sprouts grow in conditions that are like a microbe incubator—in warm, moist conditions in a closed container.)
Do microgreens regrow after cutting?
It depends on the crop. Pea seeds and some of the larger seeds do send out another shoot after they're cut back. Many of the smaller seeds don't regrow once they're cut back.
But sometimes it looks like microgreen seeds are regrowing: It's seeds that didn't yet germinate starting to grow.
Find This Helpful?
Enjoy not being bombarded by annoying ads?
Appreciate the absence of junky affiliate links for products you don’t need?
It’s because we’re reader supported.
If we’ve helped in your food-gardening journey, we’re glad of support. You can high-five us below. Any amount welcome!
More Indoor Food Garden Ideas
Articles and Interviews
For more posts about how to grow vegetables and kitchen garden design, head over to the indoor food garden home page.
Courses: Edible Gardening
Want more ideas to make a great kitchen garden? We have great online classes that you can work through at your own pace.
Edible Gardening Consultation
Book a virtual consultation so we can talk about your situation, your challenges, and your opportunities and come up with ideas for your food garden.
We can dig into techniques, suitable plants, and how to pick projects that fit your available time.
Guide: Grow Globe Artichokes in Cold Climates
Yes, you can grow this Mediterranean vegetable even if you're in a cold climate. This guide tells you what to do to harvest your own homegrown artichokes.
By Steven Biggs
Planting Artichokes for the Delicious Flower Buds
Growing artichokes in cold climates is done differently than in milder climates.
“Dad, make lots of garlic butter!” It’s the first thing my kids say when I tell them I’m cooking fresh artichokes. Fine with me! I love the garlic butter as much as they do.
Besides the taste (and the garlic butter) there’s another thing I love about globe artichoke: It’s slow to eat, so there’s lots of time for family banter. We chat as we peel off bracts, dip them in butter, and repeat.
It’s the antithesis of fast food.
In our household we just call them artichokes. But some people call them globe artichokes – and in the UK you might hear them called French artichokes. (And if you like Latin names, Cynara cardunculus, var scolymus.)
Whatever you call them, you’re eating unopened artichoke flowers. Edible flower buds! (Unlike Jerusalem artichoke, where you’re eating a tuber.)
It can be a challenge to grow artichokes in cold climates. Keep reading, this article will explain how to grow your own artichoke plants and get flower buds.
You can grow artichokes in northern climates…with the right variety, temperature, and timing.
Growing Artichokes in Northern Gardens
Artichoke is a tender perennial, meaning that it lives for a number of years where there are mild winters. But in a colder, northern climate, it does not survive the winter.
That means northern gardeners grow artichoke as an annual. (I have tried digging up mature plants in the fall to overwinter in my cold cupboard…but, frankly, it’s not worth the bother.)
In warmer areas, artichoke can be a big plant. But in the cold-climate garden, one metre (3’) high and wide is the biggest I’d expect…and probably smaller.
In cold climates, artichoke can be grown successfully from seed
How to Grow Artichoke in a Cold Climate
In areas where it survives the winter, it is often grown from “offsets,” which are side shoots that come up from established plants. These are cut off and rooted to make new plants.
If you’re in a cold climate, you probably won’t find offsets for sale. The alternative is to grow artichoke from seed.
That’s what I do.
Don’t think of seed-growing artichoke as second best. I know of a farm near where I live, in Toronto, that grows first-rate seed-grown artichokes on a large scale.
Just make sure you have a long enough growing season, upwards of about 100 frost-free days.
Grow Artichoke from Seed
Start artichoke seeds indoors, 8-10 weeks before the average last frost date for your area. Plant seeds about 6 mm (1/4”) deep. A warmer temperature helps with germination, so I put mine on a heat mat. (Hot water radiators or heated floors are good heat sources too!)
Once your artichoke seedlings are up and growing, take them off the heat.
I usually plant 3-4 seeds in a small pot. Once they’ve grown a second set of leaves, I separate them and give them their own pots.
Trick
Like many seed-grown perennials, flowering in the first year isn’t assured. To get flowers in same year that you grow your artichokes from seed, you give your young plants a cool-temperature treatment.
It seems counter-intuitive to a lot of gardeners. We’re used to coddling our seedlings. And that’s true for lots of the heat-loving crops we grow such as tomatoes, peppers, eggplants.
But…artichoke plants are different. And the cool-temperature tweak helps induce flowering.
So here’s the idea:
Imagine a young artichoke seedling growing in a warmer zone, where it grows as a perennial: The first year it makes leaves, then it lives through the mild winter, and then, finally, it flowers in its second year
You don’t have the luxury of a second year because your cold winter temperatures will kill your artichoke
But…you can expose your artichoke seedlings to cool conditions before planting them into the garden
And those cool conditions before transplanting into the garden do the same thing as a winter would – they move the plant into flower-production mode
Chill Treatment for Artichoke Plants
Another way to provide a chill treatment to artichoke seedlings is with a stint in a fridge…but make sure they don’t dry out, as fridges have a drying effect.
Move artichoke plants outdoors when they won’t be exposed to frost, but will still get a week or two of cool temperatures.
Ten to 14 days of temperatures less than 10°C (50°F) helps to get flower buds to form.
Artichoke Seed
Get artichoke varieties known to produce artichokes buds in the first season when grown from seed.
Two well-known varieties are:
‘Green Globe’
‘Imperial Star’
Planting Artichoke Plants in the Garden
Artichoke plants won’t grow as large in cold climates, so a spacing of up to 1 metre (3’) between plants is ample.
Artichoke plants can grow very large plants in areas where they survive the winter. So you might come across recommendations to space them as far apart as 1.5 metres (5’). Don’t!
Spacing: In cold climates, plant artichokes 1 metre (3’) apart
Light: Full sun is best
I’ve seen artichoke plants grown in straw-bale gardens, 2 plants to a bale. Find out more about straw-bale gardening.
Care
If your goal is large artichoke buds, remember that there is a main, central flower; and there will also be secondary flowers. I leave them all to grow, and get 5 or more artichokes from a plant.
But…gardeners out to grow large, prize-winning artichokes can prune off secondary flowers. (But don’t discard them! Use these in the kitchen as baby artichokes, see below.)
Get Your Fig Trees Through Winter
And eat fresh homegrown figs!
Top Tip
A lot of people think of Mediterranean climates – hot sun and dry conditions – when thinking of artichoke plants. They survive these conditions. But for the best crop, give your artichoke plants conditions that encourage uninterrupted growth. (And, remember, very dry conditions interrupt growth!)
Top Tip: Well-fed soil and ample moisture for uninterrupted growth
Challenges
Most years, artichoke plants are pest- and problem-free in my garden. On occasion, black aphids stop by for a visit. If beneficial insects don’t dispatch the aphids, insecticidal soap will clear them up.
Harvesting Artichokes
Harvest artichoke before the bracts open into a thistle-like flower.
Harvest artichokes before the bracts start to separate. You want them to be compact.
If you leave the flowers too long and they begin to open, you will get purple-blue thistle-like flowers.
They’re beautiful – but past best-eating.
Artichoke Harvest Tip
As you harvest artichokes, don't cut back the stem any further than you need to. You'll get side shoots from the same flower stalks. These secondary artichokes are not quick as large as the first ones, but just as tasty.
How to Eat Artichokes
For those new to artichokes, you’re peeling off the bracts, dipping them in the butter, and then dragging them against your teeth to scrape off the flesh on the inside. You don’t eat the bracts; they’re too fibrous.
And about those bracts…well, they look like petals. And some people call them scales. (I’ve seen people call them leaves, too.) But, technically, botanically, they’re bracts.
Pin this post!
As you get to the centre, there’s a cone with many small bracts. The bottom of these is usually tender enough to bite right off.
Beneath these, you come the hairy “choke,” a fibrous mat that you scrape off and discard. You don’t eat it. Use a spoon or your fingernails to dislodge the choke, but keep the thick saucer-shaped bit below. It’s called the heart – and artichoke hearts are the prize. Bathe them in butter dip before eating.
To Cook Large Artichokes:
Cut off the stem flush with the bottom of the artichoke
Remove the smaller, lower outer bracts
Use a knife to cut off the top of the artichoke (I take off the top quarter, and find that a bread knife works best to cut through the fibrous bracts)
Steam 30 minutes, top facing downwards (some people boil them, but I prefer steaming them)
Drain well and serve with garlic butter
And don’t skimp on the garlic butter. For a half pound of butter, I usually add a half teaspoon of salt, a crushed clove of garlic, and the juice of half a lemon. Where there are kids in the house demanding extra butter sauce…you can stretch it out by adding olive oil instead of more butter.
To Cook Small Artichokes:
When they’re still small, some of the stem beneath is still probably tender enough to eat. And you’ll be eating the choke too.
Halve artichokes lengthwise
Put in skillet with hot olive oil, garlic, salt and pepper and brown for a moment
Add lemon juice and water and braise until the liquid has evaporated and they’re tender (how much lemon juice will depend how tangy you like them…so play around with it.)
These braised baby artichokes are great as a side dish or on a salad.
Artichoke Plants in Garden Design
If you have a small garden, keep in mind artichoke plants are space hogs. There are more practical food plants you can grow in a small space.
But they are delicious. And they are really beautiful.
The jagged silver-grey leaves have a whitish underside. I love the colour and texture they bring to the edible garden. (Although they never quite look as good once the artichokes are removed.)
And lastly, if you like the look of artichoke leaves but don’t like to eat artichoke, grow cardoon, the leafy cousin to the artichoke.
Garden design with artichoke: Use it to add colour and texture to the edible garden.
Find This Helpful?
Enjoy not being bombarded by annoying ads?
Appreciate the absence of junky affiliate links for products you don’t need?
It’s because we’re reader supported.
If we’ve helped in your food-gardening journey, we’re glad of support. You can high-five us below. Any amount welcome!

